Security of your websites is one of our top priorities. At EasyWP, in order to ensure data transferring over a secure and encrypted connection, we support only SFTP (Secure File Transfer Protocol).
To connect over SFTP, you can use the FileZilla FTP client or another one of your choosing. If you choose FileZilla, check the guide on how to use it below.
Also, in this guide, we describe the way to access your files via the File Manager plugin.
NOTE: Before proceeding with any changes, it's advisable to perform a backup of your website.
Locating SFTP credentials
Setting up FileZilla
Managing files in FileZilla
Managing files in the WP File Manager plugin
How to locate your SFTP credentials
1. From within your EasyWP Dashboard, select the website to which you plan to access, choose the SFTP Access tab, and click on the Access Files button:
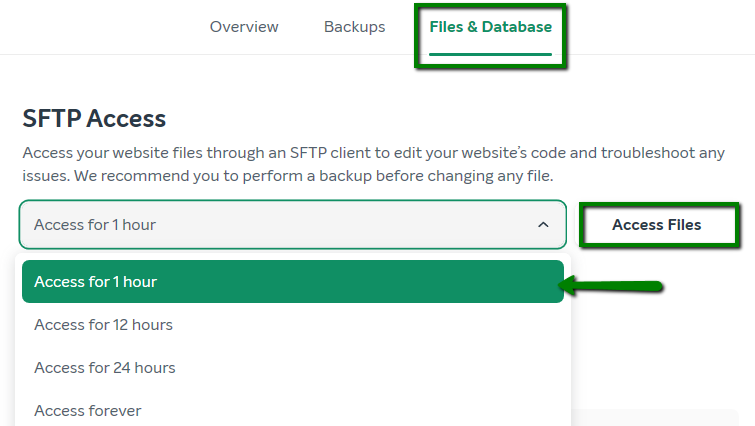
NOTE: For added security, you can select an expiration for the SFTP account password. By setting an automatic expiration, you will ensure that your SFTP account remains active only for the time necessary to work on your website. If you need to, you can also revoke a password at any time.
2. On the
SFTP Access page, you will find the SFTP credentials to connect to your website via an SFTP client:
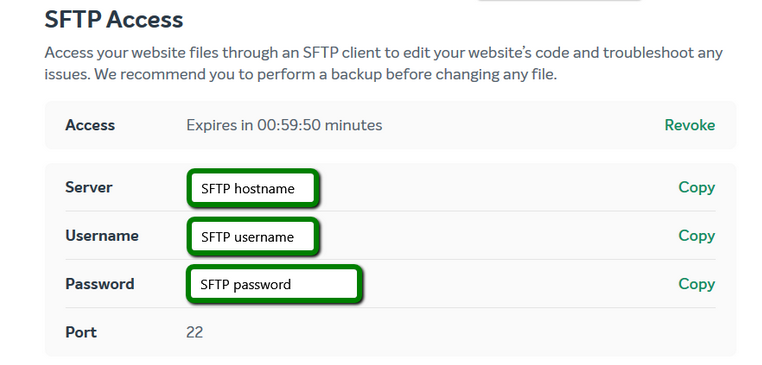
- Host/Server: check your EasyWP Dashboard
- Port: 22
- Protocol: SFTP
- Logon Type: Normal
- User: check your EasyWP Dashboard
- Password: check your EasyWP Dashboard
Once all the appropriate settings are filled in, click on Connect.
How to set up FileZilla with the EasyWP site
Once you've downloaded and installed FileZilla, launch the program. We will be using the Quickconnect option. Paste the SFTP details from your EasyWP Dashboard >> Files & Database menu in the following format:

Hit the Quickconnect button to initiate the connection. You will be taken to the root folder of your website - it is located on the right panel:
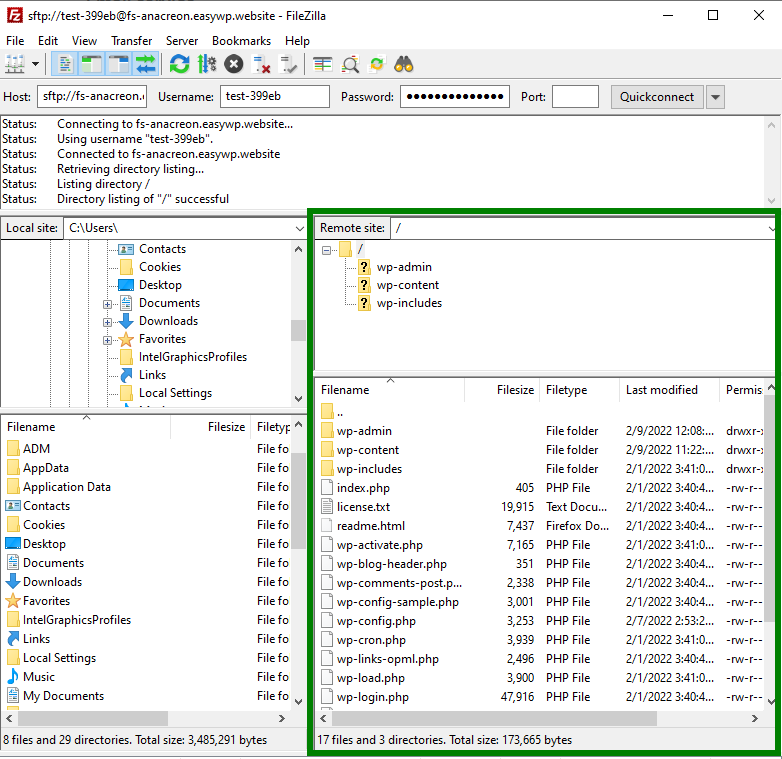
After that, you can manage your website files:
Let’s say you want to upload a new plugin for your website from your computer. Follow the steps:
1. In the left panel, where your local files are located, navigate and select the files and folders you wish to upload to the server. On the right panel, choose the correct path for your files (in our case it is wp-content/plugins). FileZilla allows you to simply drag and drop files from one panel to the other to initiate an upload:
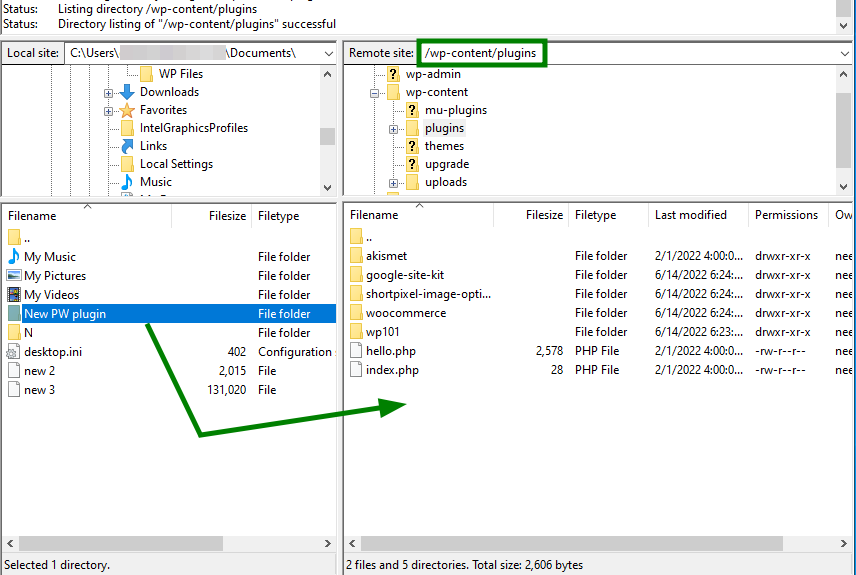
2. Alternatively, highlight the files, right-click the mouse button, and select Upload.
Your files will now be queued to be uploaded to the server.
To rename a file, in the remote site window right-click on it and select Rename:
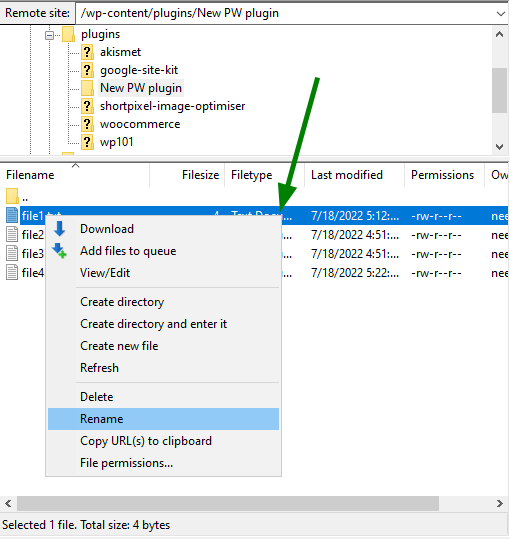
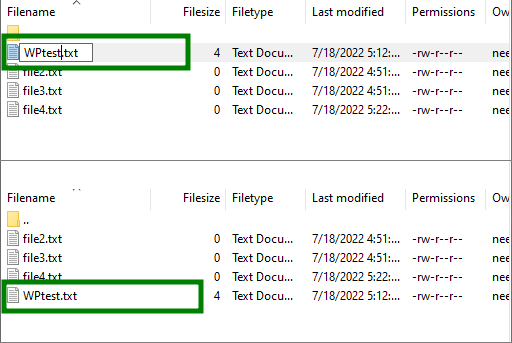
After this, give a new name to the file and hit Enter to save the changes:
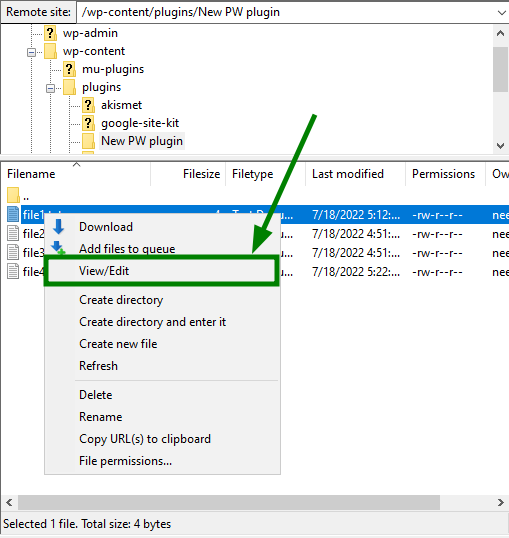
In the remote site window, locate the file you wish to edit. Click on it with the right mouse button and select the View/Edit option:
NOTE: By default, you may see a window that states "No program associated with filetype". The first option available by default is to use notepad as the editor. Keep in mind that this option is available for Windows computers and may be different for Mac and Linux.
Click the OK button.
Notepad, or your default HTML editor, will load up and show you the contents of the file. Once you're done making changes, save the file and close the editor.
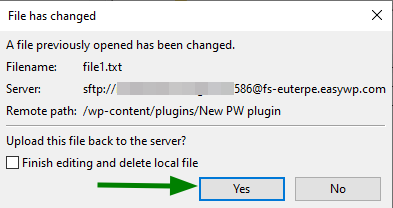
IMPORTANT: In FileZilla, you will be prompted to upload the edited file. Click Yes to move the file from your local site to the remote one:
NOTE: Please pay attention to the WordPress default files (their names start with "wp-", and index.php), and make sure not to remove any of them as their deletion might break your website.
To delete a file, in the remote site window right-click on the file you wish to remove and select Delete:
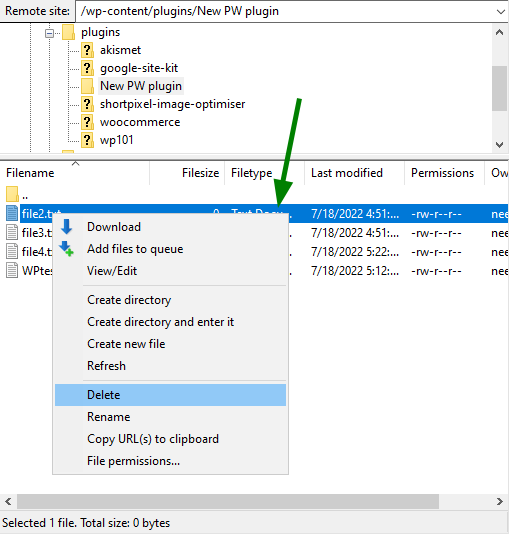
Tip: Use Ctrl + left mouse button to select several files.
Click YES in the confirmation window:
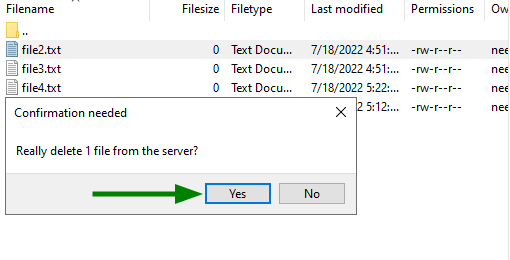
One of the many features of the FileZilla software is the ability to create new files and folders directly onto your website. This can be quite useful when you need to upload a new page or want to create a folder for holding documents and other files.
Right-click a file or folder in the remote site window, select Create new file and click it:
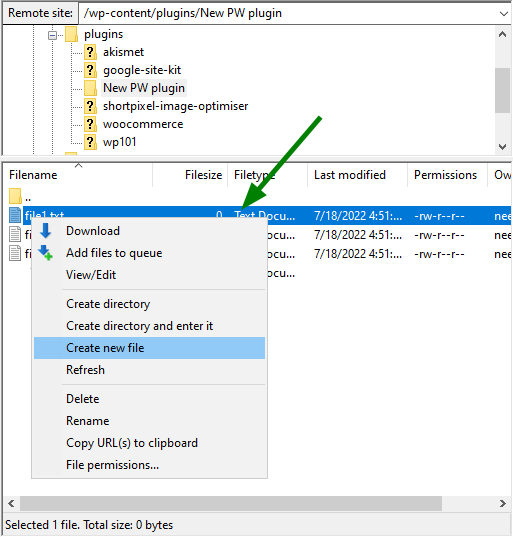
This will open a small window in which to enter a name. Give the new file a name, include the extension (e.g., .txt, .php, .html) and press OK:
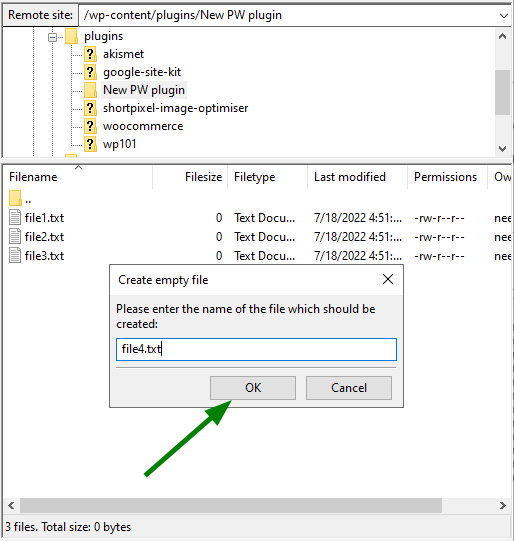
If you want to create a new folder and go into it to add a new file, right-click a file in remote view and select Create directory and enter it:
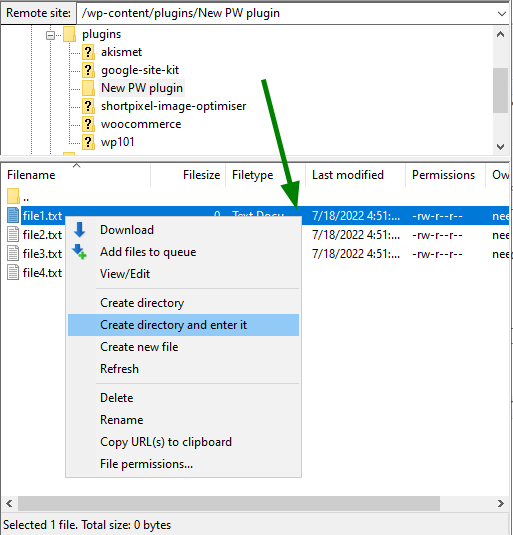
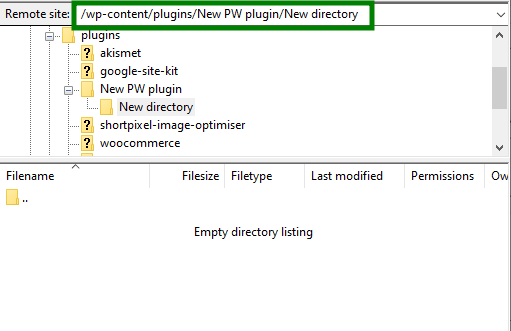
This will open a small window in which you can give your new folder a name. Once you click OK, you will be taken into the new directory where you can add files:
Managing files in the WP File Manager plugin
Here we describe another way to access and manage your website files - via the WP File Manager plugin. It allows you to edit, delete, upload, download, zip, copy and paste files and folders directly from the WordPress backend.
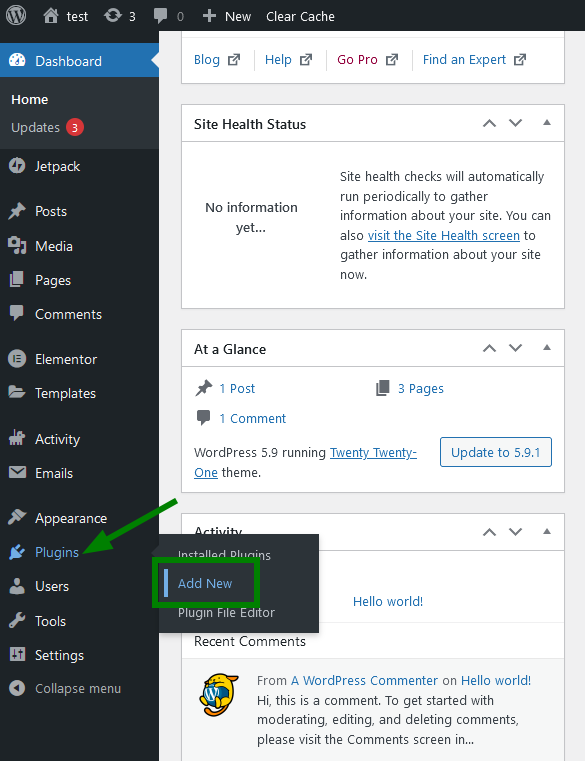
1. From within your WordPress Dashboard, navigate to the Plugins menu and click Add New:
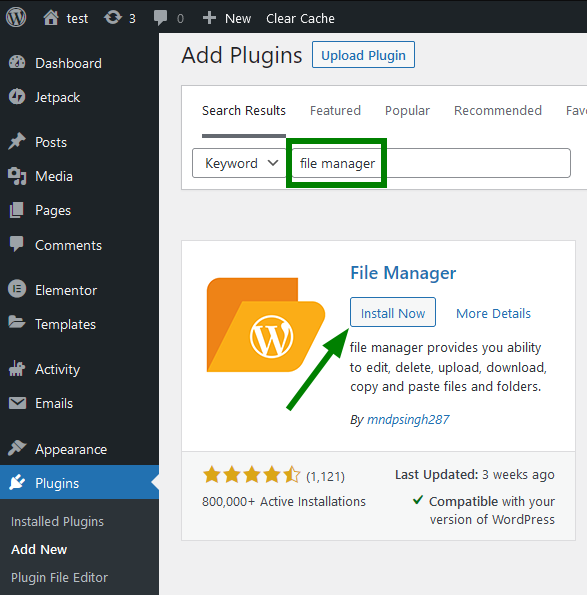
2. Use the Search bar to find the plugin's name "File Manager" quickly. Click Install Now:
3. Activate the plugin. Go to the WP File Manager tab to see the list of your website files:
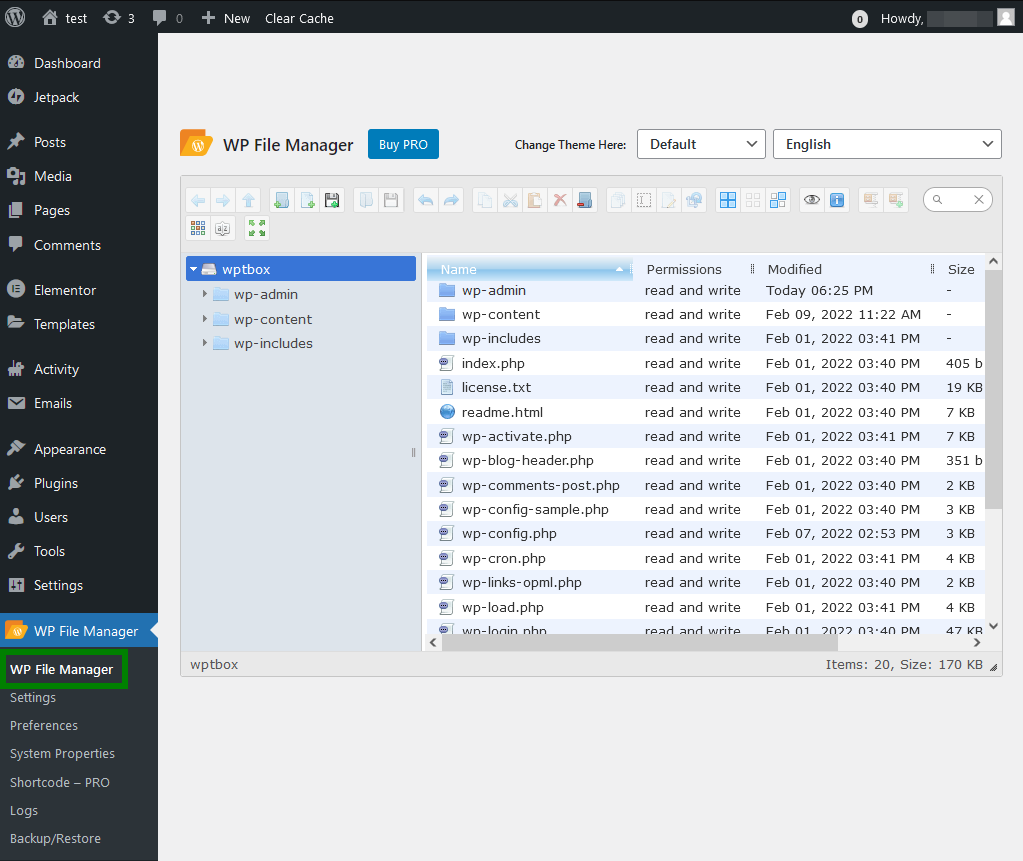
Tip: Also, you can change the theme (1) and language of the interface (2) as well as search for specific files with the search bar (3):

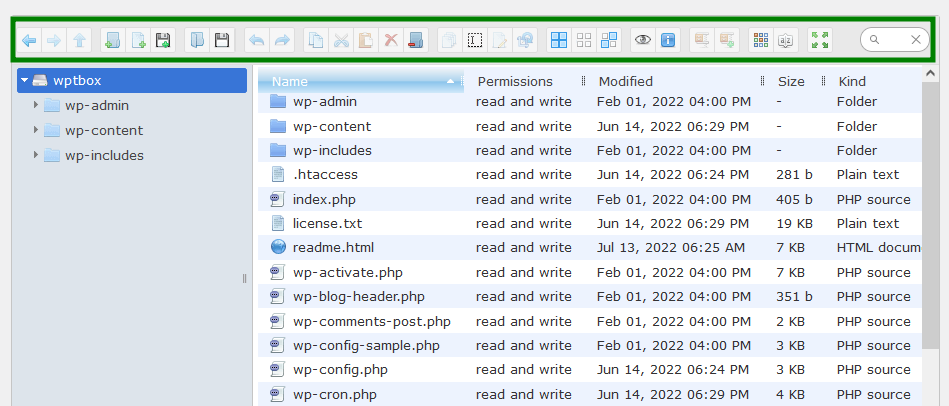
4. You can find all the settings in the toolbar above the files section. This toolbar is similar to the settings in an FTP client. It allows you to preview, edit, upload, download, and delete files or folders:
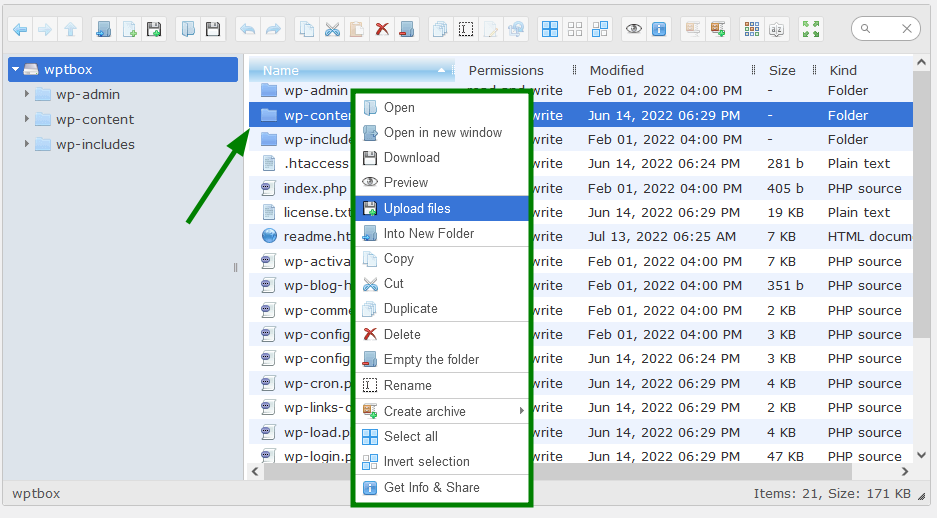
Also, you can select a file with the right mouse button and choose the option in the expanded toolbar to perform an action:
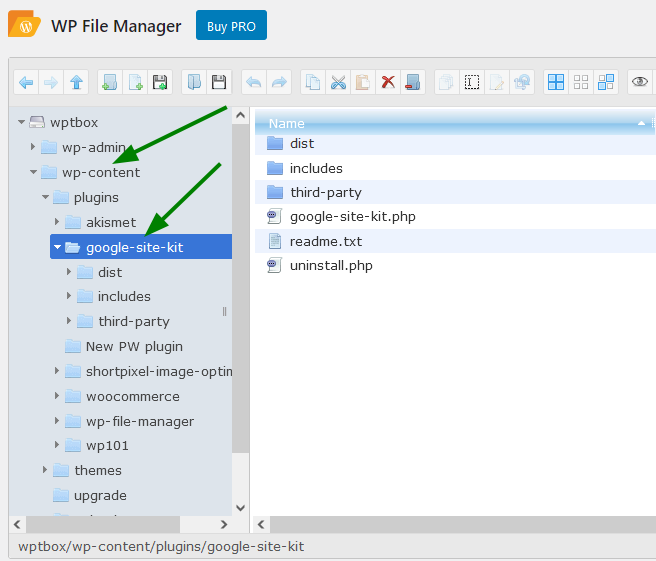
5. The folders will work the same way as they do in any FTP client. You can click on any folder to open and view its contents:
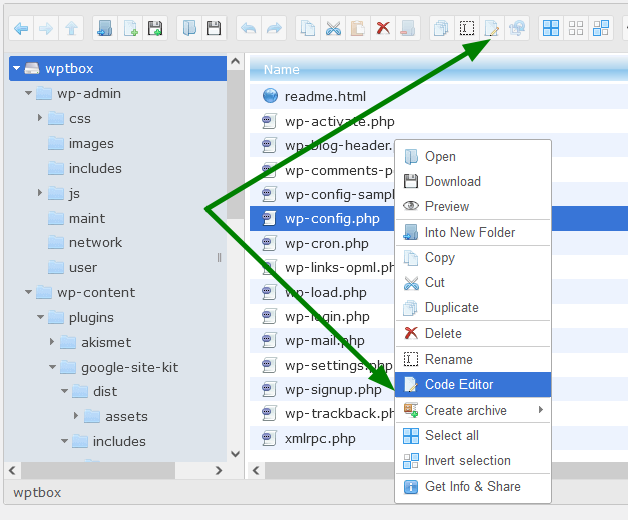
6. You can edit any file using the toolbar menu >> the Edit (or Code Editor) option:
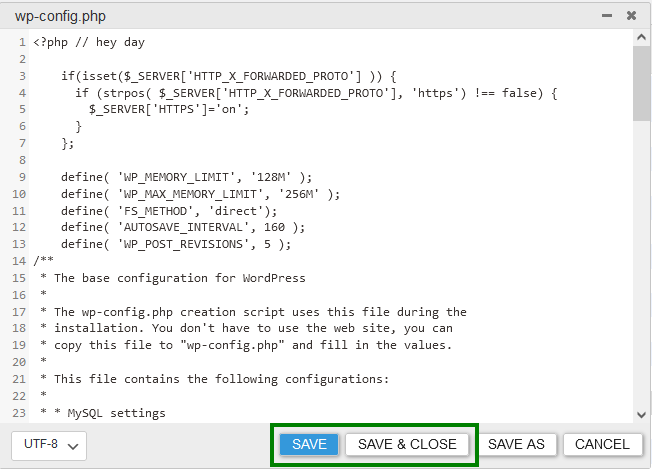
It will open the file in a popup, so you can make changes and save it:
7. You can access the media files in the wp-content>> uploads folder. The Upload Files option in the toolbar allows you to upload multiple images in one click. Also, you can drag and drop files from your computer.
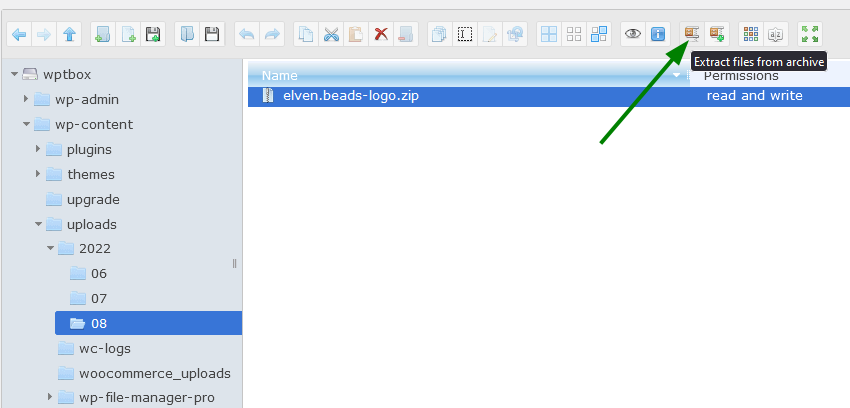
You can upload zip files and extract them in File Manager as well:
That's it!


