| Subtotal | $0.00 |
| Subtotal | $0.00 |
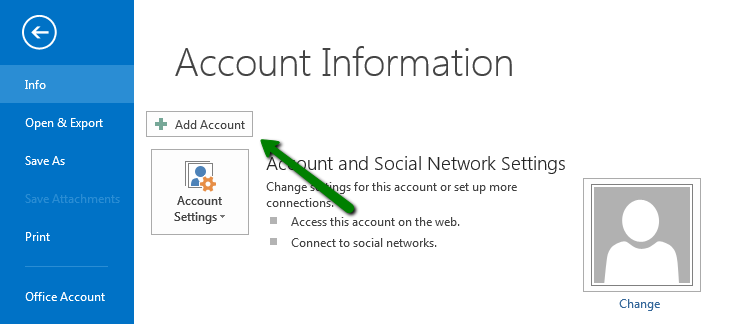
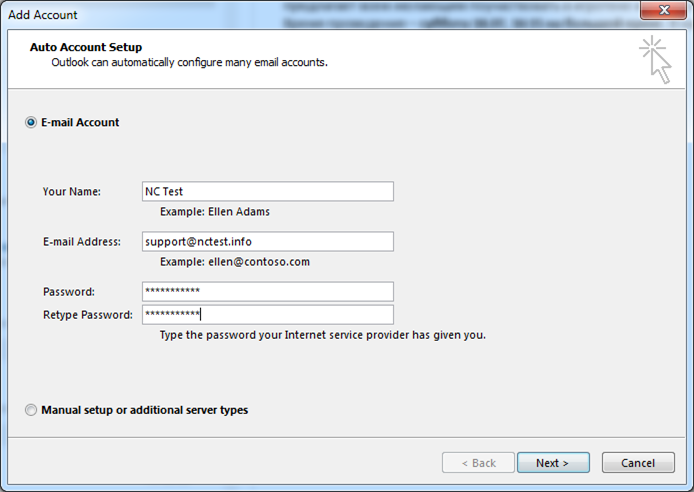
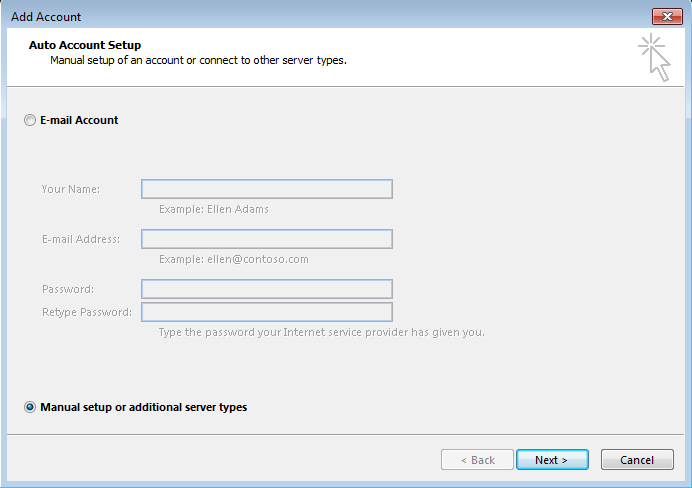
1. Check the option Manual setup or additional server types and click on Next:
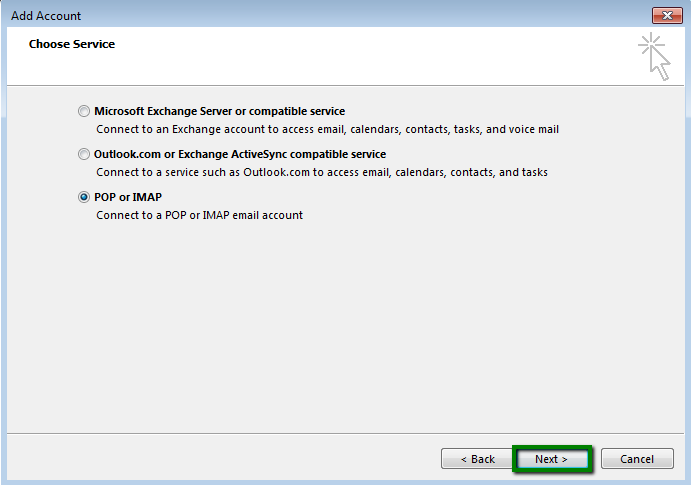
2. Select POP or IMAP and click on Next:
3. Fill out the corresponding fields:
Incoming and Outgoing mail server (SMTP): server your account is hosted on
User Name: full email address
Password: password for this mail account
Require logon using Secure Password Notification (SPA): should be unchecked
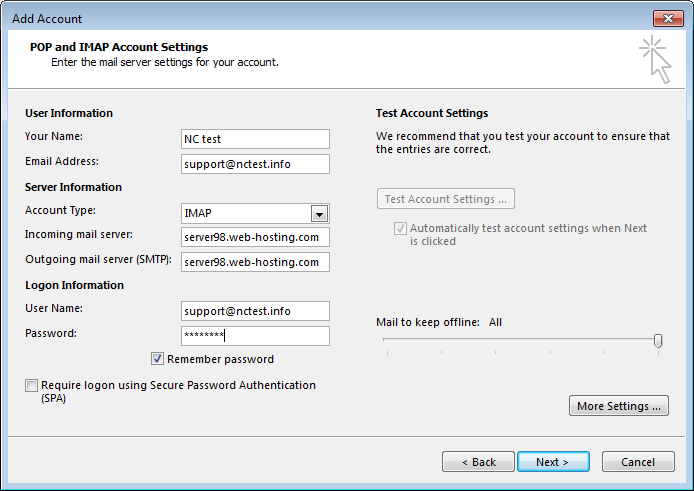
4. Once done, click on More Settings in the lower right corner of the window.
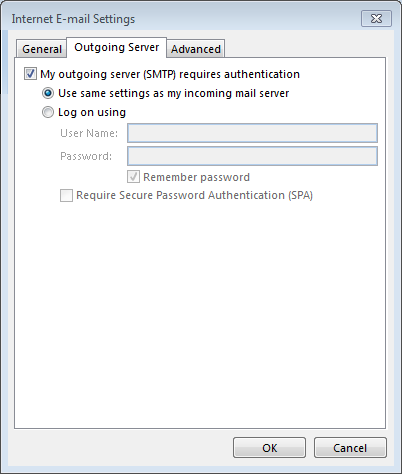
In the tab Outgoing Server checkmark the option My outgoing server (SMTP) requires authentication > Use same settings as my incoming mail server:
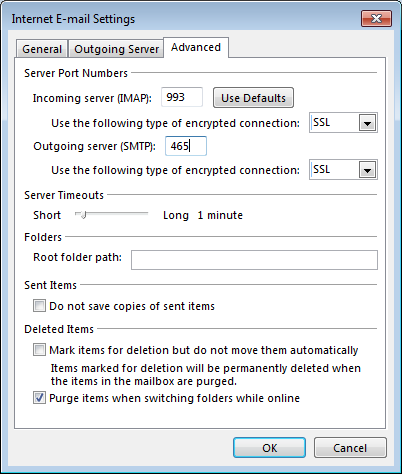
5. In the tab Advanced configure port settings as follows:
IMAP: port 993, SSL or port 143, TLS
POP3: port 995, SSL or port 110, TLS
SMTP: port 465, SSL or port 25/587, TLS
6. Once all is done, click OK to close the window and then Next to test server connection:
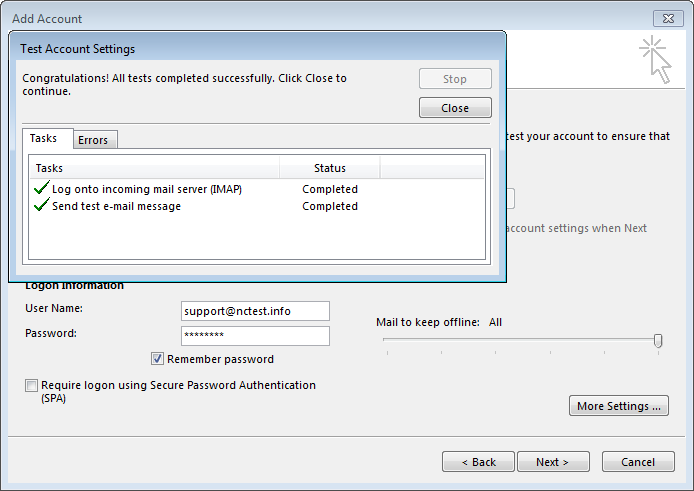
That's it!
Need any help? Contact our HelpDesk
Need help? We're always here for you.