In some cases, the correct functioning of your website depends on a PHP version installed on the server.
This guide describes how to change PHP version on Shared servers (Stellar, Stellar Plus plans and old Value, Professional, Ultimate plans). For Business SSD servers, use this guide.
NOTE:To check what PHP version is currently in use, refer to this article.
With the help of the PHP Selector menu, it is possible to select the necessary PHP version as well as enable/disable certain PHP modules and functions:
Change PHP version and/or manage extensions
- Log in to your cPanel account.
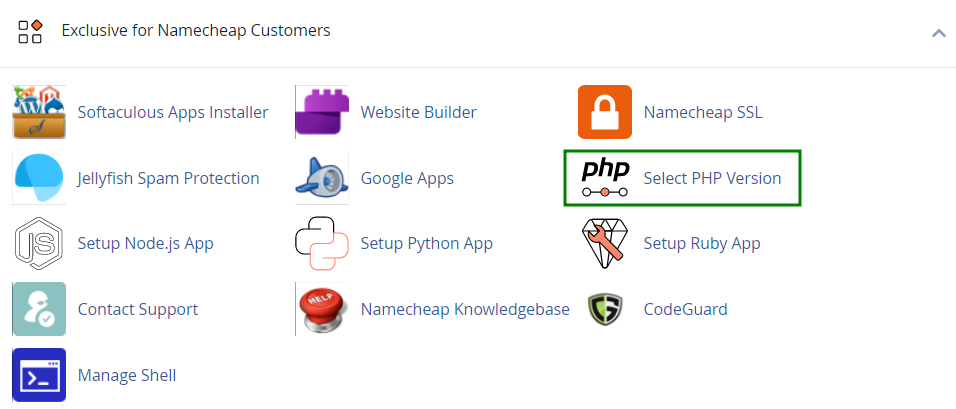
- Scroll down to the Exclusive for Namecheap Customers section >> click on the Select PHP Version menu:
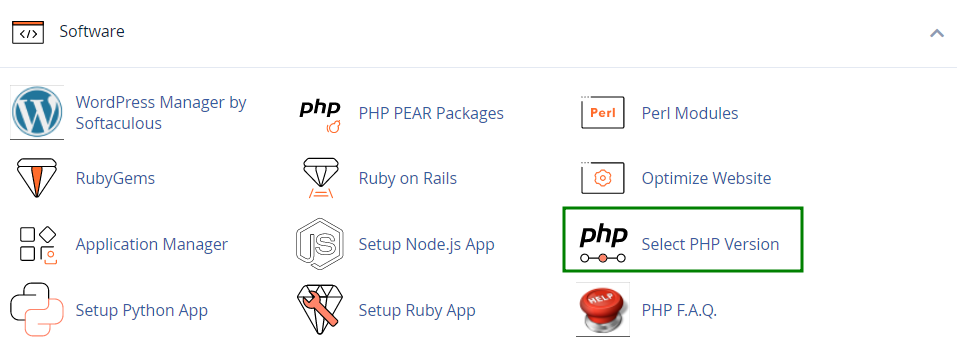
The Select PHP Version menu can also be located under the Software section on some servers:
- Inside the menu, you will see the list of available modules and extensions.
Use the Current PHP version drop-down box to select the required version and click on Apply in order to apply the changes:
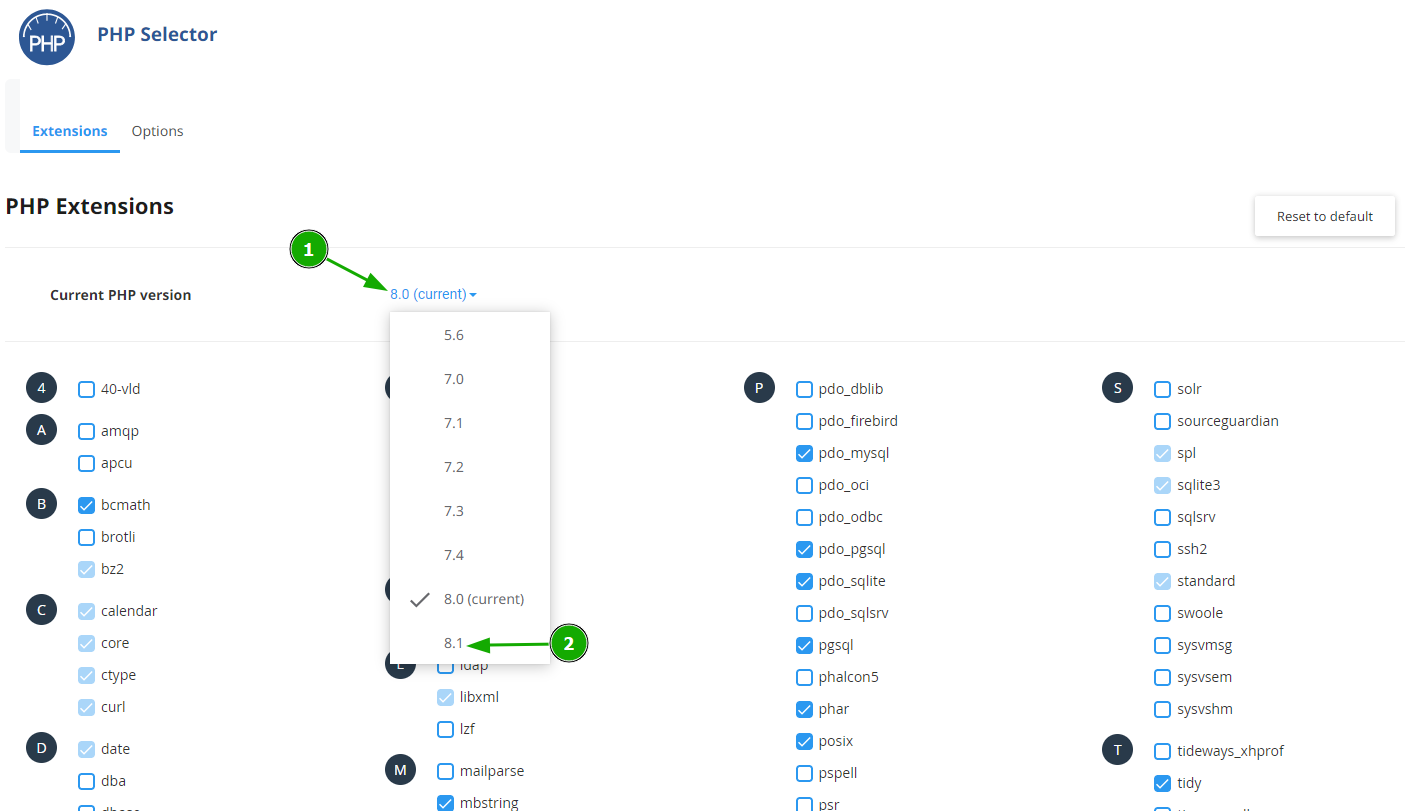

NOTE: If it is needed to set up the PHP version <7.0 for the account, please contact our Support Team.
- If you do not need to change the PHP version and just want to turn on/off specific extensions, you can do this by checking/unchecking the corresponding boxes. To change individual settings within the PHP version in question, click on the Options tab as it is shown in the following video guide:
By clicking on one of the options in blue, you will be presented with a drop-down list to change specific settings:
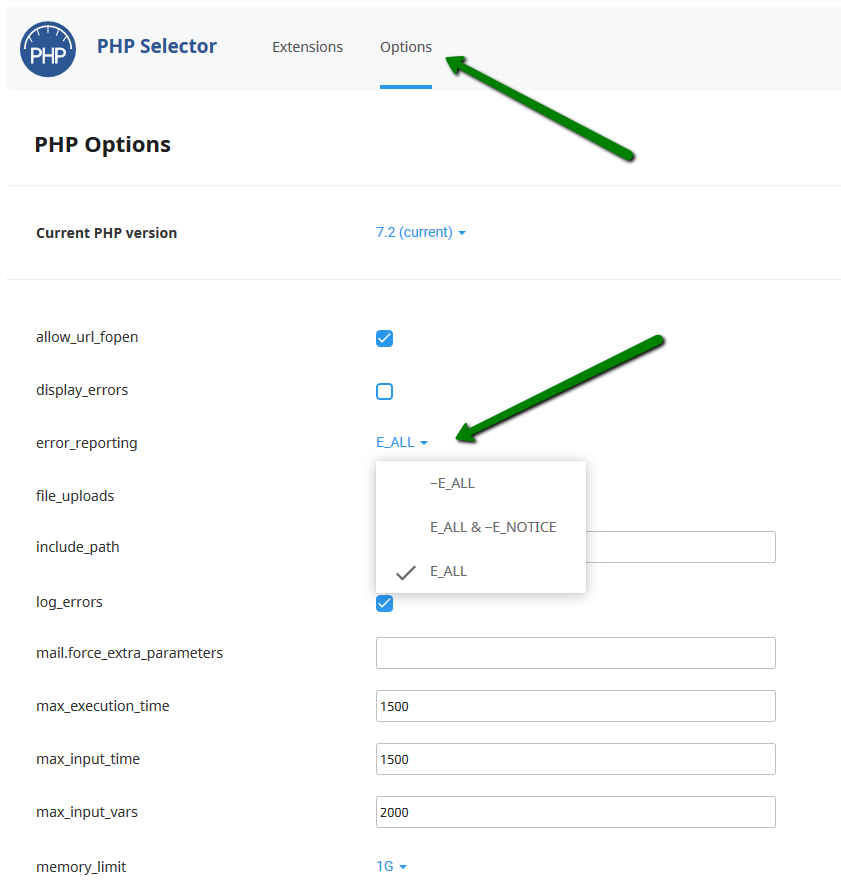
NOTE: In order to increase the max upload size, make sure to modify both post_max_size and upload_max_filesize values.
Change PHP version for addon domain
Sometimes your website may need to use a different PHP version from the one assigned to your whole cPanel account. To set a different PHP version for an addon domain, you need to add a special code to the .htaccess file of the addon as it s decribed below:
- Find the .htaccess file of the addon domain in question. The steps on how to find it can be located here.
- For the LiteSpeed servers, the code should be the following:
<FilesMatch ".(?:html|php)$">
SetHandler application/x-httpd-alt-phpXX
</FilesMatch>
where XX is the PHP version you wish to set. It can be 52, 53, 54, 55, 56, 70, 71,72, 73, 74, 80, 81, 82, 83, 84, or 85:

- Click Save changes.
NOTE: When a different PHP version is set for an addon domain, there are no PHP extensions enabled by default for this domain. To make a website work correctly, you will need to upload a php.ini file to the root folder of the addon domain. You can check this article to help you with uploading files to the hosting account.
It is needed to download the php.ini file for the selected PHP version from the Attachments section at the end of this guide. Do not forget to rename the file to php.ini once it is uploaded to your hosting account.
Alternatively, you can run the following command via SSH:
cp /opt/alt/default_php_ini/phpXX.ini /home/cPanel_username/path_to_the_folder/php.ini
- XX is PHP version you wish to set (it can be 52, 53, 54, 55, 56, 70, 71, 72, 73, 74, 80, 81, 82, 83, 84, or 85);
- cPanel_username should be replaced with your actual cPanel username;
- path_to_the_folder is a path to the root folder of the addon domain:

You can find details on how to access a hosting account via SSH here.
The process is similar if you wish to set a different PHP version for a subdomain.
That's it!
