
{"/api/v1/ncpl/simplekb/getarticle:\"{\\\"articleId\\\":10691,\\\"categoryId\\\":29}\"":{"body":{"Id":10691,"FriendlyId":"","ArticleTypeId":3,"Title":"How to deploy Angular Applications in cPanel","ArticleName":"How to deploy Angular Applications in cPanel","ArticleSummary":null,"PreponedSummary":false,"Approved":true,"Body":"QmVmb3JlIHlvdSBiZWdpbiwgbWFrZSBzdXJlIHRoYXQgdGhlIDxhIGhyZWY9Imh0dHBzOi8vdjE3LmFuZ3VsYXIuaW8vY2xpIj5Bbmd1bGFyIENMSTwvYT4gKENvbW1hbmQgTGluZSBJbnRlcmZhY2UpIGlzIGluc3RhbGxlZCBvbiB5b3VyIHN5c3RlbS4gSWYgaXQgaXNu4oCZdCwgZm9sbG93IHRoZXNlIHN0ZXBzIHRvIGluc3RhbGwgaXQ6PGJyIC8+PGJyIC8+DQoxLiBPcGVuIGEgdGVybWluYWwgb3IgY29tbWFuZCBwcm9tcHQuPGJyIC8+DQoyLiBSdW4gdGhlIGZvbGxvd2luZyBjb21tYW5kIHRvIGluc3RhbGwgQW5ndWxhciBDTEkgZ2xvYmFsbHk6PGJyIC8+PGJyIC8+PGI+bnBtIGluc3RhbGwgLWcgQGFuZ3VsYXIvY2xpPC9iPjxiciAvPjxiciAvPjxpbWcgY2xhc3M9ImtiLWltYWdlIiBzcmM9Imh0dHBzOi8vTmFtZWNoZWFwLnNpbXBsZWtiLmNvbS9TaXRlQ29udGVudHMvMi03QzIyRDUyMzZBNDU0M0VCODI3RjNCRDg5MzZFMTUzRS9tZWRpYS9hbmd1bGFyMS4xLnBuZyIgLz48YnIgLz48YnIgLz4NCjMuIEFmdGVyIHRoZSBpbnN0YWxsYXRpb24gaXMgY29tcGxldGUsIHZlcmlmeSBpdCBieSBydW5uaW5nIHRoZSBmb2xsb3dpbmcgY29tbWFuZDo8YnIgLz48YnIgLz48Yj5uZyB2ZXJzaW9uPC9iPjxiciAvPjxiciAvPjxpbWcgY2xhc3M9ImtiLWltYWdlIiBzcmM9Imh0dHBzOi8vTmFtZWNoZWFwLnNpbXBsZWtiLmNvbS9TaXRlQ29udGVudHMvMi03QzIyRDUyMzZBNDU0M0VCODI3RjNCRDg5MzZFMTUzRS9tZWRpYS9hbmd1bGFyMS4yLnBuZyIgLz48YnIgLz48YnIgLz5JZiB0aGUgY29tbWFuZCByZXR1cm5zIGEgdmVyc2lvbiBudW1iZXIsIHRoZSBBbmd1bGFyIENMSSBoYXMgYmVlbiBzdWNjZXNzZnVsbHkgaW5zdGFsbGVkLjxiciAvPjxiciAvPk5leHQsIGNoZWNrIGlmIHRoZSA8Yj5ub2RlX21vZHVsZXM8L2I+IGZvbGRlciBpcyBwcmVzZW50IGluIHlvdXIgYXBwIGRpcmVjdG9yeS4gSWYgaXTigJlzIG5vdCwgcnVuIHRoZSBmb2xsb3dpbmcgY29tbWFuZDo8YnIgLz48YnIgLz48Yj5ucG0gaW5zdGFsbDwvYj48YnIgLz48YnIgLz48aW1nIGNsYXNzPSJrYi1pbWFnZSIgc3JjPSJodHRwczovL05hbWVjaGVhcC5zaW1wbGVrYi5jb20vU2l0ZUNvbnRlbnRzLzItN0MyMkQ1MjM2QTQ1NDNFQjgyN0YzQkQ4OTM2RTE1M0UvbWVkaWEvYW5ndWxhcjEuMy5wbmciIC8+PGJyIC8+PGJyIC8+PGltZyBjbGFzcz0ia2ItaW1hZ2UiIHNyYz0iaHR0cHM6Ly9OYW1lY2hlYXAuc2ltcGxla2IuY29tL1NpdGVDb250ZW50cy8yLTdDMjJENTIzNkE0NTQzRUI4MjdGM0JEODkzNkUxNTNFL21lZGlhL2FuZ3VsYXIxLjQucG5nIiAvPjxiciAvPjxiciAvPg0KTGFzdGx5LCBjaGVjayB0aGUgTm9kZS5qcyB2ZXJzaW9uIGluIGNQYW5lbCBieSBuYXZpZ2F0aW5nIHRvIDxiPlNldHVwIE5vZGUuanMgQXBwPC9iPiAmZ3Q7Jmd0OyA8Yj4rQ1JFQVRFIEFQUExJQ0FUSU9OPC9iPiAmZ3Q7Jmd0OyA8Yj5Ob2RlLmpzIHZlcnNpb248L2I+IGluIHRoZSBkcm9wLWRvd24gbWVudS48YnIgLz48YnIgLz4NCkVuc3VyZSB0aGF0IHRoZSBOb2RlLmpzIHZlcnNpb24gb24geW91ciBsb2NhbCBjb21wdXRlciBtYXRjaGVzIHRoZSBvbmUgaW4gY1BhbmVsLiBJZiB5b3UgaGF2ZSBhIGRpZmZlcmVudCBOb2RlLmpzIHZlcnNpb24sIGFkanVzdGluZyBpdCBvbiB5b3VyIGxvY2FsIGRldmljZSBpcyByZWNvbW1lbmRlZC4gRm9yIGV4YW1wbGUsIHlvdSBjYW4gdXNlIHRoZSBOb2RlIFZlcnNpb24gTWFuYWdlciAobnZtKSBmb3IgPGEgaHJlZj0iaHR0cHM6Ly9naXRodWIuY29tL2NvcmV5YnV0bGVyL252bS13aW5kb3dzIj5XaW5kb3dzIE9TPC9hPiwgPGEgaHJlZj0iaHR0cHM6Ly9naXRodWIuY29tL252bS1zaC9udm0/dGFiPXJlYWRtZS1vdi1maWxlI2luc3RhbGxpbmctYW5kLXVwZGF0aW5nIj5tYWNPUzwvYT4sIGFuZCA8YSBocmVmPSJodHRwczovL2dpdGh1Yi5jb20vbnZtLXNoL252bT90YWI9cmVhZG1lLW92LWZpbGUjaW5zdGFsbGluZy1hbmQtdXBkYXRpbmciPkxpbnV4PC9hPi48YnIgLz48YnIgLz4NCk9uY2UgdGhlIE5vZGUuanMgdmVyc2lvbiBvbiB5b3VyIGxvY2FsIGNvbXB1dGVyIG1hdGNoZXMgdGhlIG9uZSBvbiBjUGFuZWwsIHlvdSBzaG91bGQgY2hlY2sgaWYgeW91ciBBbmd1bGFyIGFwcGxpY2F0aW9uIHdvcmtzIGNvcnJlY3RseSBhbmQgdGhlbiBidWlsZCBpdC48YnIgLz48YnIgLz48YSBocmVmPSIjQ1NSX0FwcCI+RGVwbG95aW5nIGFuIEFuZ3VsYXIgQ2xpZW50LVNpZGUgUmVuZGVyaW5nIChDU1IpIEFwcDwvYT48YnIgLz48YSBocmVmPSIjU1NSX1NTR192MSI+RGVwbG95aW5nIEFuZ3VsYXIgQXBwIHZlcnNpb24gMTYgVW5pdmVyc2FsIFNlcnZlci1TaWRlIFJlbmRlcmluZyAoU1NSKSBhbmQgU3RhdGljIFNpdGUgR2VuZXJhdGlvbiAoU1NHL1ByZXJlbmRlcmluZyk8L2E+PGJyIC8+PGEgaHJlZj0iI1NTUl9TU0dfdjIiPkRlcGxveWluZyBBbmd1bGFyIEFwcCB2ZXJzaW9ucyAxNyBhbmQgMTggU2VydmVyLVNpZGUgUmVuZGVyaW5nIChTU1IpIGFuZCBTdGF0aWMgU2l0ZSBHZW5lcmF0aW9uIChTU0cvUHJlcmVuZGVyaW5nKTwvYT48YnIgLz48YnIgLz48YSBuYW1lPSJDU1JfQXBwIj48Yj5EZXBsb3lpbmcgYW4gQW5ndWxhciBDbGllbnQtU2lkZSBSZW5kZXJpbmcgKENTUikgQXBwPC9iPjwvYT48YnIgLz48YnIgLz48Yj5TdGVwIDE6PC9iPiBDcmVhdGUgYSBwcm9kdWN0aW9uIGJ1aWxkPGJyIC8+PGJyIC8+DQpUbyBjcmVhdGUgYSBwcm9kdWN0aW9uIGJ1aWxkIG9mIHlvdXIgQW5ndWxhciBhcHBsaWNhdGlvbiwgb3BlbiB0aGUgYXBw4oCZcyBjb250ZW50IGluIHlvdXIgbG9jYWwgbWFjaGluZSdzIGNvZGUgZWRpdG9yIChJREUpIGFuZCBydW4gdGhlIGZvbGxvd2luZyBjb21tYW5kOjxiciAvPjxiciAvPjxhIGhyZWY9Imh0dHBzOi8vYW5ndWxhci5pby9jbGkvYnVpbGQiPjxiPm5nIGJ1aWxkPC9iPjwvYT48YnIgLz48YnIgLz48aW1nIGNsYXNzPSJrYi1pbWFnZSIgc3JjPSJodHRwczovL05hbWVjaGVhcC5zaW1wbGVrYi5jb20vU2l0ZUNvbnRlbnRzLzItN0MyMkQ1MjM2QTQ1NDNFQjgyN0YzQkQ4OTM2RTE1M0UvbWVkaWEvYW5ndWxhcjEuNS5wbmciIC8+PGJyIC8+PGJyIC8+DQpUaGlzIGNvbW1hbmQgd2lsbCBjcmVhdGUgYSBuZXcgZm9sZGVyIG5hbWVkIDxiPmRpc3Q8L2I+IGluIHlvdXIgcHJvamVjdCByb290IHdoaWNoIGNvbnRhaW5zIHRoZSA8Yj5icm93c2VyPC9iPiBmb2xkZXIgd2l0aCB0aGUgYnVpbGQgY29udGVudCBvZiB0aGUgYXBwbGljYXRpb24uPGJyIC8+PGJyIC8+DQpFbnN1cmUgdGhhdCB0aGVyZSBhcmUgbm8gZXJyb3JzIGR1cmluZyB0aGUgYnVpbGQgcHJvY2Vzcy4gSWYgYW55IGVycm9ycyBvY2N1ciwgdGhleSBuZWVkIHRvIGJlIGZpeGVkIGJlZm9yZSBwcm9jZWVkaW5nLjxiciAvPjxiciAvPg0KTm90ZSB0aGF0IHRoZSBwYXRoIG9mIHRoZSBidWlsZCBmb2xkZXIgYnJvd3NlciAoPGI+ZGlzdDwvYj4gYW5kIGl0cyBzdWJmb2xkZXIpIGNhbiBiZSBjaGFuZ2VkIGluIHRoZSA8Yj5hbmd1bGFyLmpzb248L2I+IGZpbGU6PGJyIC8+PGJyIC8+PGk+Im9wdGlvbnMiOiB7PGJyIC8+DQogICAgIm91dHB1dFBhdGgiOiAiZGlzdC95b3VyLWFwcC1uYW1lIiw8YnIgLz4NCn08L2k+PGJyIC8+PGJyIC8+PGI+U3RlcCAyOjwvYj4gVXBsb2FkIHRoZSBjb250ZW50IG9mIHRoZSA8Yj5icm93c2VyPC9iPiBmb2xkZXIgZnJvbSB0aGUgPGI+ZGlzdDwvYj4gZm9sZGVyIHRvIHlvdXIgY1BhbmVsPGJyIC8+PGJyIC8+DQpVc2UgRmlsZSBNYW5hZ2VyIG9yIGFuIEZUUCBjbGllbnQgbGlrZSBGaWxlWmlsbGEgdG8gdXBsb2FkIHRoZSBjb250ZW50IG9mIHRoZSA8Yj5icm93c2VyPC9iPiBmb2xkZXIgdG8geW91ciBob3N0aW5nLiBNYWtlIHN1cmUgdG8gdXBsb2FkIHRoZSBjb250ZW50IG9mIHRoZSA8Yj5icm93c2VyPC9iPiBmb2xkZXIsIG5vdCB0aGUgZm9sZGVyIGl0c2VsZi48YnIgLz48YnIgLz4NCkxlYXJuIG1vcmUgYWJvdXQgPGEgaHJlZj0iaHR0cHM6Ly93d3cubmFtZWNoZWFwLmNvbS9zdXBwb3J0L2tub3dsZWRnZWJhc2UvYXJ0aWNsZS5hc3B4LzE4MS8yNy9ob3ctZG8taS11cGxvYWQtbXktc2l0ZSI+aG93IHRvIHVwbG9hZCB5b3VyIHdlYnNpdGUgZmlsZXM8L2E+IHZpYSBGaWxlIE1hbmFnZXIsIEZUUCwgb3IgU1NILjxiciAvPjxiciAvPg0KQWZ0ZXIgaW1wb3J0aW5nIHRoZSBjb21wcmVzc2VkIGZvbGRlciwgZXh0cmFjdCB0aGUgY29udGVudCBmcm9tIHRoZSB3ZWJzaXRl4oCZcyByb290IGZvbGRlciAoZm91bmQgaW4gdGhlIDxhIGhyZWY9Imh0dHBzOi8vd3d3Lm5hbWVjaGVhcC5jb20vc3VwcG9ydC9rbm93bGVkZ2ViYXNlL2FydGljbGUuYXNweC8xMDEyNS8yOS9ob3ctdG8tbWFuYWdlLWRvbWFpbnMtaW4tY3BhbmVsLyNsaXN0Ij5Eb21haW4gbWVudTwvYT4pLiBGb3IgdGhlIG1haW4gZG9tYWluLCB1c2UgdGhlIDxiPnB1YmxpY19odG1sPC9iPiBmb2xkZXIsIGFuZCBmb3IgYWRkb24gZG9tYWlucyBhbmQgc3ViZG9tYWlucywgdXNlIHRoZWlyIHJlc3BlY3RpdmUgcm9vdCBmb2xkZXJzLjxiciAvPjxiciAvPg0KRm9yIHVwbG9hZGluZyBmaWxlcyB2aWEgRmlsZSBNYW5hZ2VyOjxiciAvPjxiciAvPjx1bD48bGk+TG9nIGludG8geW91ciA8Yj5jUGFuZWw8L2I+PC9saT48YnIgLz48bGk+TmF2aWdhdGUgdG8gPGI+RG9tYWlucyBzZWN0aW9uPC9iPiAmZ3Q7Jmd0OyA8Yj5Eb21haW5zPC9iPiBtZW51OjxiciAvPjxiciAvPjxpbWcgY2xhc3M9ImtiLWltYWdlIiBzcmM9Imh0dHBzOi8vTmFtZWNoZWFwLnNpbXBsZWtiLmNvbS9TaXRlQ29udGVudHMvMi03QzIyRDUyMzZBNDU0M0VCODI3RjNCRDg5MzZFMTUzRS9tZWRpYS9hbmd1bGFyMS42LnBuZyIgLz48YnIgLz48YnIgLz48L2xpPjxsaT5HbyB0byB5b3VyIHdlYnNpdGXigJlzIDxiPnJvb3QgZGlyZWN0b3J5PC9iPjwvbGk+PGJyIC8+PGxpPlNlbGVjdCA8Yj5VcGxvYWQ8L2I+IGZyb20gdGhlIHRvcCBtZW51PC9saT48YnIgLz48bGk+Q2hvb3NlIHRoZSBjb21wcmVzc2VkIGZpbGUgZnJvbSB5b3VyIGxvY2FsIG1hY2hpbmUgYW5kIHN0YXJ0IHRoZSB1cGxvYWQ8L2xpPjxiciAvPjxsaT5XaGVuIHRoZSB1cGxvYWQgaXMgY29tcGxldGUsIGdvIGJhY2sgdG8gdGhlIHdlYnNpdGUgZGlyZWN0b3J5PC9saT48YnIgLz48bGk+UmlnaHQtY2xpY2sgb24gdGhlIHVwbG9hZGVkIGZpbGUgYW5kIGNob29zZSA8Yj5FeHRyYWN0PC9iPjo8YnIgLz48YnIgLz48aW1nIGNsYXNzPSJrYi1pbWFnZSIgc3JjPSJodHRwczovL05hbWVjaGVhcC5zaW1wbGVrYi5jb20vU2l0ZUNvbnRlbnRzLzItN0MyMkQ1MjM2QTQ1NDNFQjgyN0YzQkQ4OTM2RTE1M0UvbWVkaWEvYW5ndWxhcjEuNy5wbmciIC8+PC9saT48L3VsPjxiciAvPjxiPlN0ZXAgMzo8L2I+IENyZWF0ZSBhIDxiPi5odGFjY2VzczwvYj4gZmlsZTxiciAvPjxiciAvPg0KVGhpcyBpcyBhIGNydWNpYWwgc3RlcCBmb3Igcm91dGluZy4gV2l0aG91dCB0aGUgPGI+Lmh0YWNjZXNzPC9iPiBmaWxlLCB5b3UgbWlnaHQgZW5jb3VudGVyIGEg4oCcNDA0IE5vdCBGb3VuZOKAnSBlcnJvciB3aGVuIHRyeWluZyB0byBuYXZpZ2F0ZSB0byBvdGhlciBwYWdlcy48YnIgLz48YnIgLz48dWw+PGxpPk1ha2Ugc3VyZSB0aGUgPGI+U2hvdyBIaWRkZW4gRmlsZXMgKGRvdGZpbGVzKTwvYj4gb3B0aW9uIGluIHRoZSA8Yj5TZXR0aW5nczwvYj4gbWVudSBpcyBlbmFibGVkOjxiciAvPjxiciAvPjxpbWcgY2xhc3M9ImtiLWltYWdlIiBzcmM9Imh0dHBzOi8vTmFtZWNoZWFwLnNpbXBsZWtiLmNvbS9TaXRlQ29udGVudHMvMi03QzIyRDUyMzZBNDU0M0VCODI3RjNCRDg5MzZFMTUzRS9tZWRpYS9hbmd1bGFyMS44LnBuZyIgLz48YnIgLz48YnIgLz48L2xpPjxsaT5DaG9vc2UgdGhlIDxiPitGaWxlPC9iPiBidXR0b24sIGFuZCBhIG5ldyBwb3AtdXAgYm94IHdpbGwgYXBwZWFyLiBFbnRlciB0aGUgbmFtZSA8Yj4uaHRhY2Nlc3M8L2I+IGFuZCBzZWxlY3QgPGI+Q3JlYXRlIE5ldyBGaWxlPC9iPjo8YnIgLz48YnIgLz48aW1nIGNsYXNzPSJrYi1pbWFnZSIgc3JjPSJodHRwczovL05hbWVjaGVhcC5zaW1wbGVrYi5jb20vU2l0ZUNvbnRlbnRzLzItN0MyMkQ1MjM2QTQ1NDNFQjgyN0YzQkQ4OTM2RTE1M0UvbWVkaWEvYW5ndWxhcjEuOS5wbmciIC8+PGJyIC8+PGJyIC8+PGltZyBjbGFzcz0ia2ItaW1hZ2UiIHNyYz0iaHR0cHM6Ly9OYW1lY2hlYXAuc2ltcGxla2IuY29tL1NpdGVDb250ZW50cy8yLTdDMjJENTIzNkE0NTQzRUI4MjdGM0JEODkzNkUxNTNFL21lZGlhL2FuZ3VsYXIyLjEucG5nIiAvPjxiciAvPjxiciAvPjwvbGk+PGxpPlNlbGVjdCB0aGUgPGI+Lmh0YWNjZXNzPC9iPiBmaWxlIGFuZCBjaG9vc2UgPGI+RWRpdDwvYj46PGJyIC8+PGJyIC8+PGltZyBjbGFzcz0ia2ItaW1hZ2UiIHNyYz0iaHR0cHM6Ly9OYW1lY2hlYXAuc2ltcGxla2IuY29tL1NpdGVDb250ZW50cy8yLTdDMjJENTIzNkE0NTQzRUI4MjdGM0JEODkzNkUxNTNFL21lZGlhL2FuZ3VsYXIyLjIucG5nIiAvPjxiciAvPjxiciAvPjwvbGk+PGxpPkVudGVyIHRoZSBmb2xsb3dpbmcgcnVsZTo8YnIgLz48YnIgLz4NClJld3JpdGVFbmdpbmUgT248YnIgLz4NClJld3JpdGVCYXNlIC88YnIgLz4NClJld3JpdGVSdWxlIF5pbmRleFwuaHRtbCQgLSBbTF08YnIgLz4NClJld3JpdGVDb25kICV7UkVRVUVTVF9GSUxFTkFNRX0gIS1mPGJyIC8+DQpSZXdyaXRlQ29uZCAle1JFUVVFU1RfRklMRU5BTUV9ICEtZDxiciAvPg0KUmV3cml0ZUNvbmQgJXtSRVFVRVNUX0ZJTEVOQU1FfSAhLWw8YnIgLz4NClJld3JpdGVSdWxlIC4gL2luZGV4Lmh0bWwgW0xdPGJyIC8+PC9saT48YnIgLz48bGk+U2VsZWN0IDxiPlNhdmUgQ2hhbmdlczwvYj4gdGhlbiBjbG9zZSB0aGUgZWRpdG9yOjxiciAvPjxiciAvPjxpbWcgY2xhc3M9ImtiLWltYWdlIiBzcmM9Imh0dHBzOi8vTmFtZWNoZWFwLnNpbXBsZWtiLmNvbS9TaXRlQ29udGVudHMvMi03QzIyRDUyMzZBNDU0M0VCODI3RjNCRDg5MzZFMTUzRS9tZWRpYS9hbmd1bGFyMi4zLnBuZyIgLz48YnIgLz48YnIgLz48L2xpPjwvdWw+DQpWaWV3IHRoaXMgdmlkZW8gZ3VpZGUgb24gPGEgaHJlZj0iaHR0cHM6Ly93d3cubmFtZWNoZWFwLmNvbS9zdXBwb3J0L2tub3dsZWRnZWJhc2UvYXJ0aWNsZS5hc3B4LzEwNTQ3LzIyNTUvdmlkZW8taG93LXRvLWFjY2Vzcy1hbmQtZWRpdC1odGFjY2Vzcy1maWxlIj5ob3cgdG8gYWNjZXNzIGFuZCBlZGl0IHRoZSAuaHRhY2Nlc3MgZmlsZTwvYT4uPGJyIC8+PGJyIC8+DQpPcGVuIGEgbmV3IHRhYiBpbiB5b3VyIHdlYiBicm93c2VyIGFuZCBlbnRlciB5b3VyIHdlYnNpdGXigJlzIFVSTC4gWW91IHNob3VsZCBub3cgc2VlIHlvdXIgQW5ndWxhciBBcHAgcnVubmluZy48YnIgLz48YnIgLz4NCkNvbmdyYXR1bGF0aW9ucyEgWW91IGhhdmUgc3VjY2Vzc2Z1bGx5IGRlcGxveWVkIHlvdXIgQW5ndWxhciBBcHAgdG8gY1BhbmVsIHNoYXJlZCBob3N0aW5nLjxiciAvPjxiciAvPjxhIG5hbWU9IlNTUl9TU0dfdjEiPjxiPkRlcGxveWluZyBBbmd1bGFyIEFwcCB2ZXJzaW9uIDE2IFVuaXZlcnNhbCBTZXJ2ZXItU2lkZSBSZW5kZXJpbmcgKFNTUikgYW5kIFN0YXRpYyBTaXRlIEdlbmVyYXRpb24gKFNTRy9QcmVyZW5kZXJpbmcpPC9iPjwvYT48YnIgLz48YnIgLz48Yj5TdGVwIDE6PC9iPiBNb2RpZnkgdGhlIHNlcnZlci50cyBmaWxlPGJyIC8+PGJyIC8+DQpGaXJzdCwgcmVwbGFjZSB0aGlzIGNvZGUgaW4gdGhlIDxiPnNlcnZlci50czwvYj4gZmlsZTo8YnIgLz48YnIgLz48aT5mdW5jdGlvbiBydW4oKTogdm9pZCB7PGJyIC8+DQogIGNvbnN0IHBvcnQgPSBwcm9jZXNzLmVudlsnUE9SVCddIHx8IDQwMDA7PGJyIC8+PGJyIC8+DQogIC8vIFN0YXJ0IHVwIHRoZSBOb2RlIHNlcnZlcjxiciAvPg0KICBjb25zdCBzZXJ2ZXIgPSBhcHAoKTs8YnIgLz4NCiAgc2VydmVyLmxpc3Rlbihwb3J0LCAoKSA9Jmd0OyB7PGJyIC8+DQogICAgY29uc29sZS5sb2coYE5vZGUgRXhwcmVzcyBzZXJ2ZXIgbGlzdGVuaW5nIG9uIGh0dHA6Ly9sb2NhbGhvc3Q6JHtwb3J0fWApOzxiciAvPg0KICB9KTs8YnIgLz4NCn08L2k+PGJyIC8+PGJyIC8+DQpXaXRoIHRoZSBuZXcgY29kZTo8YnIgLz48YnIgLz48aT5mdW5jdGlvbiBpc1J1bm5pbmdPbkFwYWNoZVBhc3NlbmdlcigpOiBib29sZWFuIHs8YnIgLz4NCiAgcmV0dXJuIG1vZHVsZUZpbGVuYW1lLmluY2x1ZGVzKCdsc25vZGUuanMnKTs8YnIgLz4NCn08YnIgLz48YnIgLz4NCmZ1bmN0aW9uIHJ1bigpOiB2b2lkIHs8YnIgLz4NCiAgLy8gU3RhcnQgdXAgdGhlIE5vZGUgc2VydmVyPGJyIC8+DQogIGNvbnN0IHNlcnZlciA9IGFwcCgpOzxiciAvPjxiciAvPg0KICBpZiAoaXNSdW5uaW5nT25BcGFjaGVQYXNzZW5nZXIoKSkgezxiciAvPg0KICAgIHNlcnZlci5saXN0ZW4oKCkgPSZndDsgezxiciAvPg0KICAgICAgY29uc29sZS5sb2coJ05vZGUgRXhwcmVzcyBsaXN0ZW5pbmcgdG8gUGFzc2VuZ2VyIEFwYWNoZScpOzxiciAvPg0KICAgIH0pOzxiciAvPg0KICAgIHJldHVybjs8YnIgLz4NCiAgfTxiciAvPjxiciAvPg0KICBjb25zdCBwb3J0ID0gcHJvY2Vzcy5lbnZbJ1BPUlQnXSB8fCA0MDAwOzxiciAvPjxiciAvPg0KICBzZXJ2ZXIubGlzdGVuKHBvcnQsICgpID0mZ3Q7IHs8YnIgLz4NCiAgICBjb25zb2xlLmxvZyhgTm9kZSBFeHByZXNzIHNlcnZlciBsaXN0ZW5pbmcgb24gaHR0cDovL2xvY2FsaG9zdDoke3BvcnR9YCk7PGJyIC8+DQogIH0pOzxiciAvPg0KfTwvaT48YnIgLz48YnIgLz4NClNlY29uZCwgcmVwbGFjZTo8YnIgLz48YnIgLz48aT5pZiAoPGJyIC8+DQogIG1vZHVsZUZpbGVuYW1lID09PSBfX2ZpbGVuYW1lIHx8PGJyIC8+DQogIG1vZHVsZUZpbGVuYW1lLmluY2x1ZGVzKCdpaXNub2RlJyk8YnIgLz4NCik8L2k+PGJyIC8+PGJyIC8+DQpXaXRoIHRoaXMgY29kZTo8YnIgLz48YnIgLz48aT5pZiAoPGJyIC8+DQogIG1vZHVsZUZpbGVuYW1lID09PSBfX2ZpbGVuYW1lIHx8PGJyIC8+DQogIG1vZHVsZUZpbGVuYW1lLmluY2x1ZGVzKCdpaXNub2RlJykgfHw8YnIgLz4NCiAgaXNSdW5uaW5nT25BcGFjaGVQYXNzZW5nZXIoKTxiciAvPg0KKTwvaT48YnIgLz48YnIgLz48Yj5TdGVwIDI6PC9iPiBCdWlsZGluZyB5b3VyIEFuZ3VsYXIgVW5pdmVyc2FsIEFwcDxiciAvPjxiciAvPg0KTm90ZSB0aGF0IHRoZSBwYXRoIG9mIHRoZSBidWlsZCBmb2xkZXLigJlzIGJyb3dzZXIgYW5kIHNlcnZlciAoPGI+ZGlzdDwvYj4gYW5kIGl0cyBzdWJmb2xkZXIpIGNhbiBiZSBjaGFuZ2VkIGluIHRoZSA8Yj5hbmd1bGFyLmpzb248L2I+IGZpbGU6PGJyIC8+PGJyIC8+PGk+Im9wdGlvbnMiOiB7PGJyIC8+DQogICAgIm91dHB1dFBhdGgiOiAiZGlzdC95b3VyLWFwcC1uYW1lIiw8YnIgLz4NCn08L2k+PGJyIC8+PGJyIC8+DQpUbyBidWlsZCBhbiBBbmd1bGFyIGFwcGxpY2F0aW9uOjxiciAvPjxiciAvPjx1bD48bGk+T3BlbiB5b3VyIHRlcm1pbmFsIGFuZCBuYXZpZ2F0ZSB0byB5b3VyIHByb2plY3QgZGlyZWN0b3J5LjwvbGk+PGJyIC8+PGxpPlJ1biB0aGUgYnVpbGQgY29tbWFuZDo8YnIgLz48YnIgLz48Yj5ucG0gcnVuIGJ1aWxkOnNzcjwvYj48YnIgLz48YnIgLz48aW1nIGNsYXNzPSJrYi1pbWFnZSIgc3JjPSJodHRwczovL05hbWVjaGVhcC5zaW1wbGVrYi5jb20vU2l0ZUNvbnRlbnRzLzItN0MyMkQ1MjM2QTQ1NDNFQjgyN0YzQkQ4OTM2RTE1M0UvbWVkaWEvYW5ndWxhcjIuNC5wbmciIC8+PGJyIC8+PGJyIC8+PC9saT48bGk+RW5zdXJlIHRoYXQgdGhlcmUgYXJlIG5vIGVycm9ycyBkdXJpbmcgdGhlIGJ1aWxkIHByb2Nlc3MuIElmIHRoZXJlIGFyZSwgdGhleSBuZWVkIHRvIGJlIGZpeGVkIGJlZm9yZSBnb2luZyBvbi48L2xpPjxiciAvPjwvdWw+DQpUaGlzIGNvbW1hbmQgd2lsbCBjb21waWxlIHlvdXIgYXBwbGljYXRpb24gYW5kIG91dHB1dCB0aGUgYnVpbGQgZmlsZXMuIFRoZSBidWlsZCBmaWxlcyB3aWxsIGJlIG9yZ2FuaXplZCBpbnRvIHR3byBzZXBhcmF0ZSBkaXJlY3RvcmllczogPGI+YnJvd3NlcjwvYj4gYW5kIDxiPnNlcnZlcjwvYj4uIFRoZXNlIGRpcmVjdG9yaWVzIGNvbnRhaW4gdGhlIGNvbXBpbGVkIGZpbGVzIGZvciB0aGUgcmVzcGVjdGl2ZSBlbnZpcm9ubWVudHMuPGJyIC8+PGJyIC8+PGI+U3RlcCAzOjwvYj4gUHJlcGFyZSBGaWxlcyBmb3IgRGVwbG95bWVudDxiciAvPjxiciAvPjx1bD48bGk+T3BlbiB0aGUgZmlsZSBtYW5hZ2VyIGFuZCBsb2NhdGUgeW91ciBBbmd1bGFyIHByb2plY3QgZmlsZXMuPC9saT48YnIgLz48bGk+RW5hYmxlIHZpc2liaWxpdHkgZm9yIGFueSBoaWRkZW4gZmlsZXMuPC9saT48YnIgLz48bGk+RXhjbHVkZSB0aGUgZm9sbG93aW5nIGZvbGRlcnMvZmlsZXM6PGJyIC8+PHVsPjxsaT5ub2RlX21vZHVsZXM7PC9saT48YnIgLz48bGk+LmdpdDs8L2xpPjxiciAvPjxsaT5SRUFETUUubWQ7PC9saT48YnIgLz48bGk+LmdpdGlnbm9yZS48L2xpPjwvdWw+PC9saT48YnIgLz48bGk+U2VsZWN0IGFsbCByZW1haW5pbmcgZmlsZXMgYW5kIGZvbGRlcnMuPC9saT48YnIgLz48bGk+Q3JlYXRlIGEgWklQIGFyY2hpdmUgb2YgdGhlIHNlbGVjdGVkIGZpbGVzLjwvbGk+PGJyIC8+PC91bD4NCkl0J3MgaW1wb3J0YW50IHRvIGV4Y2x1ZGUgdGhlIDxiPm5vZGVfbW9kdWxlczwvYj4gZGlyZWN0b3J5IGJlY2F1c2UgaXTigJlzIG9mdGVuIGxhcmdlIGFuZCBub3QgbmVlZGVkIGZvciBkZXBsb3ltZW50LiBUaGUgbmVjZXNzYXJ5IG1vZHVsZXMgd2lsbCBiZSBpbnN0YWxsZWQgb24gdGhlIHNlcnZlciBhdCBhIGxhdGVyIHN0YWdlLjxiciAvPjxiciAvPjxiPlN0ZXAgNDo8L2I+IFVwbG9hZCB0aGUgYXJjaGl2ZSBmaWxlIHRvIHlvdXIgY1BhbmVsIG9uIHNoYXJlZCBob3N0aW5nPGJyIC8+PGJyIC8+DQpMZWFybiA8YSBocmVmPSJodHRwczovL3d3dy5uYW1lY2hlYXAuY29tL3N1cHBvcnQva25vd2xlZGdlYmFzZS9hcnRpY2xlLmFzcHgvMTgxLzI3L2hvdy1kby1pLXVwbG9hZC1teS1zaXRlIj5ob3cgdG8gdXBsb2FkIHlvdXIgd2Vic2l0ZSBmaWxlczwvYT4gdmlhIEZpbGUgTWFuYWdlciwgRlRQLCBvciBTU0guPGJyIC8+PGJyIC8+PGI+Tk9URTo8L2I+IFRoZSA8Yj5wdWJsaWNfaHRtbDwvYj4gZm9sZGVyIG9mIHRoZSBtYWluIGRvbWFpbiBjYW5ub3QgYmUgdXNlZCB0byBjb25maWd1cmUgdGhlIE5vZGUuanMgc2VydmVyLiBBbGwgZmlsZXMgYW5kIGZvbGRlcnMgc2hvdWxkIGJlIGluIHRoZSBhcHDigJlzIGZvbGRlciwgbm90IGluY2x1ZGluZyA8aT5wdWJsaWNfaHRtbDwvaT4uPGJyIC8+PGJyIC8+DQpIZXJl4oCZcyBob3cgdG8gdXBsb2FkIGZpbGVzIHZpYSBGaWxlIE1hbmFnZXI6PGJyIC8+PGJyIC8+PHVsPjxsaT5Mb2cgaW50byB5b3VyIDxiPmNQYW5lbDwvYj4uPC9saT48YnIgLz48bGk+TmF2aWdhdGUgdG8gPGI+RmlsZSBNYW5hZ2VyPC9iPi48L2xpPjxiciAvPjxsaT5TZWxlY3Qgb3IgY3JlYXRlIGEgZGlyZWN0b3J5IGZvciB5b3VyIHdlYnNpdGUgY29udGVudC48L2xpPjxiciAvPjxsaT5TZWxlY3QgPGI+VXBsb2FkPC9iPiBpbiB0aGUgdG9wIG1lbnUuPC9saT48YnIgLz48bGk+Q2hvb3NlIHRoZSBjb21wcmVzc2VkIGZpbGUgZnJvbSB5b3VyIGxvY2FsIG1hY2hpbmUgYW5kIHN0YXJ0IHRoZSB1cGxvYWQuPC9saT48YnIgLz48bGk+V2hlbiB0aGUgdXBsb2FkIGlzIGNvbXBsZXRlLCBnbyBiYWNrIHRvIHRoZSB3ZWJzaXRlIGRpcmVjdG9yeS48L2xpPjxiciAvPjxsaT5SaWdodC1jbGljayBvbiB0aGUgdXBsb2FkZWQgZmlsZSBhbmQgY2hvb3NlIDxiPkV4dHJhY3Q8L2I+LjwvbGk+PGJyIC8+PC91bD48YnIgLz48Yj5TdGVwIDU6PC9iPiBTZXR0aW5nIFVwIGEgTm9kZS5qcyBBcHAgb24gY1BhbmVsIHdpdGggdGhlIG1haW4uanMgZmlsZTxiciAvPjxiciAvPg0KQ2hlY2sgb3V0IDxhIGhyZWY9Imh0dHBzOi8vd3d3Lm5hbWVjaGVhcC5jb20vc3VwcG9ydC9rbm93bGVkZ2ViYXNlL2FydGljbGUuYXNweC8xMDA0Ny8yMTgyL2hvdy10by13b3JrLXdpdGgtbm9kZWpzLWFwcCI+aG93IHRvIHdvcmsgd2l0aCBOb2RlLmpzIGFwcDwvYT4gZm9yIG1vcmUgaW5mb3JtYXRpb24uPGJyIC8+PGJyIC8+PHVsPjxsaT5JbiBjUGFuZWwsIGZpbmQgYW5kIG9wZW4gdGhlIFNldHVwIE5vZGUuanMgYXBwLjwvbGk+PGJyIC8+PGxpPlNlbGVjdCArIENSRUFURSBBUFBMSUNBVElPTi48L2xpPjxiciAvPjxsaT5Db25maWd1cmUgdGhlIGFwcGxpY2F0aW9uIHNldHRpbmdzOjxiciAvPjxiciAvPg0KTm9kZS5qcyB2ZXJzaW9uOiBzZWxlY3QgdGhlIHZlcnNpb24gdGhhdCBtYXRjaGVzIHRoZSBOb2RlLmpzIHZlcnNpb24geW91IHVzZWQgd2hlbiBkZXZlbG9waW5nIHlvdXIgYXBwIGxvY2FsbHkuPGJyIC8+DQpBcHBsaWNhdGlvbiBtb2RlOiBzZWxlY3QgUHJvZHVjdGlvbi48YnIgLz4NCkFwcGxpY2F0aW9uIHJvb3Q6IHR5cGUgdGhlIHBhdGggb2YgdGhlIGRpcmVjdG9yeSB3aGVyZSB5b3VyIHdlYnNpdGUgY29udGVudCBpcyB1cGxvYWRlZC48YnIgLz4NCkFwcGxpY2F0aW9uIFVSTDogc2VsZWN0IHlvdXIgZG9tYWluIG5hbWUuPGJyIC8+DQpBcHBsaWNhdGlvbiBzdGFydHVwIGZpbGU6IGRpc3QveW91ci1hcHAtbmFtZS9zZXJ2ZXIvbWFpbi5qczxiciAvPjxiciAvPg0KSWYgeW91IGhhdmUgYW55IGVudmlyb25tZW50IHZhcmlhYmxlcywgeW91IGNhbiBhZGQgdGhlbSBmcm9tIHlvdXIgLmVudiBvciAuZW52LmxvY2FsIGZpbGUuIEZvciBtb3JlIGluZm9ybWF0aW9uIG9uIGVudmlyb25tZW50IHZhcmlhYmxlcyBpbiBBbmd1bGFyLCBoZXJl4oCZcyB0aGUgPGEgaHJlZj0iaHR0cHM6Ly92MTcuYW5ndWxhci5pby9ndWlkZS9idWlsZCNjb25maWd1cmluZy1hcHBsaWNhdGlvbi1lbnZpcm9ubWVudHMiPmNvbmZpZ3VyaW5nIGFwcGxpY2F0aW9uIGVudmlyb25tZW50cyBkb2N1bWVudGF0aW9uPC9hPi48YnIgLz48YnIgLz48aW1nIGNsYXNzPSJrYi1pbWFnZSIgc3JjPSJodHRwczovL05hbWVjaGVhcC5zaW1wbGVrYi5jb20vU2l0ZUNvbnRlbnRzLzItN0MyMkQ1MjM2QTQ1NDNFQjgyN0YzQkQ4OTM2RTE1M0UvbWVkaWEvYW5ndWxhcjIuNS5wbmciIC8+PGJyIC8+PGJyIC8+PC9saT48bGk+Q2hvb3NlIENSRUFURSB0byBjcmVhdGUgdGhlIE5vZGUuanMgYXBwbGljYXRpb24uPC9saT48YnIgLz48bGk+U3RvcCB0aGUgYXBwIHRlbXBvcmFyaWx5LCB0aGVuIG5hdmlnYXRlIHRvIERldGVjdGVkIENvbmZpZ3VyYXRpb24gRmlsZXMuPC9saT48YnIgLz48bGk+Q2xpY2sgUnVuIE5QTSBJbnN0YWxsIHRvIGluc3RhbGwgTm9kZS5qcyBwYWNrYWdlcy48L2xpPjxiciAvPjxsaT5TdGFydCB0aGUgYXBwIGFnYWluIGJ5IGNob29zaW5nIFNUQVJUIEFQUC48L2xpPjxiciAvPjwvdWw+PGJyIC8+DQpPcGVuIGEgbmV3IHRhYiBpbiB5b3VyIHdlYiBicm93c2VyIGFuZCBlbnRlciB5b3VyIHdlYnNpdGUgVVJMLiBZb3Ugc2hvdWxkIHNlZSB5b3VyIEFuZ3VsYXIgYXBwIHJ1bm5pbmcuPGJyIC8+PGJyIC8+DQpDb25ncmF0dWxhdGlvbnMhIFlvdXIgQW5ndWxhciBVbml2ZXJzYWwgYXBwbGljYXRpb24gc2hvdWxkIG5vdyBiZSBkZXBsb3llZCBvbiBjUGFuZWwuPGJyIC8+PGJyIC8+PGEgbmFtZT0iU1NSX1NTR192MiI+PGI+RGVwbG95aW5nIEFuZ3VsYXIgQXBwIHZlcnNpb25zIDE3IGFuZCAxOCBTZXJ2ZXItU2lkZSBSZW5kZXJpbmcgKFNTUikgYW5kIFN0YXRpYyBTaXRlIEdlbmVyYXRpb24gKFNTRy9QcmVyZW5kZXJpbmcpPC9iPjwvYT48YnIgLz48YnIgLz48Yj5TdGVwIDE6PC9iPiBCdWlsZGluZyB5b3VyIEFuZ3VsYXIgU1NSIEFwcDxiciAvPjxiciAvPg0KTm90ZSB0aGF0IHRoZSBwYXRoIG9mIHRoZSBidWlsZCBmb2xkZXIgYnJvd3NlciBhbmQgc2VydmVyICg8Yj5kaXN0PC9iPiBhbmQgaXRzIHN1YmZvbGRlcikgY2FuIGJlIGNoYW5nZWQgaW4gdGhlIDxiPmFuZ3VsYXIuanNvbjwvYj4gZmlsZTo8YnIgLz48YnIgLz48aT4ib3B0aW9ucyI6IHs8YnIgLz4NCiAgICAib3V0cHV0UGF0aCI6ICJkaXN0L3lvdXItYXBwLW5hbWUiLDxiciAvPg0KfTwvaT48YnIgLz48YnIgLz4NClRvIGJ1aWxkIGFuIEFuZ3VsYXIgYXBwbGljYXRpb246PGJyIC8+PGJyIC8+PHVsPjxsaT5PcGVuIHlvdXIgdGVybWluYWwgYW5kIG5hdmlnYXRlIHRvIHlvdXIgcHJvamVjdCBkaXJlY3RvcnkuPC9saT48YnIgLz48bGk+UnVuIHRoZSBidWlsZCBjb21tYW5kOjxiciAvPjxiciAvPjxiPm5nIGJ1aWxkPC9iPjxiciAvPjxiciAvPjxpbWcgY2xhc3M9ImtiLWltYWdlIiBzcmM9Imh0dHBzOi8vTmFtZWNoZWFwLnNpbXBsZWtiLmNvbS9TaXRlQ29udGVudHMvMi03QzIyRDUyMzZBNDU0M0VCODI3RjNCRDg5MzZFMTUzRS9tZWRpYS9hbmd1bGFyMi42LnBuZyIgLz48YnIgLz48YnIgLz48L2xpPjxsaT5FbnN1cmUgdGhhdCB0aGVyZSBhcmUgbm8gZXJyb3JzIGR1cmluZyB0aGUgYnVpbGQgcHJvY2Vzcy4gSWYgdGhlcmUgYXJlLCB0aGV5IG5lZWQgdG8gYmUgZml4ZWQgYmVmb3JlIGdvaW5nIG9uLjwvbGk+PGJyIC8+PC91bD48YnIgLz4NClRoaXMgY29tbWFuZCB3aWxsIGNvbXBpbGUgeW91ciBhcHBsaWNhdGlvbiBhbmQgb3V0cHV0IHRoZSBidWlsZCBmaWxlcy4gVGhlIGJ1aWxkIGZpbGVzIHdpbGwgYmUgb3JnYW5pemVkIGludG8gdHdvIHNlcGFyYXRlIGRpcmVjdG9yaWVzOiA8Yj5icm93c2VyPC9iPiBhbmQgPGI+c2VydmVyPC9iPi4gVGhlc2UgZGlyZWN0b3JpZXMgY29udGFpbiB0aGUgY29tcGlsZWQgZmlsZXMgZm9yIHRoZSByZXNwZWN0aXZlIGVudmlyb25tZW50cy48YnIgLz48YnIgLz48Yj5TdGVwIDI6PC9iPiBQcmVwYXJlIEZpbGVzIGZvciBEZXBsb3ltZW50PGJyIC8+PGJyIC8+PHVsPjxsaT5PcGVuIHRoZSBmaWxlIG1hbmFnZXIgYW5kIGxvY2F0ZSB5b3VyIEFuZ3VsYXIgcHJvamVjdCBmaWxlcy48L2xpPjxiciAvPjxsaT5FbmFibGUgdmlzaWJpbGl0eSBmb3IgYW55IGhpZGRlbiBmaWxlcy48L2xpPjxiciAvPjxsaT5FeGNsdWRlIHRoZSBmb2xsb3dpbmcgZm9sZGVycy9maWxlczo8YnIgLz48YnIgLz48dWw+PGxpPm5vZGVfbW9kdWxlczs8L2xpPjxiciAvPjxsaT4uZ2l0OzwvbGk+PGJyIC8+PGxpPlJFQURNRS5tZDs8L2xpPjxiciAvPjxsaT4uZ2l0aWdub3JlLjwvbGk+PC91bD48L2xpPjxiciAvPjxsaT5TZWxlY3QgYWxsIHJlbWFpbmluZyBmaWxlcyBhbmQgZm9sZGVycy48L2xpPjxiciAvPjxsaT5DcmVhdGUgYSBaSVAgYXJjaGl2ZSBvZiB0aGUgc2VsZWN0ZWQgZmlsZXMuPC9saT48YnIgLz48L3VsPjxiciAvPg0KSXQncyBpbXBvcnRhbnQgdG8gZXhjbHVkZSB0aGUgPGI+bm9kZV9tb2R1bGVzPC9iPiBkaXJlY3RvcnkgYmVjYXVzZSBpdOKAmXMgb2Z0ZW4gbGFyZ2UgYW5kIG5vdCBuZWVkZWQgZm9yIGRlcGxveW1lbnQuIFRoZSBuZWNlc3NhcnkgbW9kdWxlcyB3aWxsIGJlIGluc3RhbGxlZCBvbiB0aGUgc2VydmVyIGF0IGEgbGF0ZXIgc3RhZ2UuPGJyIC8+PGJyIC8+PGI+U3RlcCAzOjwvYj4gVXBsb2FkIHRoZSBhcmNoaXZlIGZpbGUgdG8geW91ciBjUGFuZWwgb24gc2hhcmVkIGhvc3Rpbmc8YnIgLz48YnIgLz4NCkxlYXJuIDxhIGhyZWY9Imh0dHBzOi8vd3d3Lm5hbWVjaGVhcC5jb20vc3VwcG9ydC9rbm93bGVkZ2ViYXNlL2FydGljbGUuYXNweC8xODEvMjcvaG93LWRvLWktdXBsb2FkLW15LXNpdGUiPmhvdyB0byB1cGxvYWQgeW91ciB3ZWJzaXRlIGZpbGVzPC9hPiB2aWEgRmlsZSBNYW5hZ2VyLCBGVFAsIG9yIFNTSC48YnIgLz48YnIgLz48Yj5OT1RFOjwvYj4gVGhlIDxiPnB1YmxpY19odG1sPC9iPiBmb2xkZXIgb2YgdGhlIG1haW4gZG9tYWluIGNhbm5vdCBiZSB1c2VkIHRvIGNvbmZpZ3VyZSB0aGUgTm9kZS5qcyBzZXJ2ZXIuIEFsbCBmaWxlcyBhbmQgZm9sZGVycyBzaG91bGQgYmUgaW4gdGhlIGFwcOKAmXMgZm9sZGVyLCBub3QgaW5jbHVkaW5nIDxpPnB1YmxpY19odG1sPC9pPi48YnIgLz48YnIgLz4NCkhvdyB0byB1cGxvYWQgZmlsZXMgdmlhIEZpbGUgTWFuYWdlcjo8YnIgLz48YnIgLz48dWw+PGxpPkxvZyBpbnRvIHlvdXIgPGI+Y1BhbmVsPC9iPi48L2xpPjxiciAvPjxsaT5OYXZpZ2F0ZSB0byA8Yj5GaWxlIE1hbmFnZXI8L2I+LjwvbGk+PGJyIC8+PGxpPlNlbGVjdCBvciBjcmVhdGUgYSBkaXJlY3RvcnkgZm9yIHlvdXIgd2Vic2l0ZSBjb250ZW50LjwvbGk+PGJyIC8+PGxpPlNlbGVjdCA8Yj5VcGxvYWQ8L2I+IGluIHRoZSB0b3AgbWVudS48L2xpPjxiciAvPjxsaT5DaG9vc2UgdGhlIGNvbXByZXNzZWQgZmlsZSBmcm9tIHlvdXIgbG9jYWwgbWFjaGluZSBhbmQgc3RhcnQgdGhlIHVwbG9hZC48L2xpPjxiciAvPjxsaT5XaGVuIHRoZSB1cGxvYWQgaXMgY29tcGxldGUsIGdvIGJhY2sgdG8gdGhlIHdlYnNpdGUgZGlyZWN0b3J5LjwvbGk+PGJyIC8+PGxpPlJpZ2h0LWNsaWNrIG9uIHRoZSB1cGxvYWRlZCBmaWxlIGFuZCBjaG9vc2UgPGI+RXh0cmFjdDwvYj4uPC9saT48L3VsPjxiciAvPjxiPlN0ZXAgNDo8L2I+IFNldHRpbmcgVXAgYSBOb2RlLmpzIEFwcCBvbiBjUGFuZWwgd2l0aCB0aGUgc2VydmVyLm1qcyBmaWxlPGJyIC8+PGJyIC8+DQpDaGVjayBvdXQgPGEgaHJlZj0iaHR0cHM6Ly93d3cubmFtZWNoZWFwLmNvbS9zdXBwb3J0L2tub3dsZWRnZWJhc2UvYXJ0aWNsZS5hc3B4LzEwMDQ3LzIxODIvaG93LXRvLXdvcmstd2l0aC1ub2RlanMtYXBwIj5ob3cgdG8gd29yayB3aXRoIE5vZGUuanMgYXBwPC9hPiBmb3IgbW9yZSBpbmZvcm1hdGlvbi48YnIgLz48YnIgLz48dWw+PGxpPkluIGNQYW5lbCwgZmluZCBhbmQgb3BlbiB0aGUgU2V0dXAgTm9kZS5qcyBhcHAuPC9saT48YnIgLz48bGk+U2VsZWN0ICsgQ1JFQVRFIEFQUExJQ0FUSU9OLjwvbGk+PGJyIC8+PGxpPkNvbmZpZ3VyZSB0aGUgYXBwbGljYXRpb24gc2V0dGluZ3M6PGJyIC8+PGJyIC8+DQpOb2RlLmpzIHZlcnNpb246IHNlbGVjdCB0aGUgdmVyc2lvbiB0aGF0IG1hdGNoZXMgdGhlIE5vZGUuanMgdmVyc2lvbiB5b3UgdXNlZCB3aGVuIGRldmVsb3BpbmcgeW91ciBhcHAgbG9jYWxseS48YnIgLz4NCkFwcGxpY2F0aW9uIG1vZGU6IHNlbGVjdCBQcm9kdWN0aW9uLjxiciAvPg0KQXBwbGljYXRpb24gcm9vdDogdHlwZSB0aGUgcGF0aCBvZiB0aGUgZGlyZWN0b3J5IHdoZXJlIHlvdXIgd2Vic2l0ZSBjb250ZW50IGlzIHVwbG9hZGVkLjxiciAvPg0KQXBwbGljYXRpb24gVVJMOiBzZWxlY3QgeW91ciBkb21haW4gbmFtZS48YnIgLz4NCkFwcGxpY2F0aW9uIHN0YXJ0dXAgZmlsZTogZGlzdC95b3VyLWFwcC1uYW1lL3NlcnZlci9tYWluLmpzPGJyIC8+PGJyIC8+DQpJZiB5b3UgaGF2ZSBhbnkgZW52aXJvbm1lbnQgdmFyaWFibGVzLCB5b3UgY2FuIGFkZCB0aGVtIGZyb20geW91ciAuZW52IG9yIC5lbnYubG9jYWwgZmlsZS4gRm9yIG1vcmUgaW5mb3JtYXRpb24gb24gZW52aXJvbm1lbnQgdmFyaWFibGVzIGluIEFuZ3VsYXIsIGhlcmXigJlzIHRoZSA8YSBocmVmPSJodHRwczovL3YxNy5hbmd1bGFyLmlvL2d1aWRlL2J1aWxkI2NvbmZpZ3VyaW5nLWFwcGxpY2F0aW9uLWVudmlyb25tZW50cyI+Y29uZmlndXJpbmcgYXBwbGljYXRpb24gZW52aXJvbm1lbnRzIGRvY3VtZW50YXRpb248L2E+LjxiciAvPjxiciAvPjxpbWcgY2xhc3M9ImtiLWltYWdlIiBzcmM9Imh0dHBzOi8vTmFtZWNoZWFwLnNpbXBsZWtiLmNvbS9TaXRlQ29udGVudHMvMi03QzIyRDUyMzZBNDU0M0VCODI3RjNCRDg5MzZFMTUzRS9tZWRpYS9hbmd1bGFyMi43LnBuZyIgLz48YnIgLz48YnIgLz48L2xpPjxsaT5DaG9vc2UgQ1JFQVRFIHRvIGNyZWF0ZSB0aGUgTm9kZS5qcyBhcHBsaWNhdGlvbi48L2xpPjxiciAvPjxsaT5TdG9wIHRoZSBhcHAgdGVtcG9yYXJpbHksIHRoZW4gbmF2aWdhdGUgdG8gRGV0ZWN0ZWQgQ29uZmlndXJhdGlvbiBGaWxlcy48L2xpPjxiciAvPjxsaT5DbGljayBSdW4gTlBNIEluc3RhbGwgdG8gaW5zdGFsbCBOb2RlLmpzIHBhY2thZ2VzLjwvbGk+PGJyIC8+PGxpPlN0YXJ0IHRoZSBhcHAgYWdhaW4gYnkgY2hvb3NpbmcgU1RBUlQgQVBQLjwvbGk+PGJyIC8+PC91bD48YnIgLz4NCk9wZW4gYSBuZXcgdGFiIGluIHlvdXIgd2ViIGJyb3dzZXIgYW5kIGVudGVyIHlvdXIgd2Vic2l0ZSBVUkwuIFlvdSBzaG91bGQgc2VlIHlvdXIgQW5ndWxhciBhcHAgcnVubmluZy48YnIgLz48YnIgLz4NCkNvbmdyYXR1bGF0aW9ucyEgWW91ciBBbmd1bGFyIFNTUiBhcHBsaWNhdGlvbiBzaG91bGQgbm93IGJlIGRlcGxveWVkIG9uIGNQYW5lbC4=","NewTillDate":null,"FeaturedTillDate":null,"ModifiedDateTime":"2024-06-21T14:30:49.0000000","LiveDateTime":"1754-02-02T00:00:00.0000000","CreatedDateTime":"2024-06-21T14:30:49.0000000","ApprovalDatetime":"2024-06-21T14:30:49.0000000","RequestCount":10273,"MarkedAsNew":false,"MarkedAsFeatured":false,"RatingValue":0,"CategoryPaths":[{"__type":"Nc:SimpleKB:Abstractions:Dtos:CategoryPathDto","Level":1,"CategoryId":12,"CategoryName":"Hosting"},{"__type":"Nc:SimpleKB:Abstractions:Dtos:CategoryPathDto","Level":2,"CategoryId":29,"CategoryName":"cPanel questions"}],"AssociatedCategories":[{"CategoryId":29,"CategoryName":"cPanel questions","CategoryDisplayName":"HostingcPanel questions"}],"AssociatedTags":[{"TagId":72,"Tag":" cpanel"},{"TagId":82055,"Tag":"deploy angular"},{"TagId":82056,"Tag":" angular"}],"RelatedArticles":[{"ArticleId":10686,"PreferedCategoryId":29,"ArticleTypeId":3,"ArticleName":"How to deploy React.js, Vite.js, React Native, and Next.js applications in cPanel","ArticleTypeName":"How_To","Title":"How to deploy React.js, Vite.js, React Native, and Next.js applications in cPanel","LiveDateTime":null,"ModifiedDateTime":"05/23/2024","MarkedAsNew":false,"MarkedAsFeatured":false},{"ArticleId":10047,"PreferedCategoryId":2182,"ArticleTypeId":0,"ArticleName":"How to work with Node.js App","ArticleTypeName":null,"Title":"How to work with Node.js App","LiveDateTime":null,"ModifiedDateTime":"10/10/2025","MarkedAsNew":false,"MarkedAsFeatured":false}],"AssociatedMedias":[],"PreferredCategoryId":0,"RootParentCategoryName":"","RootParentCategoryId":0},"status":200,"statusText":"OK"},"/api/v1/ncpl/simplekb/getcategorybycategoryid:\"{\\\"categoryId\\\":29}\"":{"body":{"__type":"Nc:SimpleKB:Abstractions:Dtos:CategoryDto","ParentCategoryId":12,"Parent_Category_Name":"Hosting","FriendlyId":null,"ApprovedYN":true,"TreatAsTopicYN":false,"CreatedDateTime":"07/21/2008 16:03:59","CurrentCategoryPaths":[{"__type":"Nc:SimpleKB:Abstractions:Dtos:CategoryPathDto","Level":1,"CategoryId":12,"CategoryName":"Hosting"},{"__type":"Nc:SimpleKB:Abstractions:Dtos:CategoryPathDto","Level":2,"CategoryId":29,"CategoryName":"cPanel questions"}],"RelatedCategories":[],"AssociatedArticles":[{"ArticleId":9317,"Title":"List of time zones available","ArticleName":"List of time zones available","LiveDateTime":"02/02/1754 00:00:00","NewTillDate":null,"FeaturedTillDate":null,"ModifiedDateTime":"12/10/2020"},{"ArticleId":10041,"Title":"How to change contact information in cPanel","ArticleName":"How to change contact information in cPanel","LiveDateTime":"02/02/1754 00:00:00","NewTillDate":null,"FeaturedTillDate":null,"ModifiedDateTime":"12/07/2023"},{"ArticleId":10125,"Title":"How to manage domains in cPanel","ArticleName":"How to manage domains in cPanel","LiveDateTime":"02/02/1754 00:00:00","NewTillDate":null,"FeaturedTillDate":null,"ModifiedDateTime":"06/30/2023"},{"ArticleId":10170,"Title":"How to use User Manager in cPanel. Can I create a separate cPanel user?","ArticleName":"How to use User Manager in cPanel. Can I create a separate cPanel user?","LiveDateTime":"02/02/1754 00:00:00","NewTillDate":null,"FeaturedTillDate":null,"ModifiedDateTime":"02/15/2024"},{"ArticleId":10294,"Title":"How to navigate in cPanel’s File Manager","ArticleName":"How to navigate in cPanel’s File Manager","LiveDateTime":"02/02/1754 00:00:00","NewTillDate":null,"FeaturedTillDate":null,"ModifiedDateTime":"09/25/2024"},{"ArticleId":10566,"Title":"How to reset your cPanel account","ArticleName":"How to reset your cPanel account","LiveDateTime":"02/02/1754 00:00:00","NewTillDate":null,"FeaturedTillDate":null,"ModifiedDateTime":"07/22/2024"},{"ArticleId":10686,"Title":"How to deploy React.js, Vite.js, React Native, and Next.js applications in cPanel","ArticleName":"How to deploy React.js, Vite.js, React Native, and Next.js applications in cPanel","LiveDateTime":"02/02/1754 00:00:00","NewTillDate":null,"FeaturedTillDate":null,"ModifiedDateTime":"05/23/2024"},{"ArticleId":10691,"Title":"How to deploy Angular Applications in cPanel","ArticleName":"How to deploy Angular Applications in cPanel","LiveDateTime":"02/02/1754 00:00:00","NewTillDate":null,"FeaturedTillDate":null,"ModifiedDateTime":"06/21/2024"},{"ArticleId":9977,"Title":"How to install Composer on Shared servers","ArticleName":"How to install Composer on Shared servers","LiveDateTime":"02/02/1754 00:00:00","NewTillDate":null,"FeaturedTillDate":null,"ModifiedDateTime":"01/03/2024"},{"ArticleId":9797,"Title":"cPanel control panel overview","ArticleName":"cPanel control panel overview","LiveDateTime":"02/02/1754 00:00:00","NewTillDate":null,"FeaturedTillDate":null,"ModifiedDateTime":"02/12/2026"},{"ArticleId":9674,"Title":"Difference between cPanel and WHM","ArticleName":"Difference between cPanel and WHM","LiveDateTime":"02/02/1754 00:00:00","NewTillDate":null,"FeaturedTillDate":null,"ModifiedDateTime":"06/15/2023"},{"ArticleId":173,"Title":"Can I change my cPanel account username?","ArticleName":"Can I change my cPanel account username?","LiveDateTime":"02/02/1754 00:00:00","NewTillDate":null,"FeaturedTillDate":null,"ModifiedDateTime":"06/19/2024"},{"ArticleId":733,"Title":"How can I reset my cPanel password?","ArticleName":"How can I reset my cPanel password?","LiveDateTime":"02/02/1754 00:00:00","NewTillDate":null,"FeaturedTillDate":null,"ModifiedDateTime":"09/25/2024"},{"ArticleId":9976,"Title":"I can't access cPanel. What should I do?","ArticleName":"I can't access cPanel. What should I do?","LiveDateTime":"02/02/1754 00:00:00","NewTillDate":null,"FeaturedTillDate":null,"ModifiedDateTime":"12/19/2025"},{"ArticleId":1345,"Title":"cPanel inaccessible. Reasons for IP block","ArticleName":"cPanel inaccessible. Reasons for IP block","LiveDateTime":"02/02/1754 00:00:00","NewTillDate":null,"FeaturedTillDate":null,"ModifiedDateTime":"12/22/2021"},{"ArticleId":9568,"Title":"My website is down: what to do?","ArticleName":"My website is down: what to do?","LiveDateTime":"02/02/1754 00:00:00","NewTillDate":null,"FeaturedTillDate":null,"ModifiedDateTime":"06/25/2024"},{"ArticleId":897,"Title":"How to Create an Addon Domain","ArticleName":"How to Create an Addon Domain","LiveDateTime":"02/02/1754 00:00:00","NewTillDate":null,"FeaturedTillDate":null,"ModifiedDateTime":"10/28/2025"},{"ArticleId":9728,"Title":"How to set up Parked Domains","ArticleName":"How to set up Parked Domains","LiveDateTime":"02/02/1754 00:00:00","NewTillDate":null,"FeaturedTillDate":null,"ModifiedDateTime":"02/07/2025"},{"ArticleId":184,"Title":"Can I add addon domains without changing DNS?","ArticleName":"Can I add addon domains without changing DNS?","LiveDateTime":"02/02/1754 00:00:00","NewTillDate":null,"FeaturedTillDate":null,"ModifiedDateTime":"06/10/2020"},{"ArticleId":190,"Title":"Why is an addon domain connected to a subdomain?","ArticleName":"Why is an addon domain connected to a subdomain?","LiveDateTime":"02/02/1754 00:00:00","NewTillDate":null,"FeaturedTillDate":null,"ModifiedDateTime":"06/15/2023"},{"ArticleId":189,"Title":"Can I point a parked domain to a specific folder?","ArticleName":"Can I point a parked domain to a specific folder?","LiveDateTime":"02/02/1754 00:00:00","NewTillDate":null,"FeaturedTillDate":null,"ModifiedDateTime":"08/14/2019"},{"ArticleId":9190,"Title":"How to create a subdomain in cPanel","ArticleName":"How to create a subdomain in cPanel","LiveDateTime":"02/02/1754 00:00:00","NewTillDate":null,"FeaturedTillDate":null,"ModifiedDateTime":"09/25/2024"},{"ArticleId":9191,"Title":"How to create a wildcard subdomain in cPanel","ArticleName":"How to create a wildcard subdomain in cPanel","LiveDateTime":"02/02/1754 00:00:00","NewTillDate":null,"FeaturedTillDate":null,"ModifiedDateTime":"01/10/2024"},{"ArticleId":9257,"Title":"How to create a site/domain redirect in cPanel","ArticleName":"How to create a site/domain redirect in cPanel","LiveDateTime":"02/02/1754 00:00:00","NewTillDate":null,"FeaturedTillDate":null,"ModifiedDateTime":"04/15/2025"},{"ArticleId":896,"Title":"How to set up URL Frame in cPanel","ArticleName":"How to set up URL Frame in cPanel","LiveDateTime":"02/02/1754 00:00:00","NewTillDate":null,"FeaturedTillDate":null,"ModifiedDateTime":"06/13/2023"},{"ArticleId":9256,"Title":"How to edit DNS zone in cPanel","ArticleName":"How to edit DNS zone in cPanel","LiveDateTime":"02/02/1754 00:00:00","NewTillDate":null,"FeaturedTillDate":null,"ModifiedDateTime":"12/19/2025"},{"ArticleId":9700,"Title":"How to use File Manager in cPanel","ArticleName":"How to use File Manager in cPanel","LiveDateTime":"02/02/1754 00:00:00","NewTillDate":null,"FeaturedTillDate":null,"ModifiedDateTime":"06/24/2025"},{"ArticleId":1034,"Title":"How to fix Error You do not have permission to access…","ArticleName":"How to fix Error You do not have permission to access…","LiveDateTime":"02/02/1754 00:00:00","NewTillDate":null,"FeaturedTillDate":null,"ModifiedDateTime":"06/05/2024"},{"ArticleId":1011,"Title":"How to change permissions for files and directories","ArticleName":"How to change permissions for files and directories","LiveDateTime":"02/02/1754 00:00:00","NewTillDate":null,"FeaturedTillDate":null,"ModifiedDateTime":"09/25/2024"},{"ArticleId":9563,"Title":"How can I check my website access logs?","ArticleName":"How can I check my website access logs?","LiveDateTime":"02/02/1754 00:00:00","NewTillDate":null,"FeaturedTillDate":null,"ModifiedDateTime":"06/29/2023"},{"ArticleId":399,"Title":"What to do if my website stats are not updated?","ArticleName":"What to do if my website stats are not updated?","LiveDateTime":"02/02/1754 00:00:00","NewTillDate":null,"FeaturedTillDate":null,"ModifiedDateTime":"06/15/2023"},{"ArticleId":9410,"Title":"How to set up rules and redirects in .htaccess","ArticleName":"How to set up rules and redirects in .htaccess","LiveDateTime":"02/02/1754 00:00:00","NewTillDate":null,"FeaturedTillDate":null,"ModifiedDateTime":"09/25/2024"},{"ArticleId":9157,"Title":"How to set up internal protection for .htaccess","ArticleName":"How to set up internal protection for .htaccess","LiveDateTime":"02/02/1754 00:00:00","NewTillDate":null,"FeaturedTillDate":null,"ModifiedDateTime":"12/15/2021"},{"ArticleId":9767,"Title":"How to password protect files and directories","ArticleName":"How to password protect files and directories","LiveDateTime":"02/02/1754 00:00:00","NewTillDate":null,"FeaturedTillDate":null,"ModifiedDateTime":"07/16/2025"},{"ArticleId":193,"Title":"How to add custom error pages","ArticleName":"How to add custom error pages","LiveDateTime":"02/02/1754 00:00:00","NewTillDate":null,"FeaturedTillDate":null,"ModifiedDateTime":"06/15/2023"},{"ArticleId":9536,"Title":"How to block IPs from accessing your website","ArticleName":"How to block IPs from accessing your website","LiveDateTime":"02/02/1754 00:00:00","NewTillDate":null,"FeaturedTillDate":null,"ModifiedDateTime":"06/09/2023"},{"ArticleId":9565,"Title":"How to create and manage mailing lists in cPanel","ArticleName":"How to create and manage mailing lists in cPanel","LiveDateTime":"02/02/1754 00:00:00","NewTillDate":null,"FeaturedTillDate":null,"ModifiedDateTime":"12/29/2025"},{"ArticleId":9720,"Title":"How to use cPanel Calendars and Contacts Client","ArticleName":"How to use cPanel Calendars and Contacts Client","LiveDateTime":"02/02/1754 00:00:00","NewTillDate":null,"FeaturedTillDate":null,"ModifiedDateTime":"05/05/2025"},{"ArticleId":9258,"Title":"How to change MX records and Email Routing in cPanel","ArticleName":"How to change MX records and Email Routing in cPanel","LiveDateTime":"02/02/1754 00:00:00","NewTillDate":null,"FeaturedTillDate":null,"ModifiedDateTime":"09/25/2024"},{"ArticleId":9621,"Title":"How to set up Web Disk on Windows 8","ArticleName":"How to set up Web Disk on Windows 8","LiveDateTime":"02/02/1754 00:00:00","NewTillDate":null,"FeaturedTillDate":null,"ModifiedDateTime":"12/09/2021"},{"ArticleId":915,"Title":"How to set up automatic backups","ArticleName":"How to set up automatic backups","LiveDateTime":"02/02/1754 00:00:00","NewTillDate":null,"FeaturedTillDate":null,"ModifiedDateTime":"05/05/2025"},{"ArticleId":9453,"Title":"How to run scripts via cron jobs","ArticleName":"How to run scripts via cron jobs","LiveDateTime":"02/02/1754 00:00:00","NewTillDate":null,"FeaturedTillDate":null,"ModifiedDateTime":"01/21/2025"},{"ArticleId":9561,"Title":"How to create a symbolic link in cPanel","ArticleName":"How to create a symbolic link in cPanel","LiveDateTime":"02/02/1754 00:00:00","NewTillDate":null,"FeaturedTillDate":null,"ModifiedDateTime":"07/20/2023"},{"ArticleId":9331,"Title":"How to check the number of inodes in your hosting account","ArticleName":"How to check the number of inodes in your hosting account","LiveDateTime":"02/02/1754 00:00:00","NewTillDate":null,"FeaturedTillDate":null,"ModifiedDateTime":"08/04/2025"},{"ArticleId":9531,"Title":"How to set up hotlink protection","ArticleName":"How to set up hotlink protection","LiveDateTime":"02/02/1754 00:00:00","NewTillDate":null,"FeaturedTillDate":null,"ModifiedDateTime":"07/20/2023"},{"ArticleId":9694,"Title":"How to install Laravel on our server","ArticleName":"How to install Laravel on our server","LiveDateTime":"02/02/1754 00:00:00","NewTillDate":null,"FeaturedTillDate":null,"ModifiedDateTime":"07/01/2024"},{"ArticleId":9587,"Title":"How to run Python scripts","ArticleName":"How to run Python scripts","LiveDateTime":"02/02/1754 00:00:00","NewTillDate":null,"FeaturedTillDate":null,"ModifiedDateTime":"12/19/2025"},{"ArticleId":9693,"Title":"How to install Perl modules on shared servers","ArticleName":"How to install Perl modules on shared servers","LiveDateTime":"02/02/1754 00:00:00","NewTillDate":null,"FeaturedTillDate":null,"ModifiedDateTime":"09/05/2022"},{"ArticleId":6,"Title":"cPanel Documentation","ArticleName":"cPanel Documentation","LiveDateTime":"02/02/1754 00:00:00","NewTillDate":null,"FeaturedTillDate":null,"ModifiedDateTime":"07/01/2024"}],"AssociatedTags":[],"CategoryId":29,"CategoryName":"cPanel questions"},"status":200,"statusText":"OK"},"/api/v1/ncpl/simplekb/getcategories:\"{\\\"parentCategoryId\\\":0,\\\"getTree\\\":true}\"":{"body":[{"__type":"Nc:SimpleKB:Abstractions:Dtos:CategoryItemDto","ParentCategoryId":93,"TreatAsTopicYN":false,"Description":"","ImageUrl":"","ShortDesc":"","CategoryId":2216,"CategoryName":"Spam Protection"},{"__type":"Nc:SimpleKB:Abstractions:Dtos:CategoryItemDto","ParentCategoryId":14,"TreatAsTopicYN":false,"Description":"","ImageUrl":"","ShortDesc":"","CategoryId":2217,"CategoryName":"Renewal"},{"__type":"Nc:SimpleKB:Abstractions:Dtos:CategoryItemDto","ParentCategoryId":14,"TreatAsTopicYN":false,"Description":"","ImageUrl":"","ShortDesc":"","CategoryId":2218,"CategoryName":"cPanel SSL Plugin"},{"__type":"Nc:SimpleKB:Abstractions:Dtos:CategoryItemDto","ParentCategoryId":12,"TreatAsTopicYN":false,"Description":"","ImageUrl":"","ShortDesc":"","CategoryId":2219,"CategoryName":"PHP Configuration"},{"__type":"Nc:SimpleKB:Abstractions:Dtos:CategoryItemDto","ParentCategoryId":14,"TreatAsTopicYN":false,"Description":"","ImageUrl":"","ShortDesc":"","CategoryId":2221,"CategoryName":"Multi-Domain SSL Certificates"},{"__type":"Nc:SimpleKB:Abstractions:Dtos:CategoryItemDto","ParentCategoryId":14,"TreatAsTopicYN":false,"Description":"","ImageUrl":"","ShortDesc":"","CategoryId":2222,"CategoryName":"Cancellation"},{"__type":"Nc:SimpleKB:Abstractions:Dtos:CategoryItemDto","ParentCategoryId":14,"TreatAsTopicYN":false,"Description":"","ImageUrl":"","ShortDesc":"","CategoryId":2223,"CategoryName":"Browser errors"},{"__type":"Nc:SimpleKB:Abstractions:Dtos:CategoryItemDto","ParentCategoryId":14,"TreatAsTopicYN":false,"Description":"","ImageUrl":"","ShortDesc":"","CategoryId":2224,"CategoryName":"Site Seal, Logo"},{"__type":"Nc:SimpleKB:Abstractions:Dtos:CategoryItemDto","ParentCategoryId":12,"TreatAsTopicYN":false,"Description":"","ImageUrl":"","ShortDesc":"","CategoryId":2225,"CategoryName":"SEO"},{"__type":"Nc:SimpleKB:Abstractions:Dtos:CategoryItemDto","ParentCategoryId":93,"TreatAsTopicYN":false,"Description":"","ImageUrl":"","ShortDesc":"","CategoryId":2226,"CategoryName":"Email Migration"},{"__type":"Nc:SimpleKB:Abstractions:Dtos:CategoryItemDto","ParentCategoryId":2211,"TreatAsTopicYN":false,"Description":"","ImageUrl":"","ShortDesc":"","CategoryId":2227,"CategoryName":"SSL Resellers"},{"__type":"Nc:SimpleKB:Abstractions:Dtos:CategoryItemDto","ParentCategoryId":0,"TreatAsTopicYN":true,"Description":"","ImageUrl":"/assets/img/pictograms/150/cloud-red.png","ShortDesc":"","CategoryId":2228,"CategoryName":"Apps","SubCategories":[{"__type":"Nc:SimpleKB:Abstractions:Dtos:CategoryItemDto","ParentCategoryId":2228,"TreatAsTopicYN":false,"Description":"","ImageUrl":"","ShortDesc":"","CategoryId":2251,"CategoryName":"Supersonic CDN"},{"__type":"Nc:SimpleKB:Abstractions:Dtos:CategoryItemDto","ParentCategoryId":2228,"TreatAsTopicYN":false,"Description":"","ImageUrl":"","ShortDesc":"","CategoryId":2298,"CategoryName":"Site Maker"},{"__type":"Nc:SimpleKB:Abstractions:Dtos:CategoryItemDto","ParentCategoryId":2228,"TreatAsTopicYN":false,"Description":"","ImageUrl":"","ShortDesc":"","CategoryId":177,"CategoryName":"Google Workspace (formerly G Suite)"}]},{"__type":"Nc:SimpleKB:Abstractions:Dtos:CategoryItemDto","ParentCategoryId":2211,"TreatAsTopicYN":false,"Description":"","ImageUrl":"","ShortDesc":"","CategoryId":2229,"CategoryName":"Hosting Resellers"},{"__type":"Nc:SimpleKB:Abstractions:Dtos:CategoryItemDto","ParentCategoryId":34,"TreatAsTopicYN":false,"Description":"","ImageUrl":"","ShortDesc":"","CategoryId":2232,"CategoryName":"DNSSEC"},{"__type":"Nc:SimpleKB:Abstractions:Dtos:CategoryItemDto","ParentCategoryId":34,"TreatAsTopicYN":false,"Description":"","ImageUrl":"","ShortDesc":"","CategoryId":2234,"CategoryName":"Google Workspace (formerly G Suite)"},{"__type":"Nc:SimpleKB:Abstractions:Dtos:CategoryItemDto","ParentCategoryId":34,"TreatAsTopicYN":false,"Description":"","ImageUrl":"","ShortDesc":"","CategoryId":2237,"CategoryName":"Host records setup"},{"__type":"Nc:SimpleKB:Abstractions:Dtos:CategoryItemDto","ParentCategoryId":14,"TreatAsTopicYN":false,"Description":"","ImageUrl":"","ShortDesc":"","CategoryId":2238,"CategoryName":"SSL installation errors"},{"__type":"Nc:SimpleKB:Abstractions:Dtos:CategoryItemDto","ParentCategoryId":0,"TreatAsTopicYN":false,"Description":"","ImageUrl":"/assets/img/pictograms/150/easywp-red.png","ShortDesc":"","CategoryId":2239,"CategoryName":"EasyWP","SubCategories":[{"__type":"Nc:SimpleKB:Abstractions:Dtos:CategoryItemDto","ParentCategoryId":2239,"TreatAsTopicYN":false,"Description":"","ImageUrl":"","ShortDesc":"","CategoryId":2280,"CategoryName":"Getting Started"},{"__type":"Nc:SimpleKB:Abstractions:Dtos:CategoryItemDto","ParentCategoryId":2239,"TreatAsTopicYN":false,"Description":"","ImageUrl":"","ShortDesc":"","CategoryId":2279,"CategoryName":"General Information"},{"__type":"Nc:SimpleKB:Abstractions:Dtos:CategoryItemDto","ParentCategoryId":2239,"TreatAsTopicYN":false,"Description":"","ImageUrl":"","ShortDesc":"","CategoryId":2281,"CategoryName":"WordPress Migration"},{"__type":"Nc:SimpleKB:Abstractions:Dtos:CategoryItemDto","ParentCategoryId":2239,"TreatAsTopicYN":false,"Description":"","ImageUrl":"","ShortDesc":"","CategoryId":2282,"CategoryName":"Plugins and Themes"},{"__type":"Nc:SimpleKB:Abstractions:Dtos:CategoryItemDto","ParentCategoryId":2239,"TreatAsTopicYN":false,"Description":"","ImageUrl":"","ShortDesc":"","CategoryId":2284,"CategoryName":"WordPress Management"},{"__type":"Nc:SimpleKB:Abstractions:Dtos:CategoryItemDto","ParentCategoryId":2239,"TreatAsTopicYN":false,"Description":"","ImageUrl":"","ShortDesc":"","CategoryId":2285,"CategoryName":"SFTP and Database access"},{"__type":"Nc:SimpleKB:Abstractions:Dtos:CategoryItemDto","ParentCategoryId":2239,"TreatAsTopicYN":false,"Description":"","ImageUrl":"","ShortDesc":"","CategoryId":2286,"CategoryName":"Domains questions"},{"__type":"Nc:SimpleKB:Abstractions:Dtos:CategoryItemDto","ParentCategoryId":2239,"TreatAsTopicYN":false,"Description":"","ImageUrl":"","ShortDesc":"","CategoryId":2288,"CategoryName":"Billing questions"},{"__type":"Nc:SimpleKB:Abstractions:Dtos:CategoryItemDto","ParentCategoryId":2239,"TreatAsTopicYN":false,"Description":"","ImageUrl":"","ShortDesc":"","CategoryId":2287,"CategoryName":"SSL questions"}]},{"__type":"Nc:SimpleKB:Abstractions:Dtos:CategoryItemDto","ParentCategoryId":2228,"TreatAsTopicYN":false,"Description":"","ImageUrl":"","ShortDesc":"","CategoryId":2251,"CategoryName":"Supersonic CDN"},{"__type":"Nc:SimpleKB:Abstractions:Dtos:CategoryItemDto","ParentCategoryId":12,"TreatAsTopicYN":false,"Description":"","ImageUrl":"","ShortDesc":"","CategoryId":2252,"CategoryName":"InterWorx questions"},{"__type":"Nc:SimpleKB:Abstractions:Dtos:CategoryItemDto","ParentCategoryId":2253,"TreatAsTopicYN":false,"Description":"","ImageUrl":"","ShortDesc":"","CategoryId":2254,"CategoryName":"Domains How-To"},{"__type":"Nc:SimpleKB:Abstractions:Dtos:CategoryItemDto","ParentCategoryId":2253,"TreatAsTopicYN":false,"Description":"","ImageUrl":"","ShortDesc":"","CategoryId":2255,"CategoryName":"Hosting How-To"},{"__type":"Nc:SimpleKB:Abstractions:Dtos:CategoryItemDto","ParentCategoryId":2253,"TreatAsTopicYN":false,"Description":"","ImageUrl":"","ShortDesc":"","CategoryId":2257,"CategoryName":"Sales & Payments How-To"},{"__type":"Nc:SimpleKB:Abstractions:Dtos:CategoryItemDto","ParentCategoryId":2253,"TreatAsTopicYN":false,"Description":"","ImageUrl":"","ShortDesc":"","CategoryId":2258,"CategoryName":"cPanel Email How-To"},{"__type":"Nc:SimpleKB:Abstractions:Dtos:CategoryItemDto","ParentCategoryId":93,"TreatAsTopicYN":false,"Description":"","ImageUrl":"","ShortDesc":"","CategoryId":2260,"CategoryName":"Private Email Contacts and Calendars Setup"},{"__type":"Nc:SimpleKB:Abstractions:Dtos:CategoryItemDto","ParentCategoryId":2253,"TreatAsTopicYN":false,"Description":"","ImageUrl":"","ShortDesc":"","CategoryId":2262,"CategoryName":"EasyWP How-To"},{"__type":"Nc:SimpleKB:Abstractions:Dtos:CategoryItemDto","ParentCategoryId":0,"TreatAsTopicYN":false,"Description":"","ImageUrl":"https://download.namecheap.com/assets/img/domainvault-red@2x.png","ShortDesc":"","CategoryId":2289,"CategoryName":"Domain Vault","SubCategories":[]},{"__type":"Nc:SimpleKB:Abstractions:Dtos:CategoryItemDto","ParentCategoryId":14,"TreatAsTopicYN":false,"Description":"","ImageUrl":"","ShortDesc":"","CategoryId":2290,"CategoryName":"CSR code"},{"__type":"Nc:SimpleKB:Abstractions:Dtos:CategoryItemDto","ParentCategoryId":12,"TreatAsTopicYN":false,"Description":"","ImageUrl":"","ShortDesc":"","CategoryId":2291,"CategoryName":"Webuzo questions"},{"__type":"Nc:SimpleKB:Abstractions:Dtos:CategoryItemDto","ParentCategoryId":2265,"TreatAsTopicYN":false,"Description":"","ImageUrl":"","ShortDesc":"","CategoryId":2292,"CategoryName":"Browser Extensions"},{"__type":"Nc:SimpleKB:Abstractions:Dtos:CategoryItemDto","ParentCategoryId":14,"TreatAsTopicYN":false,"Description":"","ImageUrl":"","ShortDesc":"","CategoryId":2293,"CategoryName":"Automated SSL management"},{"__type":"Nc:SimpleKB:Abstractions:Dtos:CategoryItemDto","ParentCategoryId":2228,"TreatAsTopicYN":false,"Description":"","ImageUrl":"","ShortDesc":"","CategoryId":2298,"CategoryName":"Site Maker"},{"__type":"Nc:SimpleKB:Abstractions:Dtos:CategoryItemDto","ParentCategoryId":12,"TreatAsTopicYN":false,"Description":"","ImageUrl":"","ShortDesc":"","CategoryId":27,"CategoryName":"Getting Started"},{"__type":"Nc:SimpleKB:Abstractions:Dtos:CategoryItemDto","ParentCategoryId":0,"TreatAsTopicYN":false,"Description":"","ImageUrl":"/assets/img/pictograms/150/support-red.png","ShortDesc":"","CategoryId":5,"CategoryName":"General & Support","SubCategories":[]},{"__type":"Nc:SimpleKB:Abstractions:Dtos:CategoryItemDto","ParentCategoryId":2200,"TreatAsTopicYN":false,"Description":"","ImageUrl":"","ShortDesc":"","CategoryId":7,"CategoryName":"Billing FAQ"},{"__type":"Nc:SimpleKB:Abstractions:Dtos:CategoryItemDto","ParentCategoryId":2209,"TreatAsTopicYN":false,"Description":"","ImageUrl":"","ShortDesc":"","CategoryId":8,"CategoryName":"Transfer Information"},{"__type":"Nc:SimpleKB:Abstractions:Dtos:CategoryItemDto","ParentCategoryId":12,"TreatAsTopicYN":false,"Description":"","ImageUrl":"","ShortDesc":"","CategoryId":22,"CategoryName":"Hosting Information"},{"__type":"Nc:SimpleKB:Abstractions:Dtos:CategoryItemDto","ParentCategoryId":14,"TreatAsTopicYN":false,"Description":"","ImageUrl":"","ShortDesc":"","CategoryId":38,"CategoryName":"SSL General"},{"__type":"Nc:SimpleKB:Abstractions:Dtos:CategoryItemDto","ParentCategoryId":9,"TreatAsTopicYN":false,"Description":"","ImageUrl":"","ShortDesc":"","CategoryId":45,"CategoryName":"Account Security"},{"__type":"Nc:SimpleKB:Abstractions:Dtos:CategoryItemDto","ParentCategoryId":34,"TreatAsTopicYN":false,"Description":"","ImageUrl":"","ShortDesc":"","CategoryId":46,"CategoryName":"Domain Management"},{"__type":"Nc:SimpleKB:Abstractions:Dtos:CategoryItemDto","ParentCategoryId":2211,"TreatAsTopicYN":false,"Description":"","ImageUrl":"","ShortDesc":"","CategoryId":63,"CategoryName":"Namecheap API"},{"__type":"Nc:SimpleKB:Abstractions:Dtos:CategoryItemDto","ParentCategoryId":2228,"TreatAsTopicYN":false,"Description":"","ImageUrl":"","ShortDesc":"","CategoryId":177,"CategoryName":"Google Workspace (formerly G Suite)"},{"__type":"Nc:SimpleKB:Abstractions:Dtos:CategoryItemDto","ParentCategoryId":93,"TreatAsTopicYN":false,"Description":"","ImageUrl":"","ShortDesc":"","CategoryId":2179,"CategoryName":"Private Email: General Information"},{"__type":"Nc:SimpleKB:Abstractions:Dtos:CategoryItemDto","ParentCategoryId":2265,"TreatAsTopicYN":false,"Description":"","ImageUrl":"","ShortDesc":"","CategoryId":2274,"CategoryName":"General"},{"__type":"Nc:SimpleKB:Abstractions:Dtos:CategoryItemDto","ParentCategoryId":2239,"TreatAsTopicYN":false,"Description":"","ImageUrl":"","ShortDesc":"","CategoryId":2280,"CategoryName":"Getting Started"},{"__type":"Nc:SimpleKB:Abstractions:Dtos:CategoryItemDto","ParentCategoryId":2239,"TreatAsTopicYN":false,"Description":"","ImageUrl":"","ShortDesc":"","CategoryId":2279,"CategoryName":"General Information"},{"__type":"Nc:SimpleKB:Abstractions:Dtos:CategoryItemDto","ParentCategoryId":93,"TreatAsTopicYN":false,"Description":"","ImageUrl":"","ShortDesc":"","CategoryId":2215,"CategoryName":"Private Email: Mailbox Management"},{"__type":"Nc:SimpleKB:Abstractions:Dtos:CategoryItemDto","ParentCategoryId":2211,"TreatAsTopicYN":false,"Description":"","ImageUrl":"","ShortDesc":"","CategoryId":2196,"CategoryName":"WHMCS module for SSL"},{"__type":"Nc:SimpleKB:Abstractions:Dtos:CategoryItemDto","ParentCategoryId":0,"TreatAsTopicYN":false,"Description":"","ImageUrl":"/assets/img/pictograms/150/savings-red.png","ShortDesc":"","CategoryId":2200,"CategoryName":"Checkout & Billing","SubCategories":[{"__type":"Nc:SimpleKB:Abstractions:Dtos:CategoryItemDto","ParentCategoryId":2200,"TreatAsTopicYN":false,"Description":"","ImageUrl":"","ShortDesc":"","CategoryId":7,"CategoryName":"Billing FAQ"},{"__type":"Nc:SimpleKB:Abstractions:Dtos:CategoryItemDto","ParentCategoryId":2200,"TreatAsTopicYN":false,"Description":"","ImageUrl":"","ShortDesc":"","CategoryId":2201,"CategoryName":"Domains Billing"},{"__type":"Nc:SimpleKB:Abstractions:Dtos:CategoryItemDto","ParentCategoryId":2200,"TreatAsTopicYN":false,"Description":"","ImageUrl":"","ShortDesc":"","CategoryId":21,"CategoryName":"Hosting Billing"},{"__type":"Nc:SimpleKB:Abstractions:Dtos:CategoryItemDto","ParentCategoryId":2200,"TreatAsTopicYN":false,"Description":"","ImageUrl":"","ShortDesc":"","CategoryId":71,"CategoryName":"SSL Certificates Billing"},{"__type":"Nc:SimpleKB:Abstractions:Dtos:CategoryItemDto","ParentCategoryId":2200,"TreatAsTopicYN":false,"Description":"","ImageUrl":"","ShortDesc":"","CategoryId":2177,"CategoryName":"Private Email"}]},{"__type":"Nc:SimpleKB:Abstractions:Dtos:CategoryItemDto","ParentCategoryId":2200,"TreatAsTopicYN":false,"Description":"","ImageUrl":"","ShortDesc":"","CategoryId":2201,"CategoryName":"Domains Billing"},{"__type":"Nc:SimpleKB:Abstractions:Dtos:CategoryItemDto","ParentCategoryId":14,"TreatAsTopicYN":false,"Description":"","ImageUrl":"","ShortDesc":"","CategoryId":67,"CategoryName":"Activation"},{"__type":"Nc:SimpleKB:Abstractions:Dtos:CategoryItemDto","ParentCategoryId":2209,"TreatAsTopicYN":false,"Description":"","ImageUrl":"","ShortDesc":"","CategoryId":83,"CategoryName":"Transfer to Namecheap"},{"__type":"Nc:SimpleKB:Abstractions:Dtos:CategoryItemDto","ParentCategoryId":9,"TreatAsTopicYN":false,"Description":"","ImageUrl":"","ShortDesc":"","CategoryId":43,"CategoryName":"Profile Management"},{"__type":"Nc:SimpleKB:Abstractions:Dtos:CategoryItemDto","ParentCategoryId":34,"TreatAsTopicYN":false,"Description":"","ImageUrl":"","ShortDesc":"","CategoryId":10,"CategoryName":"DNS Questions"},{"__type":"Nc:SimpleKB:Abstractions:Dtos:CategoryItemDto","ParentCategoryId":12,"TreatAsTopicYN":false,"Description":"","ImageUrl":"","ShortDesc":"","CategoryId":29,"CategoryName":"cPanel questions"},{"__type":"Nc:SimpleKB:Abstractions:Dtos:CategoryItemDto","ParentCategoryId":2200,"TreatAsTopicYN":false,"Description":"","ImageUrl":"","ShortDesc":"","CategoryId":21,"CategoryName":"Hosting Billing"},{"__type":"Nc:SimpleKB:Abstractions:Dtos:CategoryItemDto","ParentCategoryId":34,"TreatAsTopicYN":false,"Description":"","ImageUrl":"","ShortDesc":"","CategoryId":11,"CategoryName":"Dynamic DNS"},{"__type":"Nc:SimpleKB:Abstractions:Dtos:CategoryItemDto","ParentCategoryId":9,"TreatAsTopicYN":false,"Description":"","ImageUrl":"","ShortDesc":"","CategoryId":44,"CategoryName":"Account Access"},{"__type":"Nc:SimpleKB:Abstractions:Dtos:CategoryItemDto","ParentCategoryId":2209,"TreatAsTopicYN":false,"Description":"","ImageUrl":"","ShortDesc":"","CategoryId":84,"CategoryName":"Transfer to another provider"},{"__type":"Nc:SimpleKB:Abstractions:Dtos:CategoryItemDto","ParentCategoryId":14,"TreatAsTopicYN":false,"Description":"","ImageUrl":"","ShortDesc":"","CategoryId":68,"CategoryName":"Validation"},{"__type":"Nc:SimpleKB:Abstractions:Dtos:CategoryItemDto","ParentCategoryId":12,"TreatAsTopicYN":false,"Description":"","ImageUrl":"","ShortDesc":"","CategoryId":2182,"CategoryName":"cPanel: Software Management"},{"__type":"Nc:SimpleKB:Abstractions:Dtos:CategoryItemDto","ParentCategoryId":93,"TreatAsTopicYN":false,"Description":"","ImageUrl":"","ShortDesc":"","CategoryId":2214,"CategoryName":"Email Forwarding"},{"__type":"Nc:SimpleKB:Abstractions:Dtos:CategoryItemDto","ParentCategoryId":2265,"TreatAsTopicYN":false,"Description":"","ImageUrl":"","ShortDesc":"","CategoryId":2270,"CategoryName":"Routers"},{"__type":"Nc:SimpleKB:Abstractions:Dtos:CategoryItemDto","ParentCategoryId":2239,"TreatAsTopicYN":false,"Description":"","ImageUrl":"","ShortDesc":"","CategoryId":2281,"CategoryName":"WordPress Migration"},{"__type":"Nc:SimpleKB:Abstractions:Dtos:CategoryItemDto","ParentCategoryId":2239,"TreatAsTopicYN":false,"Description":"","ImageUrl":"","ShortDesc":"","CategoryId":2282,"CategoryName":"Plugins and Themes"},{"__type":"Nc:SimpleKB:Abstractions:Dtos:CategoryItemDto","ParentCategoryId":2265,"TreatAsTopicYN":false,"Description":"","ImageUrl":"","ShortDesc":"","CategoryId":2272,"CategoryName":"TV"},{"__type":"Nc:SimpleKB:Abstractions:Dtos:CategoryItemDto","ParentCategoryId":12,"TreatAsTopicYN":false,"Description":"","ImageUrl":"","ShortDesc":"","CategoryId":2187,"CategoryName":"cPanel: WordPress"},{"__type":"Nc:SimpleKB:Abstractions:Dtos:CategoryItemDto","ParentCategoryId":2209,"TreatAsTopicYN":false,"Description":"","ImageUrl":"","ShortDesc":"","CategoryId":219,"CategoryName":"Canceled Transfers"},{"__type":"Nc:SimpleKB:Abstractions:Dtos:CategoryItemDto","ParentCategoryId":2200,"TreatAsTopicYN":false,"Description":"","ImageUrl":"","ShortDesc":"","CategoryId":71,"CategoryName":"SSL Certificates Billing"},{"__type":"Nc:SimpleKB:Abstractions:Dtos:CategoryItemDto","ParentCategoryId":93,"TreatAsTopicYN":false,"Description":"","ImageUrl":"","ShortDesc":"","CategoryId":2176,"CategoryName":"Private Email: DNS Settings"},{"__type":"Nc:SimpleKB:Abstractions:Dtos:CategoryItemDto","ParentCategoryId":14,"TreatAsTopicYN":false,"Description":"","ImageUrl":"","ShortDesc":"","CategoryId":69,"CategoryName":"Installation"},{"__type":"Nc:SimpleKB:Abstractions:Dtos:CategoryItemDto","ParentCategoryId":0,"TreatAsTopicYN":false,"Description":"","ImageUrl":"/assets/img/pictograms/150/reseller-red.png","ShortDesc":"","CategoryId":34,"CategoryName":"Domains","SubCategories":[{"__type":"Nc:SimpleKB:Abstractions:Dtos:CategoryItemDto","ParentCategoryId":34,"TreatAsTopicYN":false,"Description":"","ImageUrl":"","ShortDesc":"","CategoryId":2232,"CategoryName":"DNSSEC"},{"__type":"Nc:SimpleKB:Abstractions:Dtos:CategoryItemDto","ParentCategoryId":34,"TreatAsTopicYN":false,"Description":"","ImageUrl":"","ShortDesc":"","CategoryId":2234,"CategoryName":"Google Workspace (formerly G Suite)"},{"__type":"Nc:SimpleKB:Abstractions:Dtos:CategoryItemDto","ParentCategoryId":34,"TreatAsTopicYN":false,"Description":"","ImageUrl":"","ShortDesc":"","CategoryId":2237,"CategoryName":"Host records setup"},{"__type":"Nc:SimpleKB:Abstractions:Dtos:CategoryItemDto","ParentCategoryId":34,"TreatAsTopicYN":false,"Description":"","ImageUrl":"","ShortDesc":"","CategoryId":46,"CategoryName":"Domain Management"},{"__type":"Nc:SimpleKB:Abstractions:Dtos:CategoryItemDto","ParentCategoryId":34,"TreatAsTopicYN":false,"Description":"","ImageUrl":"","ShortDesc":"","CategoryId":10,"CategoryName":"DNS Questions"},{"__type":"Nc:SimpleKB:Abstractions:Dtos:CategoryItemDto","ParentCategoryId":34,"TreatAsTopicYN":false,"Description":"","ImageUrl":"","ShortDesc":"","CategoryId":11,"CategoryName":"Dynamic DNS"},{"__type":"Nc:SimpleKB:Abstractions:Dtos:CategoryItemDto","ParentCategoryId":34,"TreatAsTopicYN":false,"Description":"","ImageUrl":"","ShortDesc":"","CategoryId":35,"CategoryName":"Registrations"},{"__type":"Nc:SimpleKB:Abstractions:Dtos:CategoryItemDto","ParentCategoryId":34,"TreatAsTopicYN":false,"Description":"","ImageUrl":"","ShortDesc":"","CategoryId":2207,"CategoryName":"Renewal questions"},{"__type":"Nc:SimpleKB:Abstractions:Dtos:CategoryItemDto","ParentCategoryId":34,"TreatAsTopicYN":false,"Description":"","ImageUrl":"","ShortDesc":"","CategoryId":36,"CategoryName":"Domains with extended attributes"},{"__type":"Nc:SimpleKB:Abstractions:Dtos:CategoryItemDto","ParentCategoryId":34,"TreatAsTopicYN":false,"Description":"","ImageUrl":"","ShortDesc":"","CategoryId":51,"CategoryName":"FreeDNS"},{"__type":"Nc:SimpleKB:Abstractions:Dtos:CategoryItemDto","ParentCategoryId":34,"TreatAsTopicYN":false,"Description":"","ImageUrl":"","ShortDesc":"","CategoryId":15,"CategoryName":"Namecheap Market"},{"__type":"Nc:SimpleKB:Abstractions:Dtos:CategoryItemDto","ParentCategoryId":34,"TreatAsTopicYN":false,"Description":"","ImageUrl":"","ShortDesc":"","CategoryId":2208,"CategoryName":"3rd Party Services Setup"},{"__type":"Nc:SimpleKB:Abstractions:Dtos:CategoryItemDto","ParentCategoryId":34,"TreatAsTopicYN":false,"Description":"","ImageUrl":"","ShortDesc":"","CategoryId":2278,"CategoryName":"Handshake TLDs"}]},{"__type":"Nc:SimpleKB:Abstractions:Dtos:CategoryItemDto","ParentCategoryId":34,"TreatAsTopicYN":false,"Description":"","ImageUrl":"","ShortDesc":"","CategoryId":35,"CategoryName":"Registrations"},{"__type":"Nc:SimpleKB:Abstractions:Dtos:CategoryItemDto","ParentCategoryId":14,"TreatAsTopicYN":false,"Description":"","ImageUrl":"","ShortDesc":"","CategoryId":70,"CategoryName":"Reissuance"},{"__type":"Nc:SimpleKB:Abstractions:Dtos:CategoryItemDto","ParentCategoryId":0,"TreatAsTopicYN":false,"Description":"","ImageUrl":"/assets/img/pictograms/150/protection-red.png","ShortDesc":"","CategoryId":37,"CategoryName":"Domain Privacy Protection","SubCategories":[]},{"__type":"Nc:SimpleKB:Abstractions:Dtos:CategoryItemDto","ParentCategoryId":2200,"TreatAsTopicYN":false,"Description":"","ImageUrl":"","ShortDesc":"","CategoryId":2177,"CategoryName":"Private Email"},{"__type":"Nc:SimpleKB:Abstractions:Dtos:CategoryItemDto","ParentCategoryId":93,"TreatAsTopicYN":false,"Description":"","ImageUrl":"","ShortDesc":"","CategoryId":2178,"CategoryName":"Private Email: Webmail Features"},{"__type":"Nc:SimpleKB:Abstractions:Dtos:CategoryItemDto","ParentCategoryId":34,"TreatAsTopicYN":false,"Description":"","ImageUrl":"","ShortDesc":"","CategoryId":2207,"CategoryName":"Renewal questions"},{"__type":"Nc:SimpleKB:Abstractions:Dtos:CategoryItemDto","ParentCategoryId":12,"TreatAsTopicYN":false,"Description":"","ImageUrl":"","ShortDesc":"","CategoryId":2210,"CategoryName":"cPanel Add-ons"},{"__type":"Nc:SimpleKB:Abstractions:Dtos:CategoryItemDto","ParentCategoryId":2265,"TreatAsTopicYN":false,"Description":"","ImageUrl":"","ShortDesc":"","CategoryId":2273,"CategoryName":"Gaming Consoles"},{"__type":"Nc:SimpleKB:Abstractions:Dtos:CategoryItemDto","ParentCategoryId":2239,"TreatAsTopicYN":false,"Description":"","ImageUrl":"","ShortDesc":"","CategoryId":2284,"CategoryName":"WordPress Management"},{"__type":"Nc:SimpleKB:Abstractions:Dtos:CategoryItemDto","ParentCategoryId":2239,"TreatAsTopicYN":false,"Description":"","ImageUrl":"","ShortDesc":"","CategoryId":2285,"CategoryName":"SFTP and Database access"},{"__type":"Nc:SimpleKB:Abstractions:Dtos:CategoryItemDto","ParentCategoryId":2265,"TreatAsTopicYN":false,"Description":"","ImageUrl":"","ShortDesc":"","CategoryId":2268,"CategoryName":"macOS"},{"__type":"Nc:SimpleKB:Abstractions:Dtos:CategoryItemDto","ParentCategoryId":93,"TreatAsTopicYN":false,"Description":"","ImageUrl":"","ShortDesc":"","CategoryId":2175,"CategoryName":"Private Email: Client Setup"},{"__type":"Nc:SimpleKB:Abstractions:Dtos:CategoryItemDto","ParentCategoryId":0,"TreatAsTopicYN":false,"Description":"","ImageUrl":"/assets/img/pictograms/150/status-red.png","ShortDesc":"","CategoryId":2209,"CategoryName":"Domain Transfers","SubCategories":[{"__type":"Nc:SimpleKB:Abstractions:Dtos:CategoryItemDto","ParentCategoryId":2209,"TreatAsTopicYN":false,"Description":"","ImageUrl":"","ShortDesc":"","CategoryId":8,"CategoryName":"Transfer Information"},{"__type":"Nc:SimpleKB:Abstractions:Dtos:CategoryItemDto","ParentCategoryId":2209,"TreatAsTopicYN":false,"Description":"","ImageUrl":"","ShortDesc":"","CategoryId":83,"CategoryName":"Transfer to Namecheap"},{"__type":"Nc:SimpleKB:Abstractions:Dtos:CategoryItemDto","ParentCategoryId":2209,"TreatAsTopicYN":false,"Description":"","ImageUrl":"","ShortDesc":"","CategoryId":84,"CategoryName":"Transfer to another provider"},{"__type":"Nc:SimpleKB:Abstractions:Dtos:CategoryItemDto","ParentCategoryId":2209,"TreatAsTopicYN":false,"Description":"","ImageUrl":"","ShortDesc":"","CategoryId":219,"CategoryName":"Canceled Transfers"}]},{"__type":"Nc:SimpleKB:Abstractions:Dtos:CategoryItemDto","ParentCategoryId":12,"TreatAsTopicYN":false,"Description":"","ImageUrl":"","ShortDesc":"","CategoryId":48,"CategoryName":"VPS"},{"__type":"Nc:SimpleKB:Abstractions:Dtos:CategoryItemDto","ParentCategoryId":34,"TreatAsTopicYN":false,"Description":"","ImageUrl":"","ShortDesc":"","CategoryId":36,"CategoryName":"Domains with extended attributes"},{"__type":"Nc:SimpleKB:Abstractions:Dtos:CategoryItemDto","ParentCategoryId":0,"TreatAsTopicYN":true,"Description":"","ImageUrl":"/assets/img/pictograms/150/server-red.png","ShortDesc":"","CategoryId":12,"CategoryName":"Hosting","SubCategories":[{"__type":"Nc:SimpleKB:Abstractions:Dtos:CategoryItemDto","ParentCategoryId":12,"TreatAsTopicYN":false,"Description":"","ImageUrl":"","ShortDesc":"","CategoryId":2219,"CategoryName":"PHP Configuration"},{"__type":"Nc:SimpleKB:Abstractions:Dtos:CategoryItemDto","ParentCategoryId":12,"TreatAsTopicYN":false,"Description":"","ImageUrl":"","ShortDesc":"","CategoryId":2225,"CategoryName":"SEO"},{"__type":"Nc:SimpleKB:Abstractions:Dtos:CategoryItemDto","ParentCategoryId":12,"TreatAsTopicYN":false,"Description":"","ImageUrl":"","ShortDesc":"","CategoryId":2252,"CategoryName":"InterWorx questions"},{"__type":"Nc:SimpleKB:Abstractions:Dtos:CategoryItemDto","ParentCategoryId":12,"TreatAsTopicYN":false,"Description":"","ImageUrl":"","ShortDesc":"","CategoryId":2291,"CategoryName":"Webuzo questions"},{"__type":"Nc:SimpleKB:Abstractions:Dtos:CategoryItemDto","ParentCategoryId":12,"TreatAsTopicYN":false,"Description":"","ImageUrl":"","ShortDesc":"","CategoryId":27,"CategoryName":"Getting Started"},{"__type":"Nc:SimpleKB:Abstractions:Dtos:CategoryItemDto","ParentCategoryId":12,"TreatAsTopicYN":false,"Description":"","ImageUrl":"","ShortDesc":"","CategoryId":22,"CategoryName":"Hosting Information"},{"__type":"Nc:SimpleKB:Abstractions:Dtos:CategoryItemDto","ParentCategoryId":12,"TreatAsTopicYN":false,"Description":"","ImageUrl":"","ShortDesc":"","CategoryId":29,"CategoryName":"cPanel questions"},{"__type":"Nc:SimpleKB:Abstractions:Dtos:CategoryItemDto","ParentCategoryId":12,"TreatAsTopicYN":false,"Description":"","ImageUrl":"","ShortDesc":"","CategoryId":2182,"CategoryName":"cPanel: Software Management"},{"__type":"Nc:SimpleKB:Abstractions:Dtos:CategoryItemDto","ParentCategoryId":12,"TreatAsTopicYN":false,"Description":"","ImageUrl":"","ShortDesc":"","CategoryId":2187,"CategoryName":"cPanel: WordPress"},{"__type":"Nc:SimpleKB:Abstractions:Dtos:CategoryItemDto","ParentCategoryId":12,"TreatAsTopicYN":false,"Description":"","ImageUrl":"","ShortDesc":"","CategoryId":2210,"CategoryName":"cPanel Add-ons"},{"__type":"Nc:SimpleKB:Abstractions:Dtos:CategoryItemDto","ParentCategoryId":12,"TreatAsTopicYN":false,"Description":"","ImageUrl":"","ShortDesc":"","CategoryId":48,"CategoryName":"VPS"},{"__type":"Nc:SimpleKB:Abstractions:Dtos:CategoryItemDto","ParentCategoryId":12,"TreatAsTopicYN":false,"Description":"","ImageUrl":"","ShortDesc":"","CategoryId":2188,"CategoryName":"Dedicated Server"},{"__type":"Nc:SimpleKB:Abstractions:Dtos:CategoryItemDto","ParentCategoryId":12,"TreatAsTopicYN":false,"Description":"","ImageUrl":"","ShortDesc":"","CategoryId":30,"CategoryName":"WHM questions"},{"__type":"Nc:SimpleKB:Abstractions:Dtos:CategoryItemDto","ParentCategoryId":12,"TreatAsTopicYN":false,"Description":"","ImageUrl":"","ShortDesc":"","CategoryId":32,"CategoryName":"DNS settings"},{"__type":"Nc:SimpleKB:Abstractions:Dtos:CategoryItemDto","ParentCategoryId":12,"TreatAsTopicYN":false,"Description":"","ImageUrl":"","ShortDesc":"","CategoryId":103,"CategoryName":"LVE (CloudLinux)"},{"__type":"Nc:SimpleKB:Abstractions:Dtos:CategoryItemDto","ParentCategoryId":12,"TreatAsTopicYN":false,"Description":"","ImageUrl":"","ShortDesc":"","CategoryId":89,"CategoryName":"SSH Access"},{"__type":"Nc:SimpleKB:Abstractions:Dtos:CategoryItemDto","ParentCategoryId":12,"TreatAsTopicYN":false,"Description":"","ImageUrl":"","ShortDesc":"","CategoryId":205,"CategoryName":"FTP questions"},{"__type":"Nc:SimpleKB:Abstractions:Dtos:CategoryItemDto","ParentCategoryId":12,"TreatAsTopicYN":false,"Description":"","ImageUrl":"","ShortDesc":"","CategoryId":2180,"CategoryName":"MySQL questions"},{"__type":"Nc:SimpleKB:Abstractions:Dtos:CategoryItemDto","ParentCategoryId":12,"TreatAsTopicYN":false,"Description":"","ImageUrl":"","ShortDesc":"","CategoryId":2199,"CategoryName":"Hosting Migration"},{"__type":"Nc:SimpleKB:Abstractions:Dtos:CategoryItemDto","ParentCategoryId":12,"TreatAsTopicYN":false,"Description":"","ImageUrl":"","ShortDesc":"","CategoryId":2194,"CategoryName":"Tips & Tricks"},{"__type":"Nc:SimpleKB:Abstractions:Dtos:CategoryItemDto","ParentCategoryId":12,"TreatAsTopicYN":false,"Description":"","ImageUrl":"","ShortDesc":"","CategoryId":239,"CategoryName":"WHMCS"},{"__type":"Nc:SimpleKB:Abstractions:Dtos:CategoryItemDto","ParentCategoryId":12,"TreatAsTopicYN":false,"Description":"","ImageUrl":"","ShortDesc":"","CategoryId":33,"CategoryName":"SSL Installation"}]},{"__type":"Nc:SimpleKB:Abstractions:Dtos:CategoryItemDto","ParentCategoryId":93,"TreatAsTopicYN":false,"Description":"","ImageUrl":"","ShortDesc":"","CategoryId":2171,"CategoryName":"Private Email: Active Sync (Exchange) Setup"},{"__type":"Nc:SimpleKB:Abstractions:Dtos:CategoryItemDto","ParentCategoryId":12,"TreatAsTopicYN":false,"Description":"","ImageUrl":"","ShortDesc":"","CategoryId":2188,"CategoryName":"Dedicated Server"},{"__type":"Nc:SimpleKB:Abstractions:Dtos:CategoryItemDto","ParentCategoryId":2265,"TreatAsTopicYN":false,"Description":"","ImageUrl":"","ShortDesc":"","CategoryId":2269,"CategoryName":"iOS"},{"__type":"Nc:SimpleKB:Abstractions:Dtos:CategoryItemDto","ParentCategoryId":2239,"TreatAsTopicYN":false,"Description":"","ImageUrl":"","ShortDesc":"","CategoryId":2286,"CategoryName":"Domains questions"},{"__type":"Nc:SimpleKB:Abstractions:Dtos:CategoryItemDto","ParentCategoryId":2239,"TreatAsTopicYN":false,"Description":"","ImageUrl":"","ShortDesc":"","CategoryId":2288,"CategoryName":"Billing questions"},{"__type":"Nc:SimpleKB:Abstractions:Dtos:CategoryItemDto","ParentCategoryId":2265,"TreatAsTopicYN":false,"Description":"","ImageUrl":"","ShortDesc":"","CategoryId":2271,"CategoryName":"Linux"},{"__type":"Nc:SimpleKB:Abstractions:Dtos:CategoryItemDto","ParentCategoryId":12,"TreatAsTopicYN":false,"Description":"","ImageUrl":"","ShortDesc":"","CategoryId":30,"CategoryName":"WHM questions"},{"__type":"Nc:SimpleKB:Abstractions:Dtos:CategoryItemDto","ParentCategoryId":93,"TreatAsTopicYN":false,"Description":"","ImageUrl":"","ShortDesc":"","CategoryId":31,"CategoryName":"cPanel Email FAQs"},{"__type":"Nc:SimpleKB:Abstractions:Dtos:CategoryItemDto","ParentCategoryId":34,"TreatAsTopicYN":false,"Description":"","ImageUrl":"","ShortDesc":"","CategoryId":51,"CategoryName":"FreeDNS"},{"__type":"Nc:SimpleKB:Abstractions:Dtos:CategoryItemDto","ParentCategoryId":0,"TreatAsTopicYN":false,"Description":"","ImageUrl":"/assets/img/pictograms/150/email-red.png","ShortDesc":"","CategoryId":93,"CategoryName":"Email service","SubCategories":[{"__type":"Nc:SimpleKB:Abstractions:Dtos:CategoryItemDto","ParentCategoryId":93,"TreatAsTopicYN":false,"Description":"","ImageUrl":"","ShortDesc":"","CategoryId":2216,"CategoryName":"Spam Protection"},{"__type":"Nc:SimpleKB:Abstractions:Dtos:CategoryItemDto","ParentCategoryId":93,"TreatAsTopicYN":false,"Description":"","ImageUrl":"","ShortDesc":"","CategoryId":2226,"CategoryName":"Email Migration"},{"__type":"Nc:SimpleKB:Abstractions:Dtos:CategoryItemDto","ParentCategoryId":93,"TreatAsTopicYN":false,"Description":"","ImageUrl":"","ShortDesc":"","CategoryId":2260,"CategoryName":"Private Email Contacts and Calendars Setup"},{"__type":"Nc:SimpleKB:Abstractions:Dtos:CategoryItemDto","ParentCategoryId":93,"TreatAsTopicYN":false,"Description":"","ImageUrl":"","ShortDesc":"","CategoryId":2179,"CategoryName":"Private Email: General Information"},{"__type":"Nc:SimpleKB:Abstractions:Dtos:CategoryItemDto","ParentCategoryId":93,"TreatAsTopicYN":false,"Description":"","ImageUrl":"","ShortDesc":"","CategoryId":2215,"CategoryName":"Private Email: Mailbox Management"},{"__type":"Nc:SimpleKB:Abstractions:Dtos:CategoryItemDto","ParentCategoryId":93,"TreatAsTopicYN":false,"Description":"","ImageUrl":"","ShortDesc":"","CategoryId":2214,"CategoryName":"Email Forwarding"},{"__type":"Nc:SimpleKB:Abstractions:Dtos:CategoryItemDto","ParentCategoryId":93,"TreatAsTopicYN":false,"Description":"","ImageUrl":"","ShortDesc":"","CategoryId":2176,"CategoryName":"Private Email: DNS Settings"},{"__type":"Nc:SimpleKB:Abstractions:Dtos:CategoryItemDto","ParentCategoryId":93,"TreatAsTopicYN":false,"Description":"","ImageUrl":"","ShortDesc":"","CategoryId":2178,"CategoryName":"Private Email: Webmail Features"},{"__type":"Nc:SimpleKB:Abstractions:Dtos:CategoryItemDto","ParentCategoryId":93,"TreatAsTopicYN":false,"Description":"","ImageUrl":"","ShortDesc":"","CategoryId":2175,"CategoryName":"Private Email: Client Setup"},{"__type":"Nc:SimpleKB:Abstractions:Dtos:CategoryItemDto","ParentCategoryId":93,"TreatAsTopicYN":false,"Description":"","ImageUrl":"","ShortDesc":"","CategoryId":2171,"CategoryName":"Private Email: Active Sync (Exchange) Setup"},{"__type":"Nc:SimpleKB:Abstractions:Dtos:CategoryItemDto","ParentCategoryId":93,"TreatAsTopicYN":false,"Description":"","ImageUrl":"","ShortDesc":"","CategoryId":31,"CategoryName":"cPanel Email FAQs"},{"__type":"Nc:SimpleKB:Abstractions:Dtos:CategoryItemDto","ParentCategoryId":93,"TreatAsTopicYN":false,"Description":"","ImageUrl":"","ShortDesc":"","CategoryId":2186,"CategoryName":"cPanel Email: Client Setup"},{"__type":"Nc:SimpleKB:Abstractions:Dtos:CategoryItemDto","ParentCategoryId":93,"TreatAsTopicYN":false,"Description":"","ImageUrl":"","ShortDesc":"","CategoryId":2204,"CategoryName":"Private Email: Video Overview"}]},{"__type":"Nc:SimpleKB:Abstractions:Dtos:CategoryItemDto","ParentCategoryId":12,"TreatAsTopicYN":false,"Description":"","ImageUrl":"","ShortDesc":"","CategoryId":32,"CategoryName":"DNS settings"},{"__type":"Nc:SimpleKB:Abstractions:Dtos:CategoryItemDto","ParentCategoryId":34,"TreatAsTopicYN":false,"Description":"","ImageUrl":"","ShortDesc":"","CategoryId":15,"CategoryName":"Namecheap Market"},{"__type":"Nc:SimpleKB:Abstractions:Dtos:CategoryItemDto","ParentCategoryId":93,"TreatAsTopicYN":false,"Description":"","ImageUrl":"","ShortDesc":"","CategoryId":2186,"CategoryName":"cPanel Email: Client Setup"},{"__type":"Nc:SimpleKB:Abstractions:Dtos:CategoryItemDto","ParentCategoryId":2265,"TreatAsTopicYN":false,"Description":"","ImageUrl":"","ShortDesc":"","CategoryId":2266,"CategoryName":"Windows"},{"__type":"Nc:SimpleKB:Abstractions:Dtos:CategoryItemDto","ParentCategoryId":2239,"TreatAsTopicYN":false,"Description":"","ImageUrl":"","ShortDesc":"","CategoryId":2287,"CategoryName":"SSL questions"},{"__type":"Nc:SimpleKB:Abstractions:Dtos:CategoryItemDto","ParentCategoryId":2265,"TreatAsTopicYN":false,"Description":"","ImageUrl":"","ShortDesc":"","CategoryId":2267,"CategoryName":"Android"},{"__type":"Nc:SimpleKB:Abstractions:Dtos:CategoryItemDto","ParentCategoryId":34,"TreatAsTopicYN":false,"Description":"","ImageUrl":"","ShortDesc":"","CategoryId":2208,"CategoryName":"3rd Party Services Setup"},{"__type":"Nc:SimpleKB:Abstractions:Dtos:CategoryItemDto","ParentCategoryId":93,"TreatAsTopicYN":false,"Description":"","ImageUrl":"","ShortDesc":"","CategoryId":2204,"CategoryName":"Private Email: Video Overview"},{"__type":"Nc:SimpleKB:Abstractions:Dtos:CategoryItemDto","ParentCategoryId":0,"TreatAsTopicYN":false,"Description":"","ImageUrl":"/assets/img/pictograms/150/security-red.png","ShortDesc":"","CategoryId":14,"CategoryName":"SSL Certificates","SubCategories":[{"__type":"Nc:SimpleKB:Abstractions:Dtos:CategoryItemDto","ParentCategoryId":14,"TreatAsTopicYN":false,"Description":"","ImageUrl":"","ShortDesc":"","CategoryId":2217,"CategoryName":"Renewal"},{"__type":"Nc:SimpleKB:Abstractions:Dtos:CategoryItemDto","ParentCategoryId":14,"TreatAsTopicYN":false,"Description":"","ImageUrl":"","ShortDesc":"","CategoryId":2218,"CategoryName":"cPanel SSL Plugin"},{"__type":"Nc:SimpleKB:Abstractions:Dtos:CategoryItemDto","ParentCategoryId":14,"TreatAsTopicYN":false,"Description":"","ImageUrl":"","ShortDesc":"","CategoryId":2221,"CategoryName":"Multi-Domain SSL Certificates"},{"__type":"Nc:SimpleKB:Abstractions:Dtos:CategoryItemDto","ParentCategoryId":14,"TreatAsTopicYN":false,"Description":"","ImageUrl":"","ShortDesc":"","CategoryId":2222,"CategoryName":"Cancellation"},{"__type":"Nc:SimpleKB:Abstractions:Dtos:CategoryItemDto","ParentCategoryId":14,"TreatAsTopicYN":false,"Description":"","ImageUrl":"","ShortDesc":"","CategoryId":2223,"CategoryName":"Browser errors"},{"__type":"Nc:SimpleKB:Abstractions:Dtos:CategoryItemDto","ParentCategoryId":14,"TreatAsTopicYN":false,"Description":"","ImageUrl":"","ShortDesc":"","CategoryId":2224,"CategoryName":"Site Seal, Logo"},{"__type":"Nc:SimpleKB:Abstractions:Dtos:CategoryItemDto","ParentCategoryId":14,"TreatAsTopicYN":false,"Description":"","ImageUrl":"","ShortDesc":"","CategoryId":2238,"CategoryName":"SSL installation errors"},{"__type":"Nc:SimpleKB:Abstractions:Dtos:CategoryItemDto","ParentCategoryId":14,"TreatAsTopicYN":false,"Description":"","ImageUrl":"","ShortDesc":"","CategoryId":2290,"CategoryName":"CSR code"},{"__type":"Nc:SimpleKB:Abstractions:Dtos:CategoryItemDto","ParentCategoryId":14,"TreatAsTopicYN":false,"Description":"","ImageUrl":"","ShortDesc":"","CategoryId":2293,"CategoryName":"Automated SSL management"},{"__type":"Nc:SimpleKB:Abstractions:Dtos:CategoryItemDto","ParentCategoryId":14,"TreatAsTopicYN":false,"Description":"","ImageUrl":"","ShortDesc":"","CategoryId":38,"CategoryName":"SSL General"},{"__type":"Nc:SimpleKB:Abstractions:Dtos:CategoryItemDto","ParentCategoryId":14,"TreatAsTopicYN":false,"Description":"","ImageUrl":"","ShortDesc":"","CategoryId":67,"CategoryName":"Activation"},{"__type":"Nc:SimpleKB:Abstractions:Dtos:CategoryItemDto","ParentCategoryId":14,"TreatAsTopicYN":false,"Description":"","ImageUrl":"","ShortDesc":"","CategoryId":68,"CategoryName":"Validation"},{"__type":"Nc:SimpleKB:Abstractions:Dtos:CategoryItemDto","ParentCategoryId":14,"TreatAsTopicYN":false,"Description":"","ImageUrl":"","ShortDesc":"","CategoryId":69,"CategoryName":"Installation"},{"__type":"Nc:SimpleKB:Abstractions:Dtos:CategoryItemDto","ParentCategoryId":14,"TreatAsTopicYN":false,"Description":"","ImageUrl":"","ShortDesc":"","CategoryId":70,"CategoryName":"Reissuance"}]},{"__type":"Nc:SimpleKB:Abstractions:Dtos:CategoryItemDto","ParentCategoryId":0,"TreatAsTopicYN":true,"Description":"","ImageUrl":"/assets/img/pictograms/150/performance-red.png","ShortDesc":"","CategoryId":9,"CategoryName":"My Account","SubCategories":[{"__type":"Nc:SimpleKB:Abstractions:Dtos:CategoryItemDto","ParentCategoryId":9,"TreatAsTopicYN":false,"Description":"","ImageUrl":"","ShortDesc":"","CategoryId":45,"CategoryName":"Account Security"},{"__type":"Nc:SimpleKB:Abstractions:Dtos:CategoryItemDto","ParentCategoryId":9,"TreatAsTopicYN":false,"Description":"","ImageUrl":"","ShortDesc":"","CategoryId":43,"CategoryName":"Profile Management"},{"__type":"Nc:SimpleKB:Abstractions:Dtos:CategoryItemDto","ParentCategoryId":9,"TreatAsTopicYN":false,"Description":"","ImageUrl":"","ShortDesc":"","CategoryId":44,"CategoryName":"Account Access"}]},{"__type":"Nc:SimpleKB:Abstractions:Dtos:CategoryItemDto","ParentCategoryId":34,"TreatAsTopicYN":false,"Description":"","ImageUrl":"","ShortDesc":"","CategoryId":2278,"CategoryName":"Handshake TLDs"},{"__type":"Nc:SimpleKB:Abstractions:Dtos:CategoryItemDto","ParentCategoryId":12,"TreatAsTopicYN":false,"Description":"","ImageUrl":"","ShortDesc":"","CategoryId":103,"CategoryName":"LVE (CloudLinux)"},{"__type":"Nc:SimpleKB:Abstractions:Dtos:CategoryItemDto","ParentCategoryId":0,"TreatAsTopicYN":false,"Description":"","ImageUrl":"/assets/img/pictograms/150/affiliates-red.png","ShortDesc":"","CategoryId":55,"CategoryName":"Affiliates","SubCategories":[]},{"__type":"Nc:SimpleKB:Abstractions:Dtos:CategoryItemDto","ParentCategoryId":12,"TreatAsTopicYN":false,"Description":"","ImageUrl":"","ShortDesc":"","CategoryId":89,"CategoryName":"SSH Access"},{"__type":"Nc:SimpleKB:Abstractions:Dtos:CategoryItemDto","ParentCategoryId":0,"TreatAsTopicYN":false,"Description":"","ImageUrl":"/assets/img/pictograms/150/tools-red.png","ShortDesc":"","CategoryId":2211,"CategoryName":"API & Resellers","SubCategories":[{"__type":"Nc:SimpleKB:Abstractions:Dtos:CategoryItemDto","ParentCategoryId":2211,"TreatAsTopicYN":false,"Description":"","ImageUrl":"","ShortDesc":"","CategoryId":2227,"CategoryName":"SSL Resellers"},{"__type":"Nc:SimpleKB:Abstractions:Dtos:CategoryItemDto","ParentCategoryId":2211,"TreatAsTopicYN":false,"Description":"","ImageUrl":"","ShortDesc":"","CategoryId":2229,"CategoryName":"Hosting Resellers"},{"__type":"Nc:SimpleKB:Abstractions:Dtos:CategoryItemDto","ParentCategoryId":2211,"TreatAsTopicYN":false,"Description":"","ImageUrl":"","ShortDesc":"","CategoryId":63,"CategoryName":"Namecheap API"},{"__type":"Nc:SimpleKB:Abstractions:Dtos:CategoryItemDto","ParentCategoryId":2211,"TreatAsTopicYN":false,"Description":"","ImageUrl":"","ShortDesc":"","CategoryId":2196,"CategoryName":"WHMCS module for SSL"}]},{"__type":"Nc:SimpleKB:Abstractions:Dtos:CategoryItemDto","ParentCategoryId":0,"TreatAsTopicYN":false,"Description":"","ImageUrl":"/assets/img/pictograms/150/timer-red.png","ShortDesc":"","CategoryId":2212,"CategoryName":"Legacy Products","SubCategories":[]},{"__type":"Nc:SimpleKB:Abstractions:Dtos:CategoryItemDto","ParentCategoryId":12,"TreatAsTopicYN":false,"Description":"","ImageUrl":"","ShortDesc":"","CategoryId":205,"CategoryName":"FTP questions"},{"__type":"Nc:SimpleKB:Abstractions:Dtos:CategoryItemDto","ParentCategoryId":12,"TreatAsTopicYN":false,"Description":"","ImageUrl":"","ShortDesc":"","CategoryId":2180,"CategoryName":"MySQL questions"},{"__type":"Nc:SimpleKB:Abstractions:Dtos:CategoryItemDto","ParentCategoryId":12,"TreatAsTopicYN":false,"Description":"","ImageUrl":"","ShortDesc":"","CategoryId":2199,"CategoryName":"Hosting Migration"},{"__type":"Nc:SimpleKB:Abstractions:Dtos:CategoryItemDto","ParentCategoryId":0,"TreatAsTopicYN":false,"Description":"","ImageUrl":"/assets/img/pictograms/150/premiumdns-red.png","ShortDesc":"","CategoryId":2231,"CategoryName":"PremiumDNS","SubCategories":[]},{"__type":"Nc:SimpleKB:Abstractions:Dtos:CategoryItemDto","ParentCategoryId":12,"TreatAsTopicYN":false,"Description":"","ImageUrl":"","ShortDesc":"","CategoryId":2194,"CategoryName":"Tips & Tricks"},{"__type":"Nc:SimpleKB:Abstractions:Dtos:CategoryItemDto","ParentCategoryId":0,"TreatAsTopicYN":false,"Description":"","ImageUrl":"https://static.nc-img.com/live-resource/icons/knowledgebase/fastVPN_icon-150px.png","ShortDesc":"","CategoryId":2265,"CategoryName":"FastVPN","SubCategories":[{"__type":"Nc:SimpleKB:Abstractions:Dtos:CategoryItemDto","ParentCategoryId":2265,"TreatAsTopicYN":false,"Description":"","ImageUrl":"","ShortDesc":"","CategoryId":2292,"CategoryName":"Browser Extensions"},{"__type":"Nc:SimpleKB:Abstractions:Dtos:CategoryItemDto","ParentCategoryId":2265,"TreatAsTopicYN":false,"Description":"","ImageUrl":"","ShortDesc":"","CategoryId":2274,"CategoryName":"General"},{"__type":"Nc:SimpleKB:Abstractions:Dtos:CategoryItemDto","ParentCategoryId":2265,"TreatAsTopicYN":false,"Description":"","ImageUrl":"","ShortDesc":"","CategoryId":2270,"CategoryName":"Routers"},{"__type":"Nc:SimpleKB:Abstractions:Dtos:CategoryItemDto","ParentCategoryId":2265,"TreatAsTopicYN":false,"Description":"","ImageUrl":"","ShortDesc":"","CategoryId":2272,"CategoryName":"TV"},{"__type":"Nc:SimpleKB:Abstractions:Dtos:CategoryItemDto","ParentCategoryId":2265,"TreatAsTopicYN":false,"Description":"","ImageUrl":"","ShortDesc":"","CategoryId":2273,"CategoryName":"Gaming Consoles"},{"__type":"Nc:SimpleKB:Abstractions:Dtos:CategoryItemDto","ParentCategoryId":2265,"TreatAsTopicYN":false,"Description":"","ImageUrl":"","ShortDesc":"","CategoryId":2268,"CategoryName":"macOS"},{"__type":"Nc:SimpleKB:Abstractions:Dtos:CategoryItemDto","ParentCategoryId":2265,"TreatAsTopicYN":false,"Description":"","ImageUrl":"","ShortDesc":"","CategoryId":2269,"CategoryName":"iOS"},{"__type":"Nc:SimpleKB:Abstractions:Dtos:CategoryItemDto","ParentCategoryId":2265,"TreatAsTopicYN":false,"Description":"","ImageUrl":"","ShortDesc":"","CategoryId":2271,"CategoryName":"Linux"},{"__type":"Nc:SimpleKB:Abstractions:Dtos:CategoryItemDto","ParentCategoryId":2265,"TreatAsTopicYN":false,"Description":"","ImageUrl":"","ShortDesc":"","CategoryId":2266,"CategoryName":"Windows"},{"__type":"Nc:SimpleKB:Abstractions:Dtos:CategoryItemDto","ParentCategoryId":2265,"TreatAsTopicYN":false,"Description":"","ImageUrl":"","ShortDesc":"","CategoryId":2267,"CategoryName":"Android"}]},{"__type":"Nc:SimpleKB:Abstractions:Dtos:CategoryItemDto","ParentCategoryId":12,"TreatAsTopicYN":false,"Description":"","ImageUrl":"","ShortDesc":"","CategoryId":239,"CategoryName":"WHMCS"},{"__type":"Nc:SimpleKB:Abstractions:Dtos:CategoryItemDto","ParentCategoryId":12,"TreatAsTopicYN":false,"Description":"","ImageUrl":"","ShortDesc":"","CategoryId":33,"CategoryName":"SSL Installation"}],"status":200,"statusText":"OK"}}
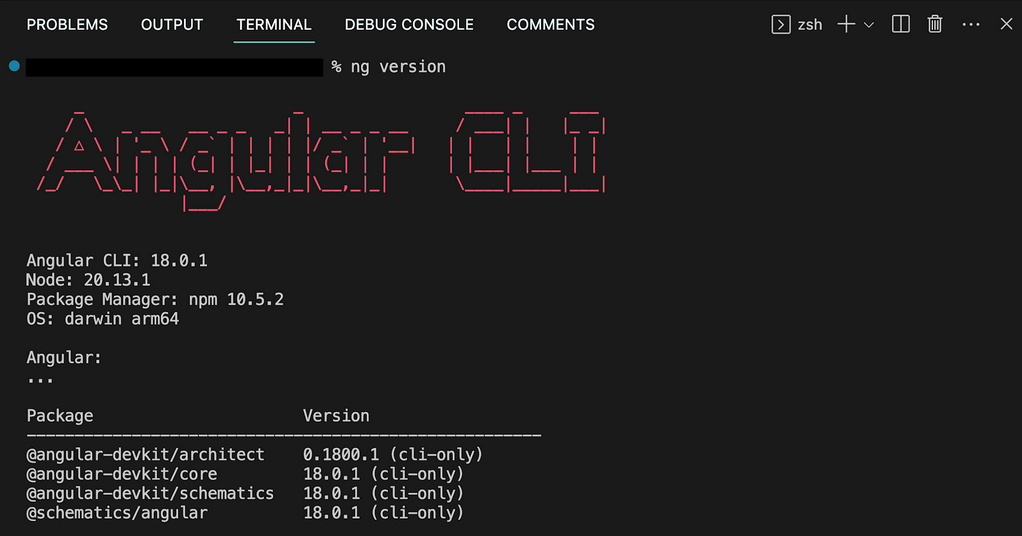

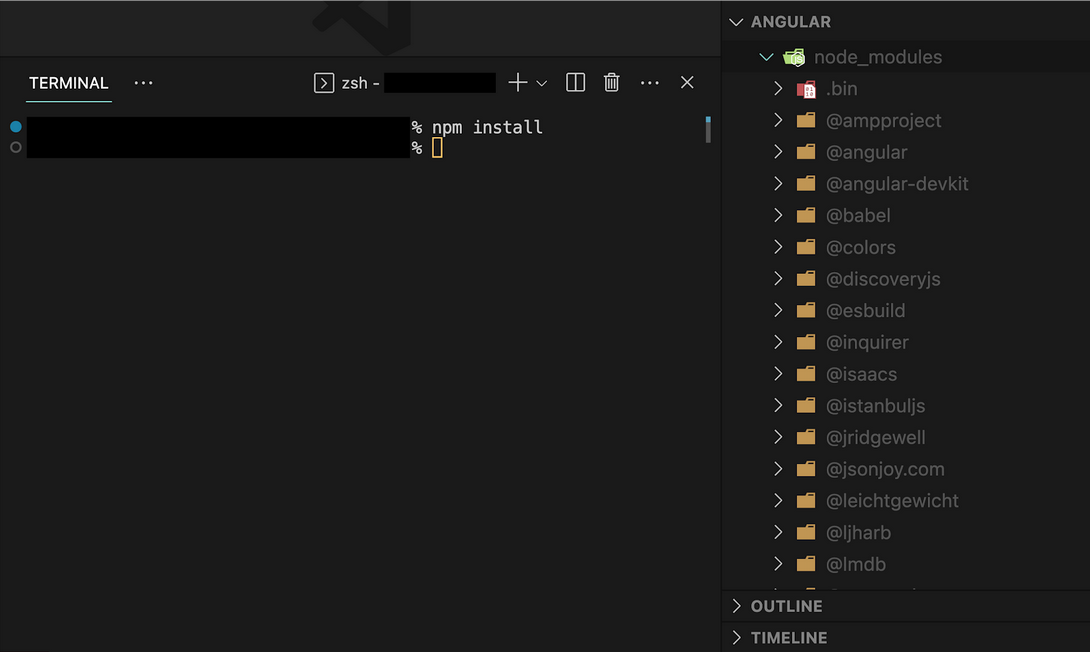

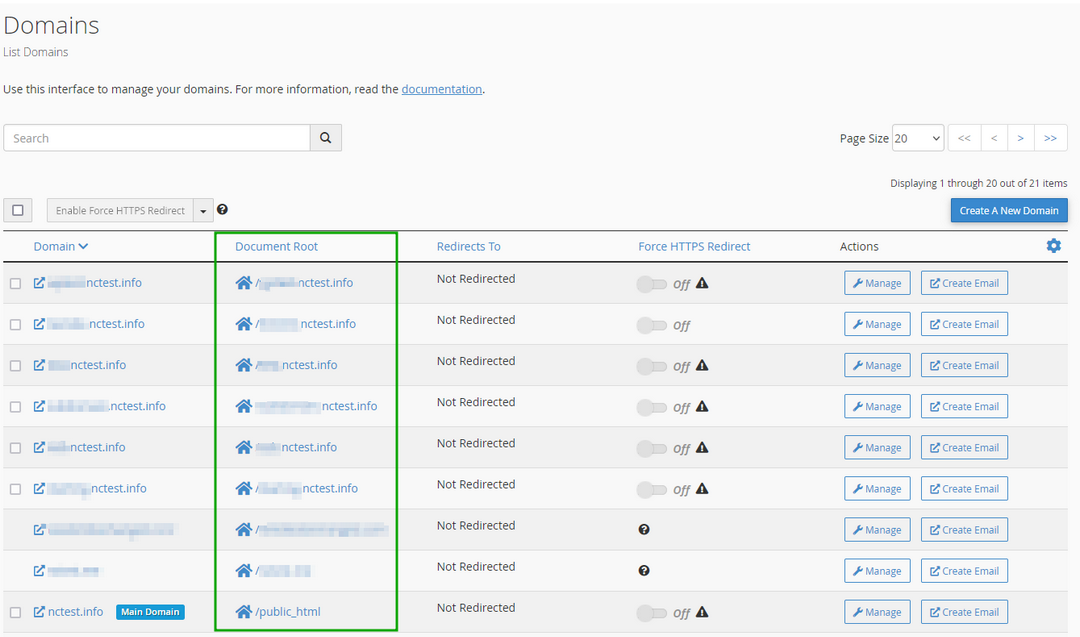
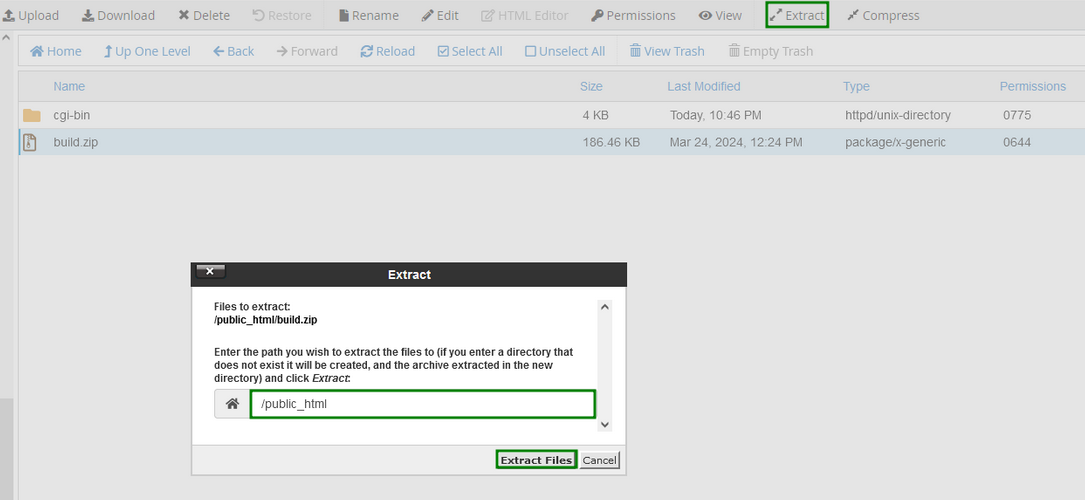
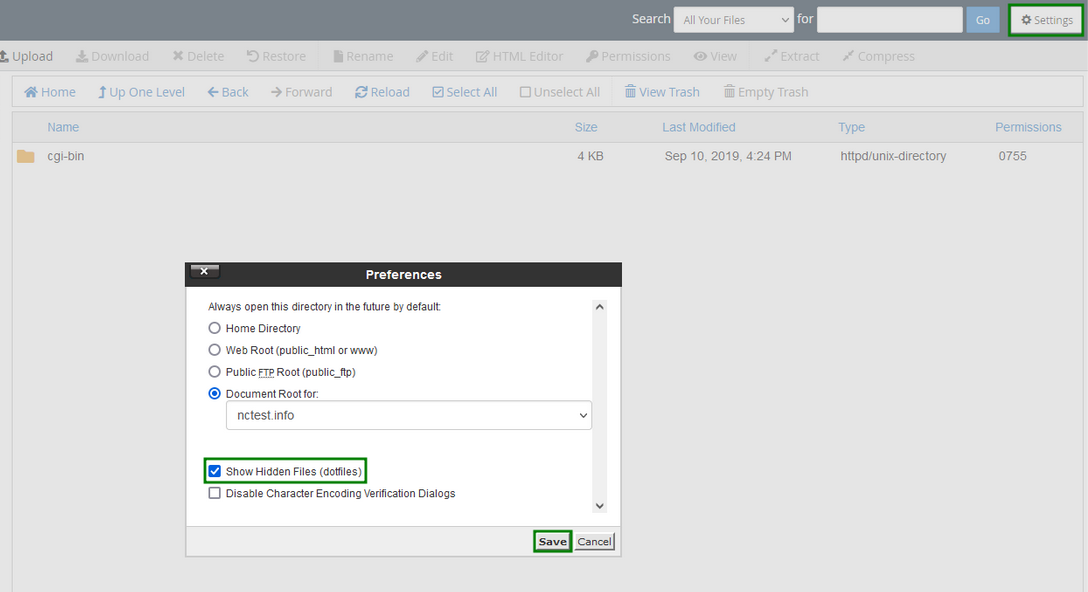
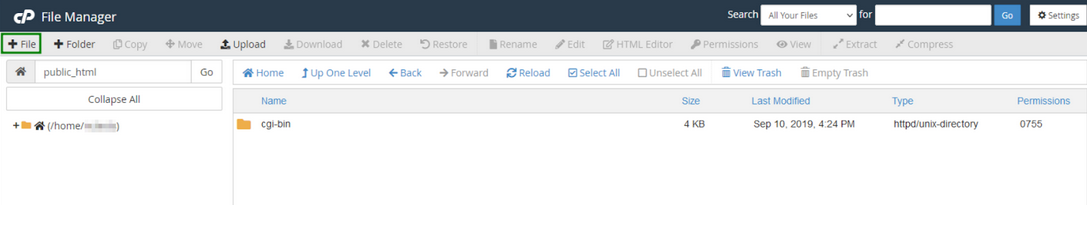
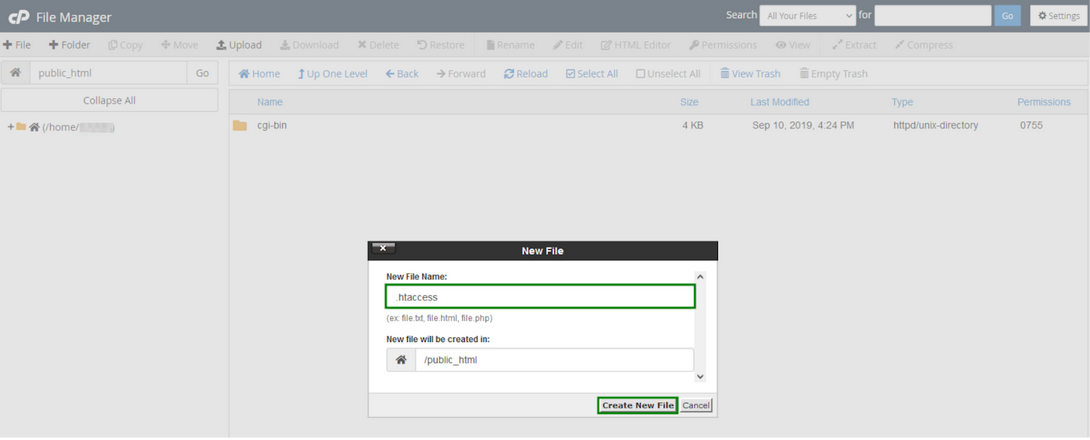


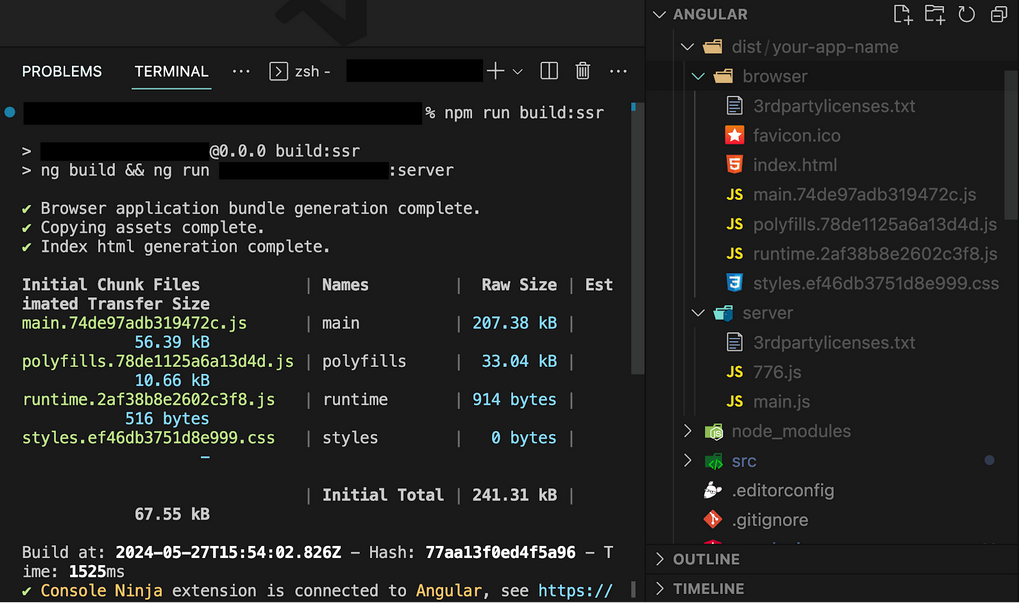

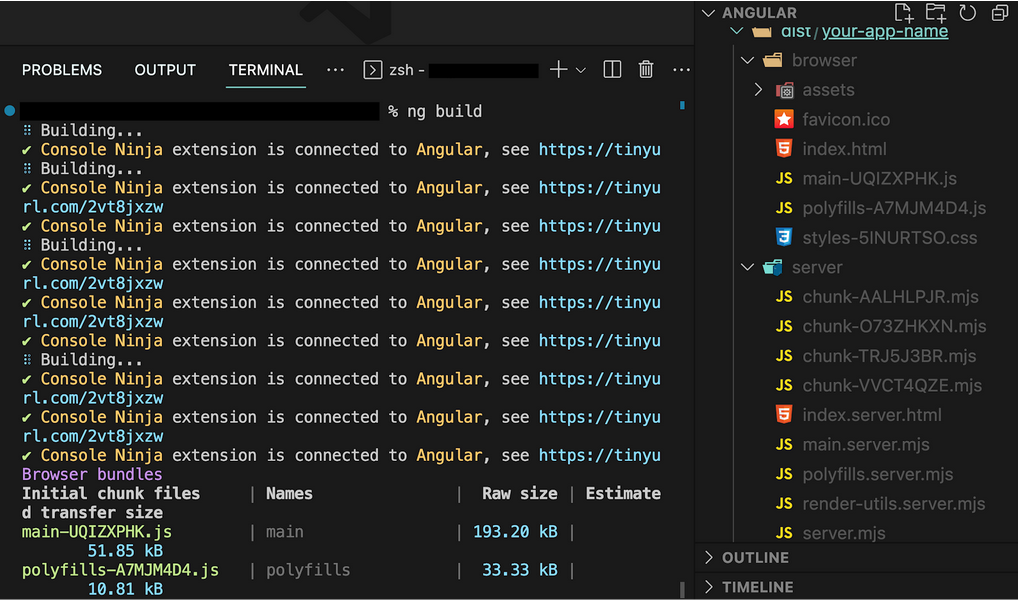
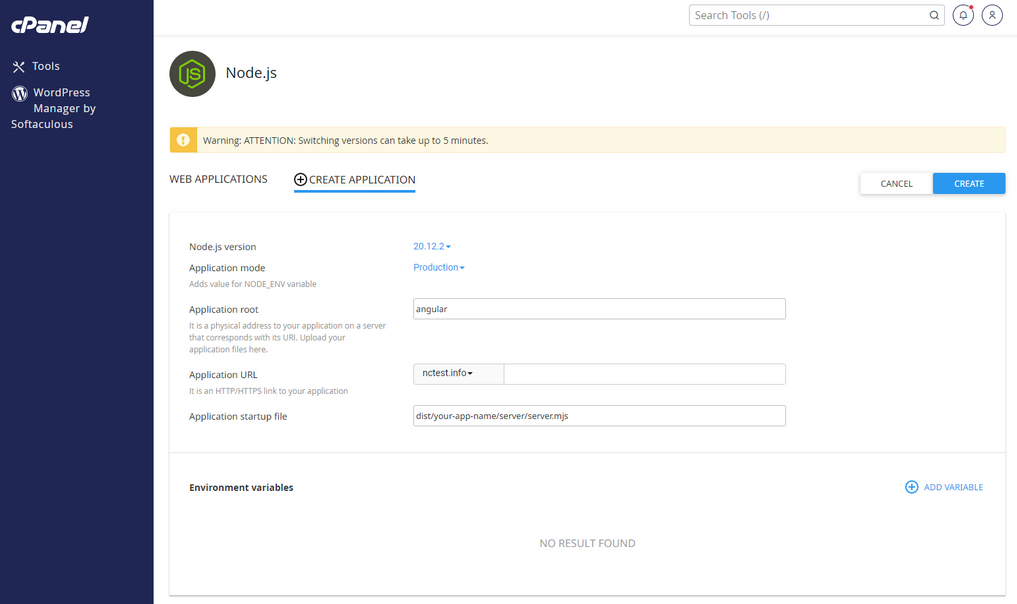
Need help? We're always here for you.