This article is valid for both new plans (purchased on or after June 2, 2026) and legacy Private Email plans (purchased before June 2, 2026).
In this article, we’ll cover how to set up your Namecheap Private Email mailbox via IMAP protocol in the Outlook client.
Outlook for Windows (also referred to as New Outlook) is the latest email client developed by Microsoft and will replace the preloaded Windows Mail and Calendar apps on Windows 10 and 11. It will also ship as the default mail app of Windows 11 from late 2024 onwards.
NOTE: In this article, we use nctest@namecheap.com as the example address.
Follow these steps in order to add a new email account:
1. Open the Outlook (new) application on your Windows device.
2. After opening Outlook, you’ll need to enter the Private Email address you’d like to add and press Continue:

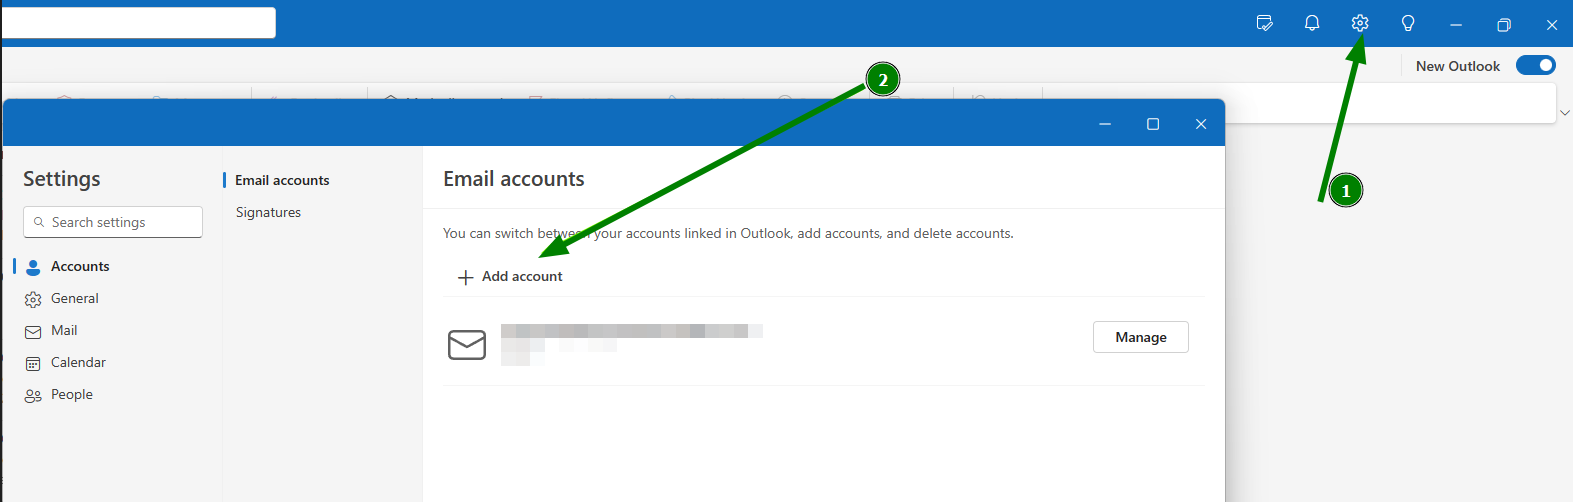
TIP: If you already have an email account set up in new Outlook, navigate to the top-right corner and select Settings icon >> Add account:
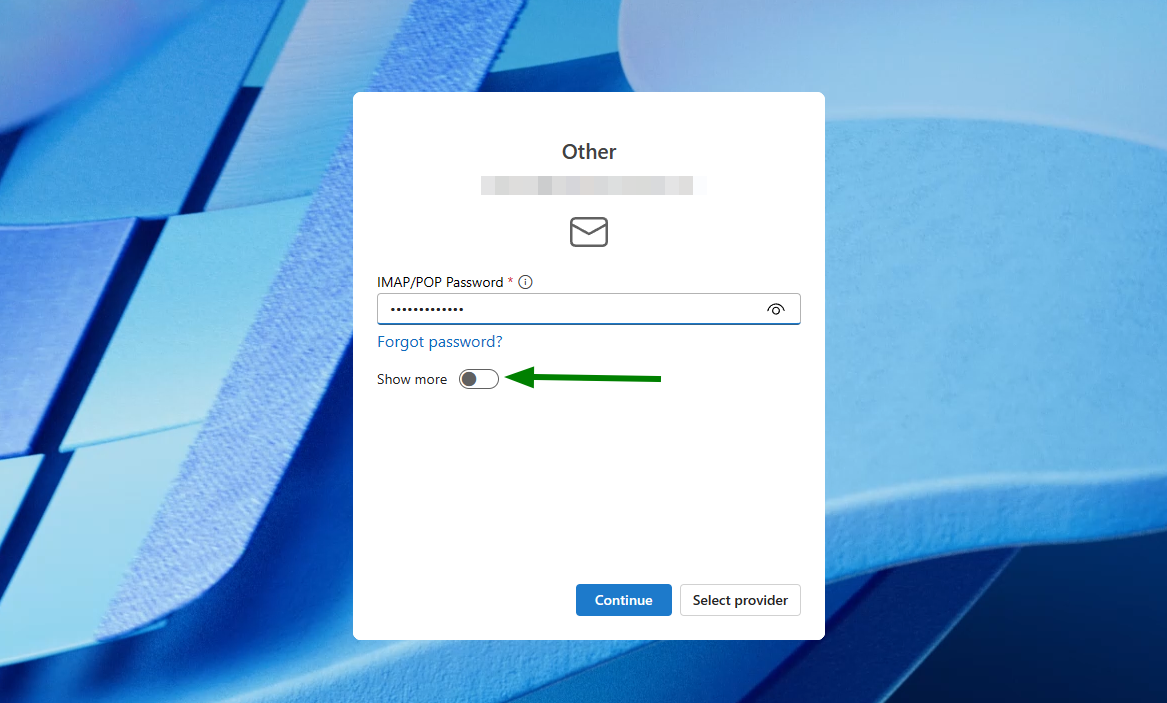
3. In the next window, click Show more to reveal incoming/outgoing settings:
Note: New Outlook does not currently support the POP3 protocol. Therefore, it's only possible to add a mailbox via IMAP protocol.
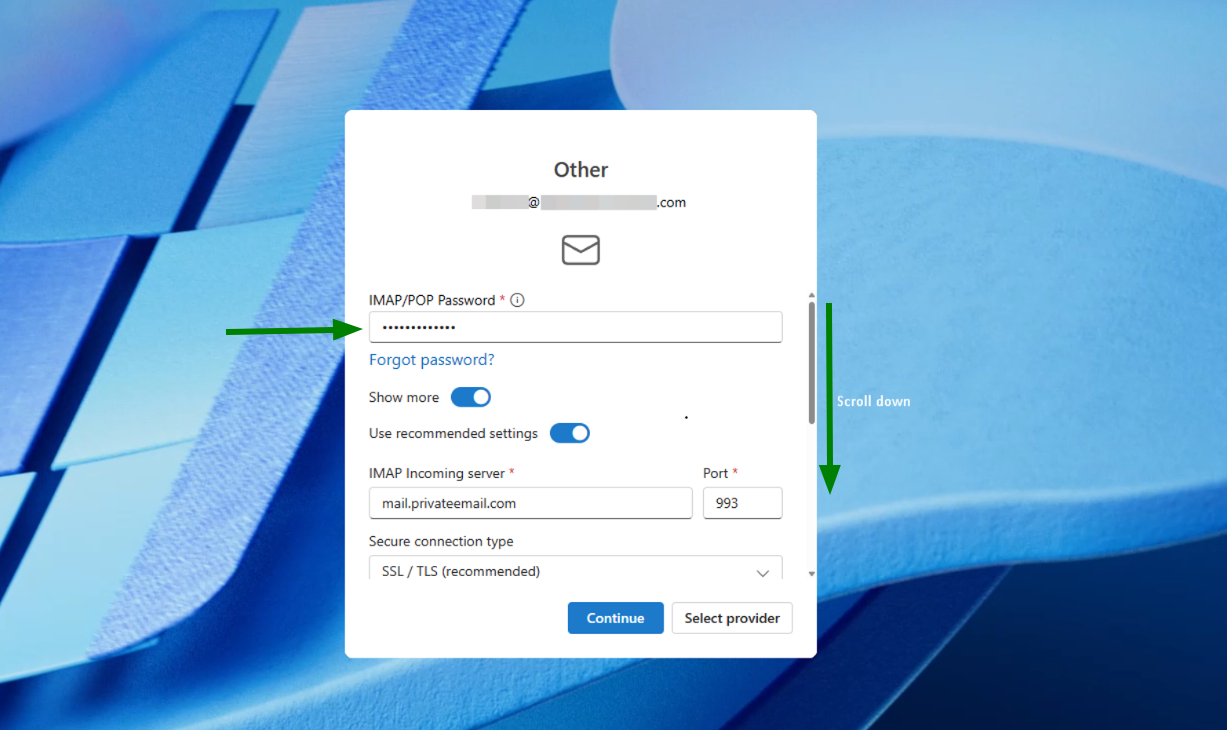
4. Enter the following server settings:
- IMAP/POP Password: Your current mailbox password;
- IMAP Incoming Server: mail.privateemail.com;
- Incoming Server Port: 993 (or 143 with StartTLS);
- Secure connection type: SSL/TLS (or StartTLS if 143 port is used).
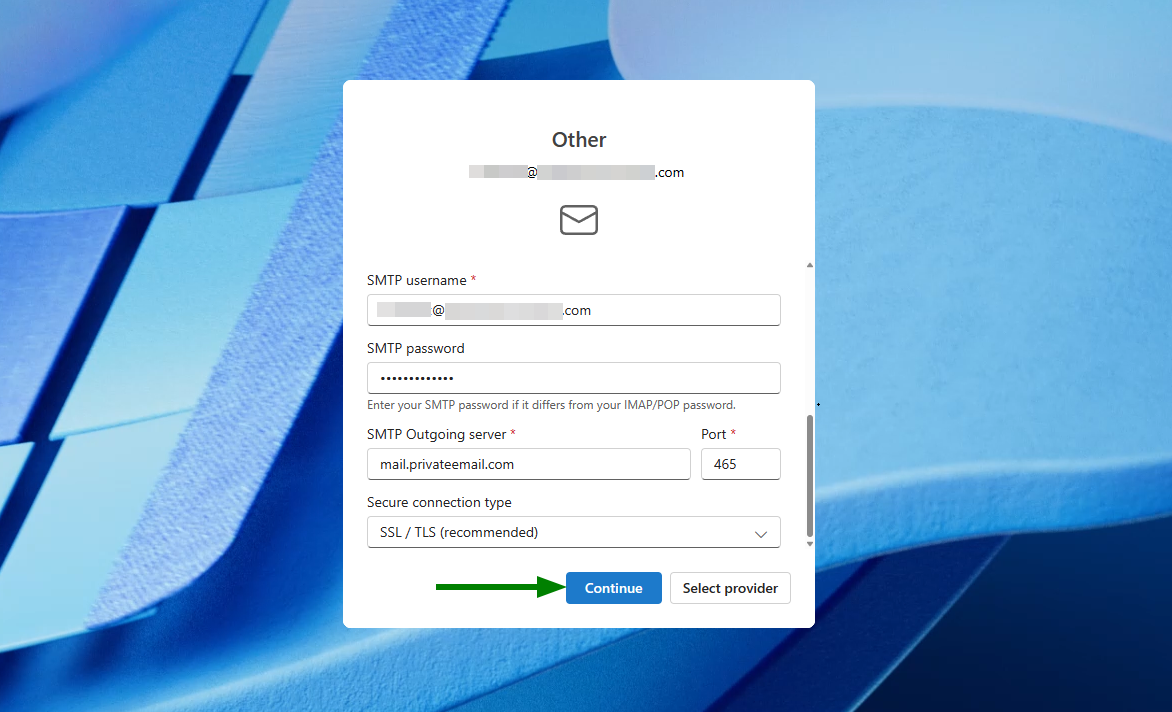
- SMTP Username: Your full Private Email email address;
- SMTP Password: Your current mailbox password;
- SMTP Outgoing Server: mail.privateemail.com (additionally, you may try using the smtp.privateemail.com server);
- Outgoing Server Port: 465 (or 587 with StartTLS);
- Secure connection type: SSL/TLS (or StartTLS if 587 port is used):
5. Once all the details are filled, click Continue:
6. Next, the message about Microsoft Cloud will appear:

Syncing your account to the Microsoft Cloud means that a copy of your emails will be synchronized between your Private Email server and Microsoft's data centers.
You may want to check Microsoft’s terms that apply to account data:
The Microsoft Services Agreement and the Microsoft Privacy Statement apply to your use of these versions of Outlook and to your account data. In addition, the provider’s terms of service and privacy policy continue to apply to your account data.
To proceed with the setup, press Continue.
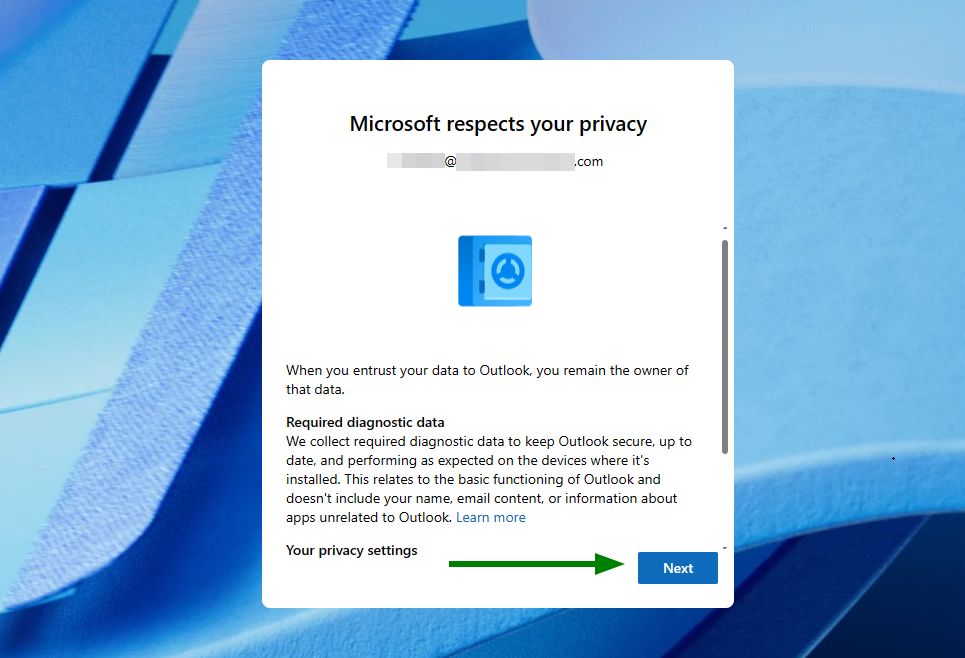
7. After that, the Outlook client navigates to a new window associated with the privacy. To continue with the setup, press Next:
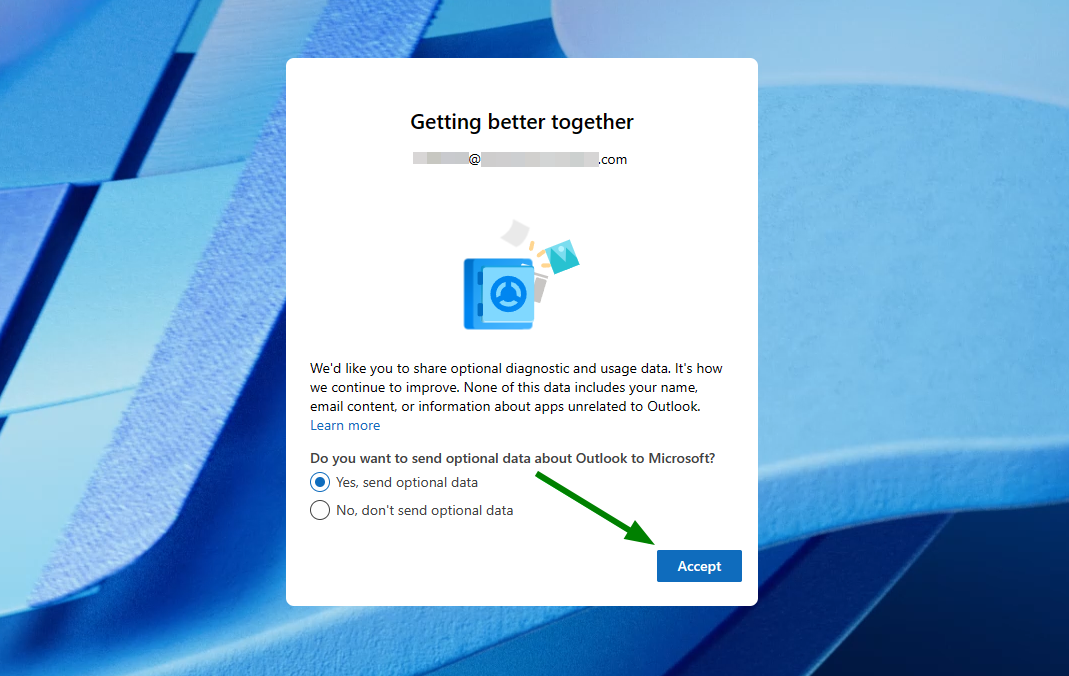
8. Finally, to finish setting up the Private Email mailbox, the Outlook client will ask if it can gather user data for improvement. Select your preference and click Accept:
NOTE: You may encounter the following error while setting up an email account set up in Outlook: "Something went wrong. Try again. You may need an app password.”
In this case, please make sure the login details you use are correct. You can check your Private Email login details to the Private Email mailbox by logging into the Private Email webmail - https://privateemail.com/). If any issues arise, please do not hesitate to reset the password.

Also, you may face the following error during sending emails:
“SmtpSubmissionPermanent5XXException: Smtp submission failed. Server 'mail.privateemail.com' Port '465'. --> Unexpected SMTP server response. Expected: 235, actual: 535, whole response: 535 5.7.8 Error: authentication failed: (reason unavailable)”.
In this case, please make sure the password in SMTP settings matches the correct password for the Private Email mailbox.

In order to check or update the configuration of an existing email account, follow these steps:
1. Open the Mail application on your device.
2. Click on 3 dots next to your added mailbox and choose the option ‘Manage account’:

3. Select the mailbox in question and click Manage:

4. Use the slider to scroll to the bottom of the page and you will be able to select the Repair options:

5. On the next page, you will see incoming and outgoing server settings.
Make sure all of them are set properly. If any information is set incorrectly, update it for both Incoming mail and Outgoing mail configurations.
6. Once all details for the outgoing connection are updated, click Continue:

Should any questions arise, feel free to contact our Support Team for further assistance.
That's it!
