U.S. DollarEuroBritish PoundCanadian DollarsAustralian DollarsIndian RupeesChina Yuan RMBMore Info →
How to deploy React.js, Vite.js, React Native, and Next.js applications in cPanel
An application must work perfectly in its local environment, and a domain or subdomain must be connected to your shared hosting. Find more information on how to connect a domain to hosting.
While the examples of running commands will be shown using NPM, you can also use other JavaScript runtimes for your projects. For more information, you can check the websites:
NOTE: It’s important to run commands like npm run build on your local machine. Since the server environment can differ from your development setup, an app that works locally might not build successfully on a different system.
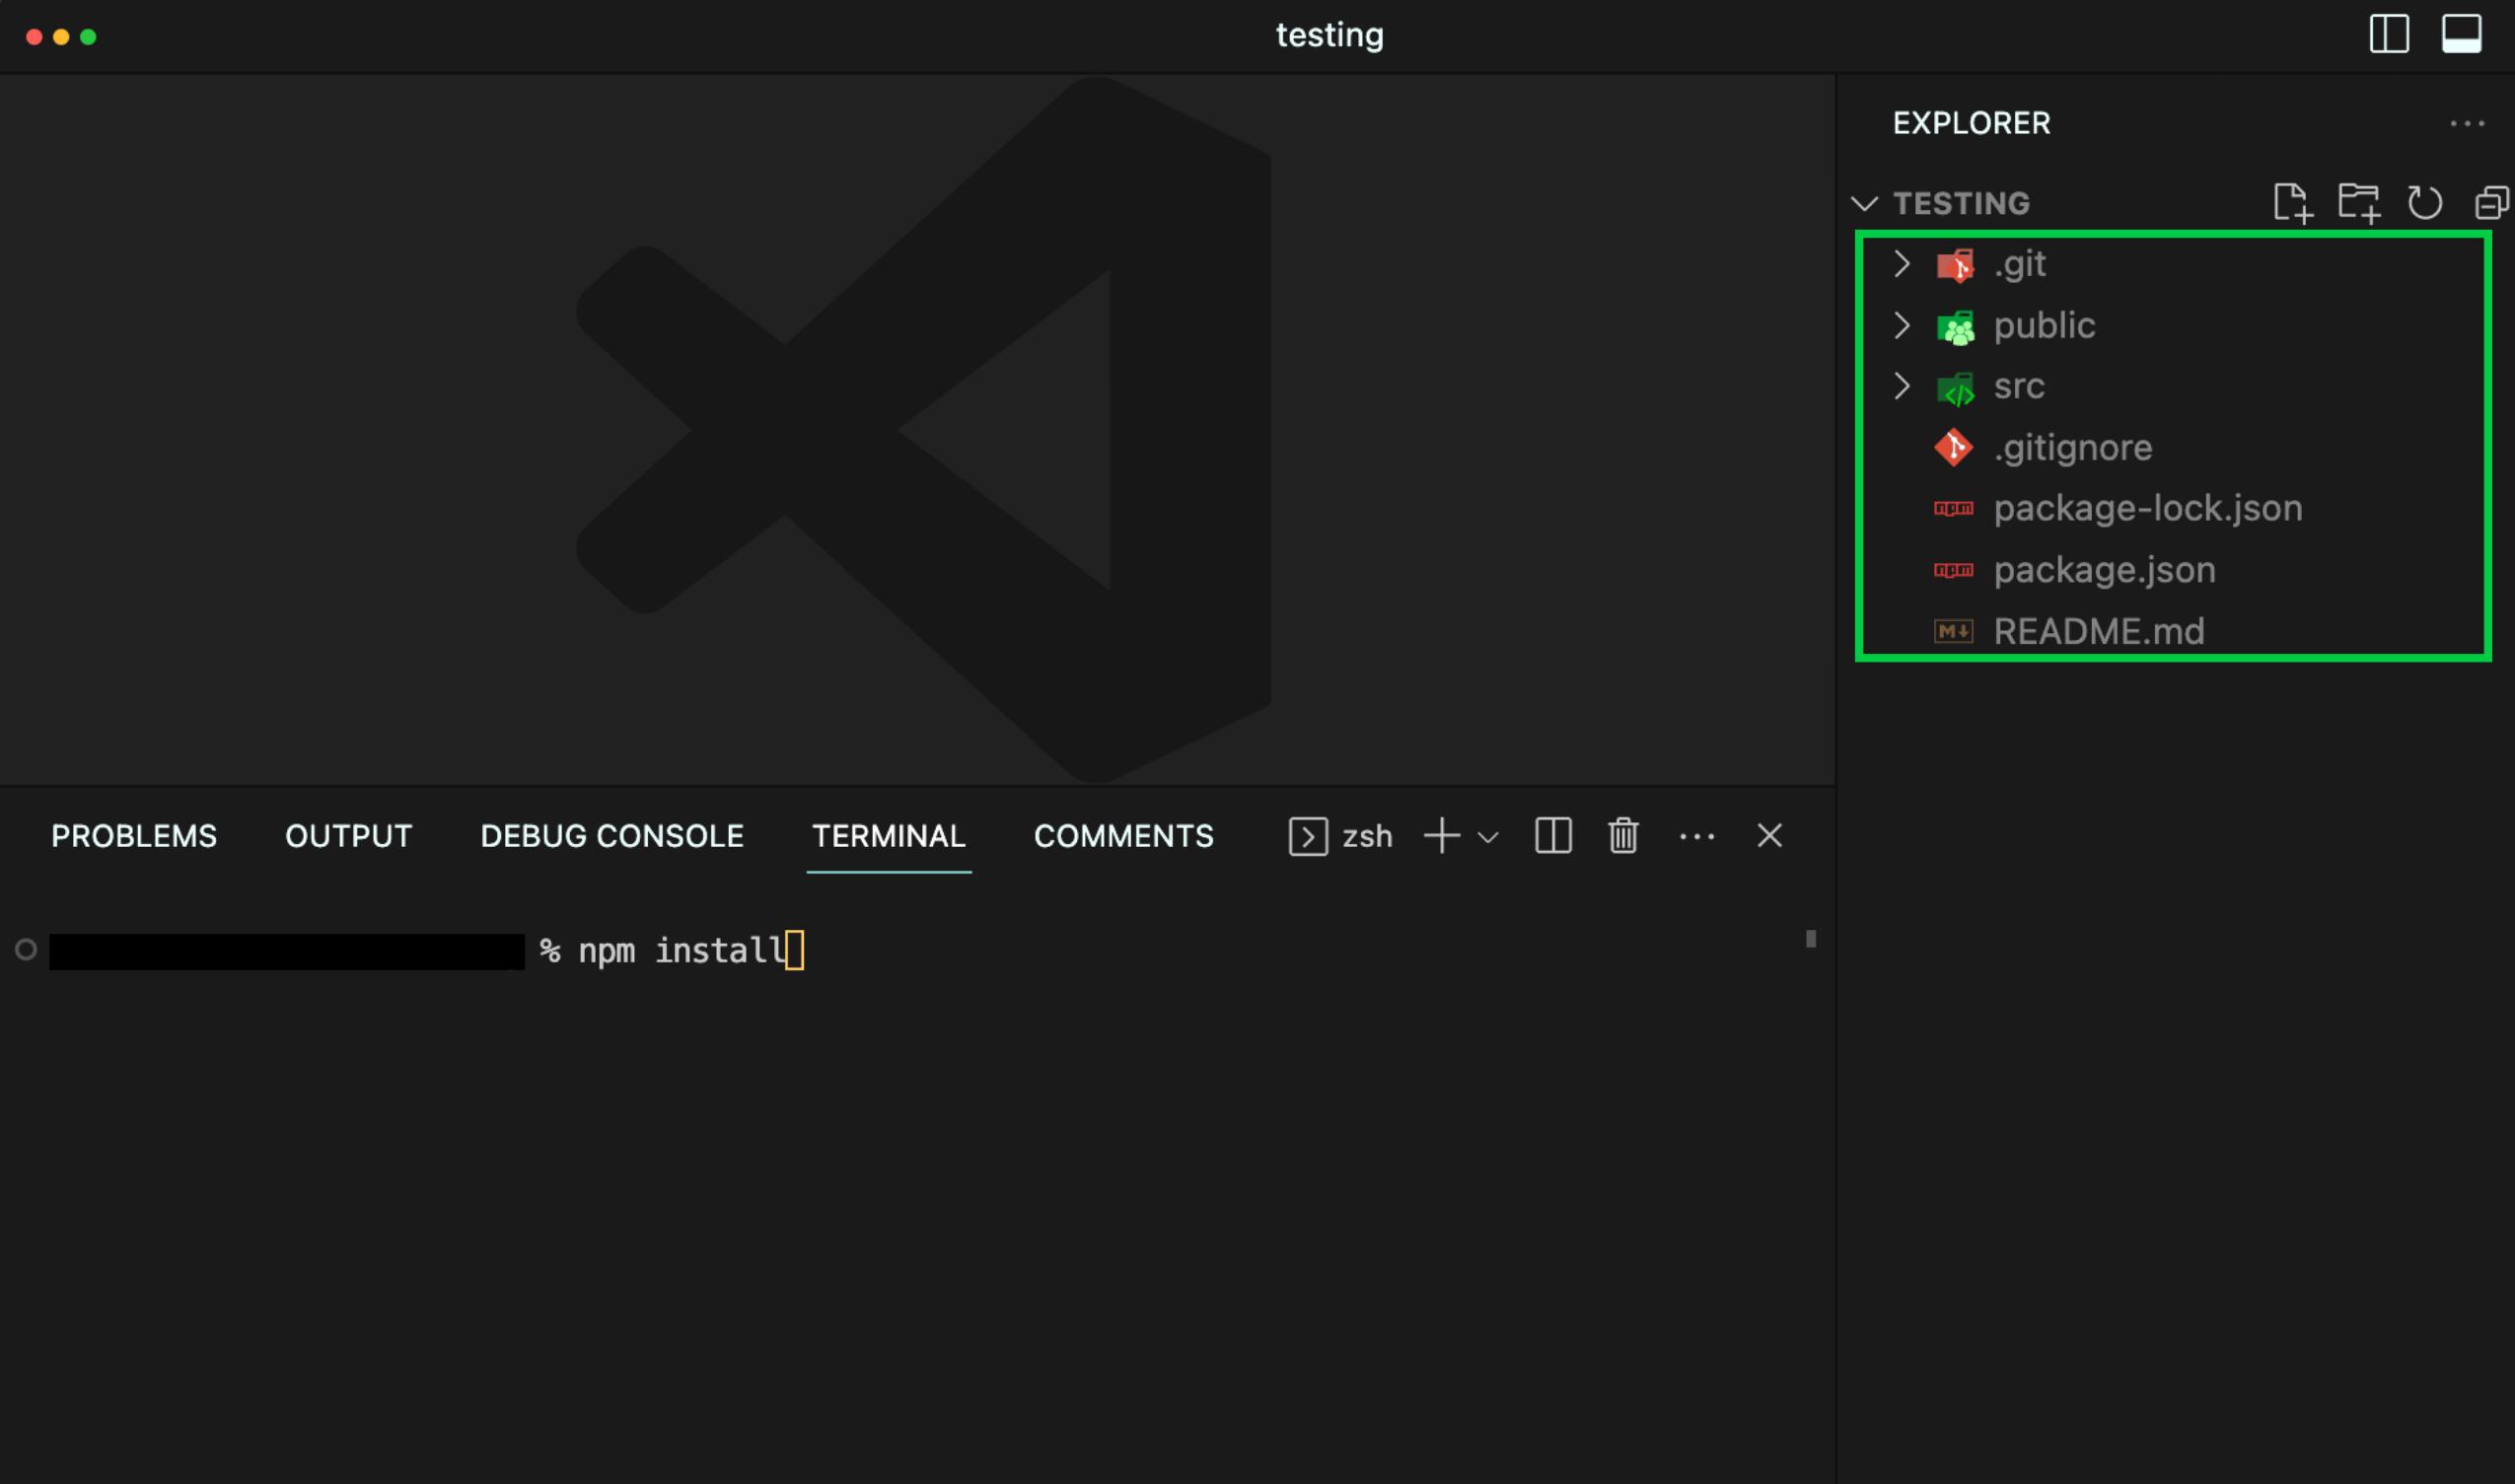
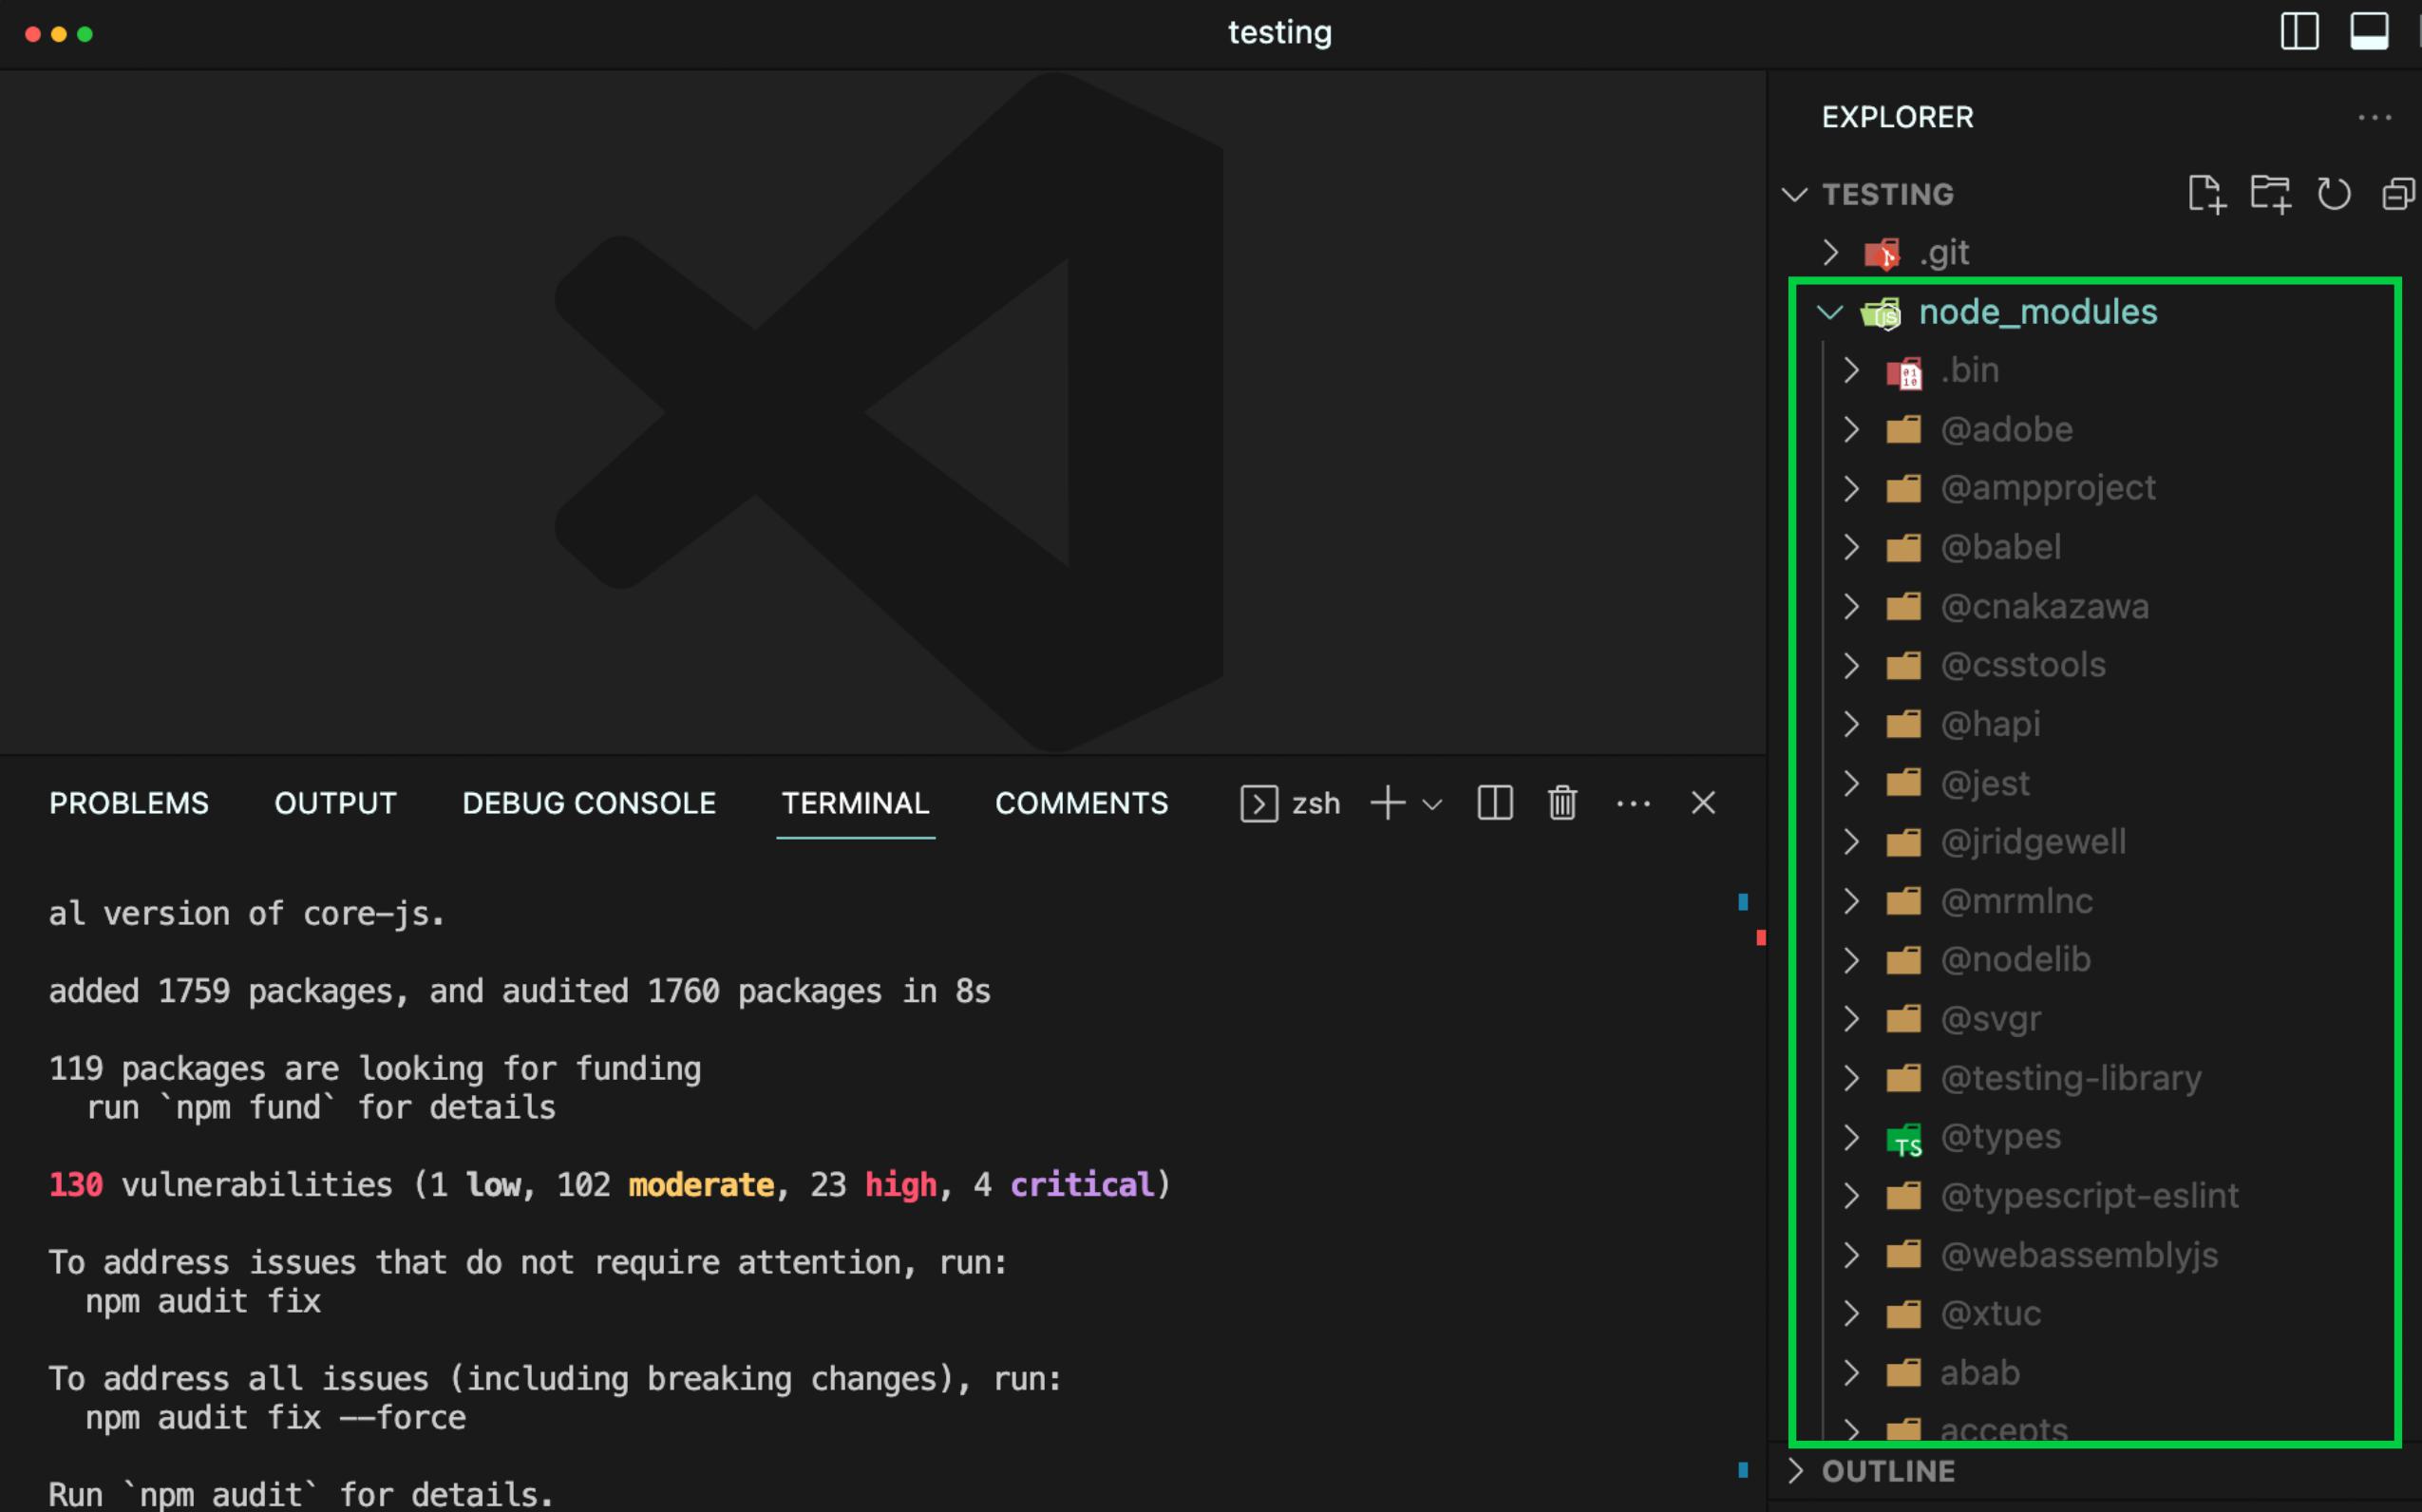
Open the app’s content in your local machine's code editor (IDE). In the example, Visual Studio Code is used. Make sure that node modules are installed. If not, you can install them by running:
npm install
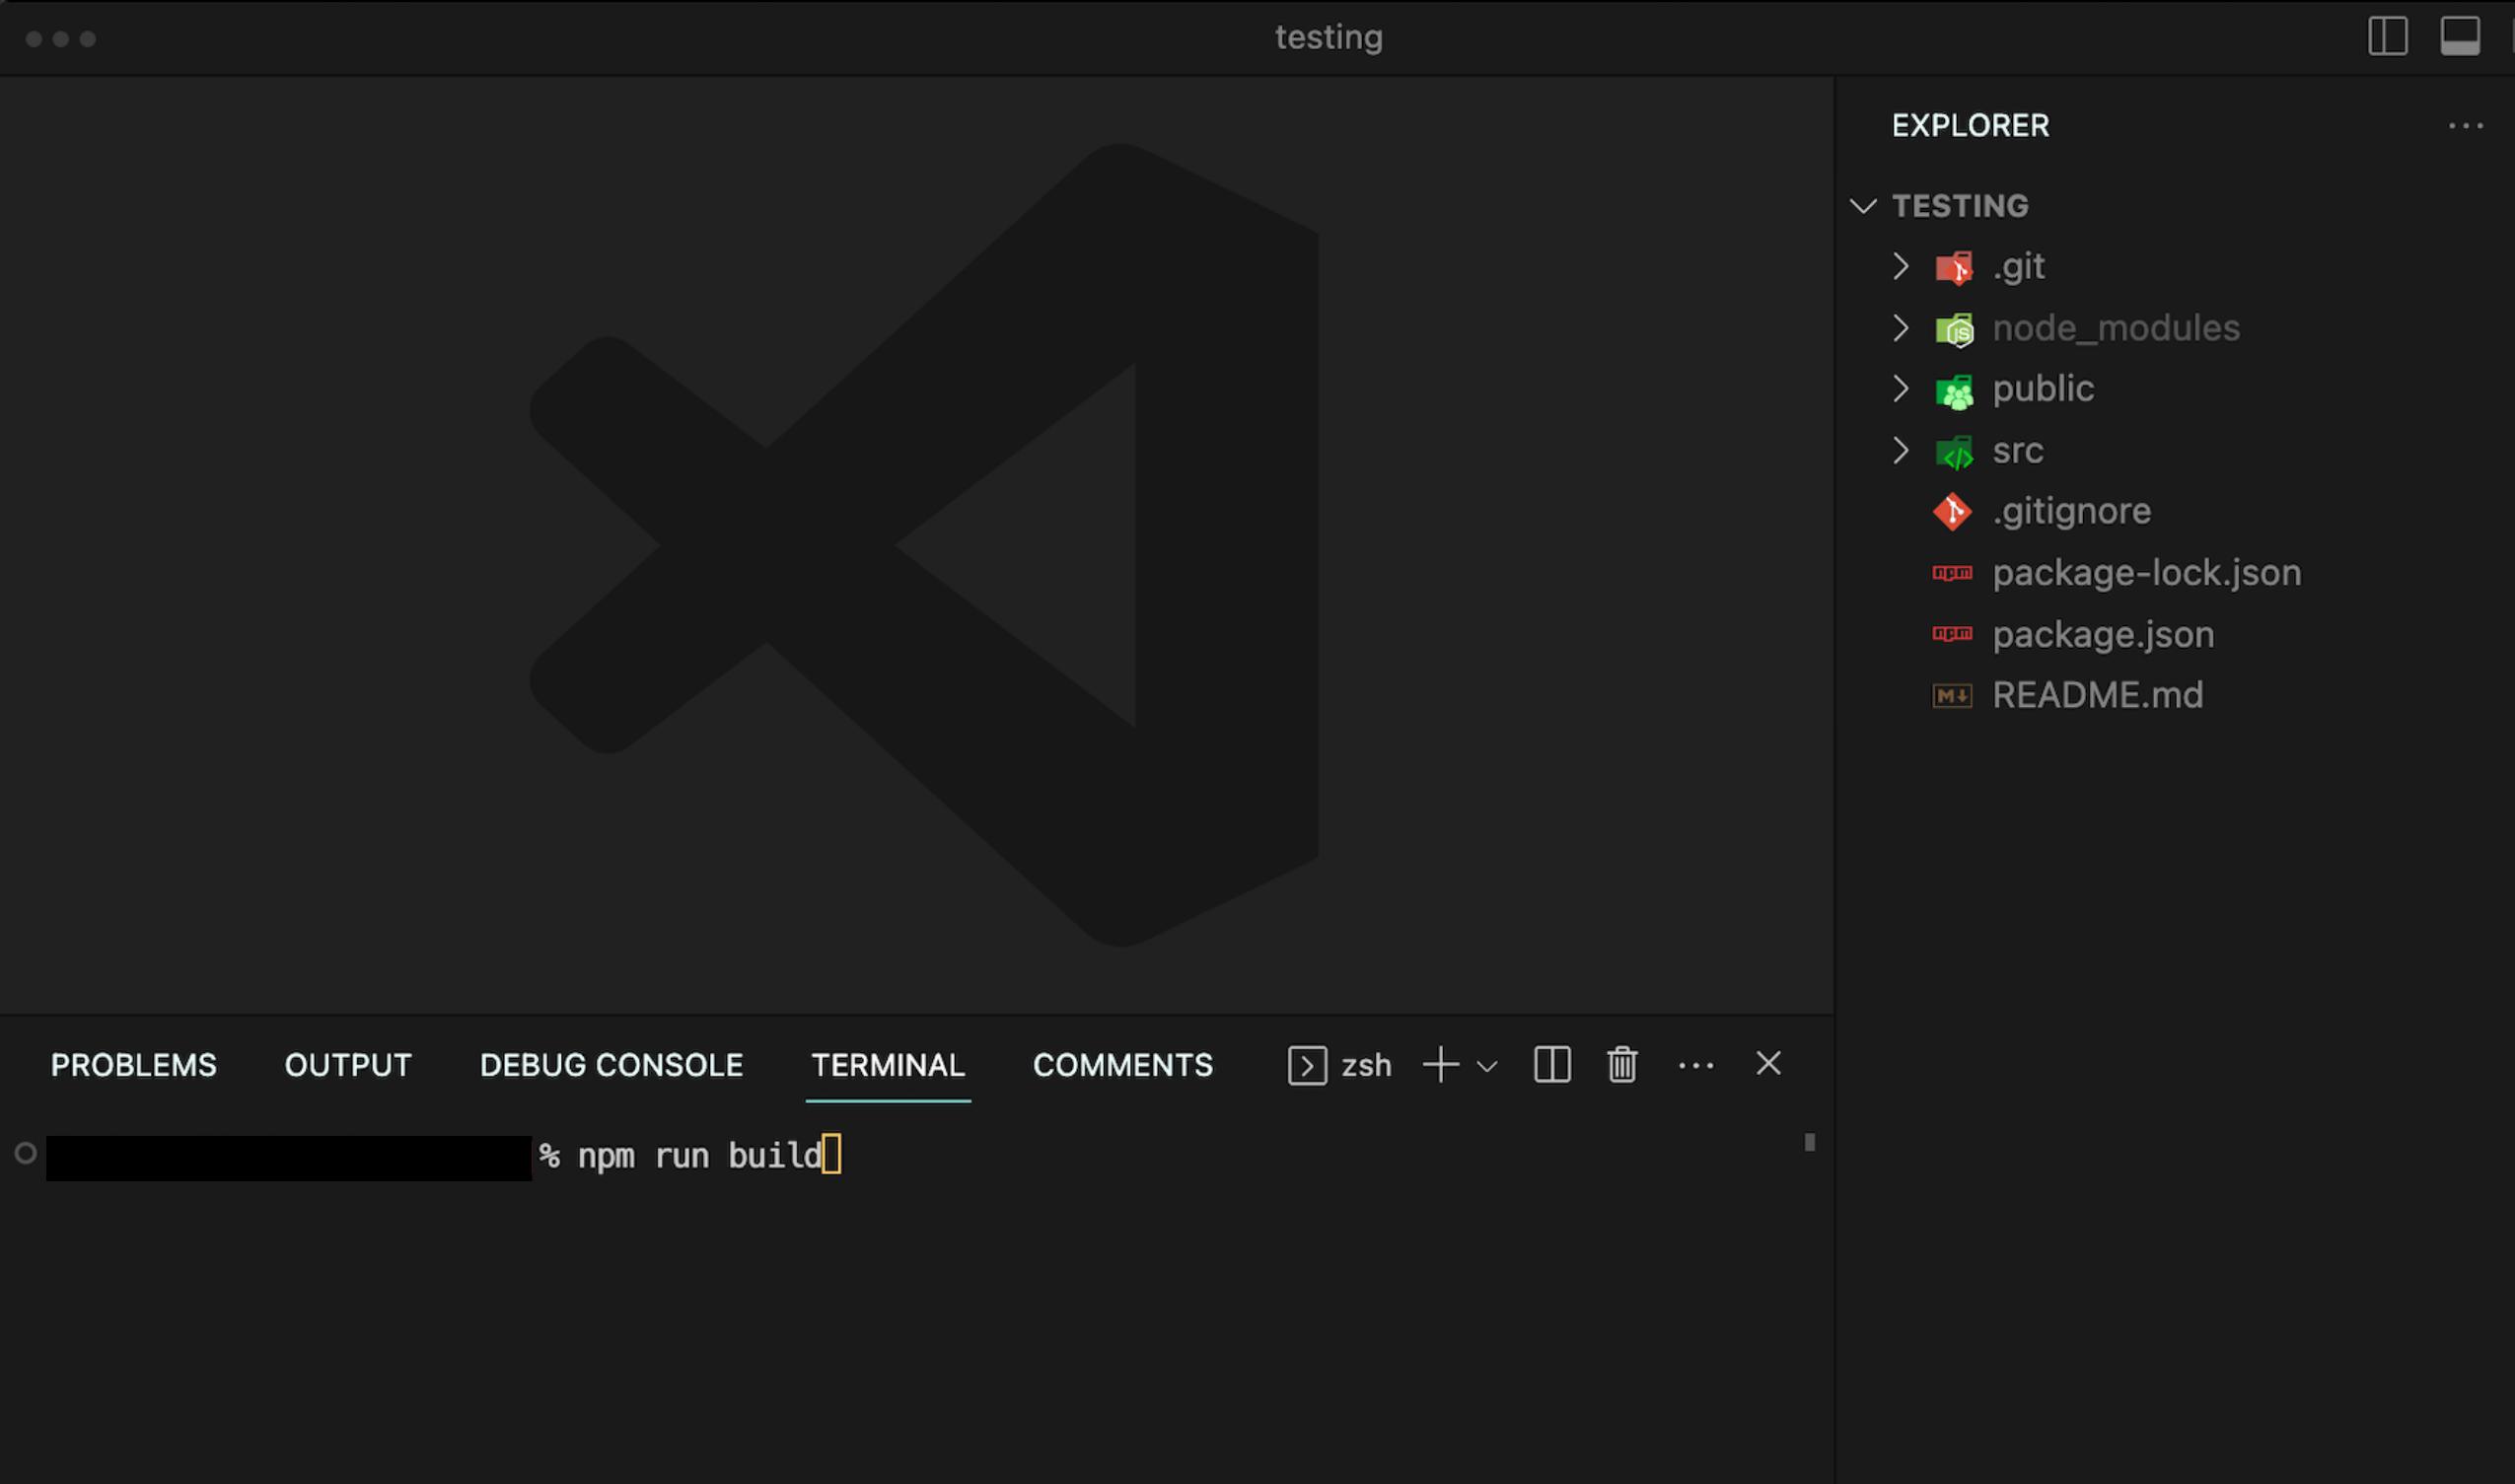
Once the node modules are present, you can build your React.js (Vite.js) app by running:
npm run build
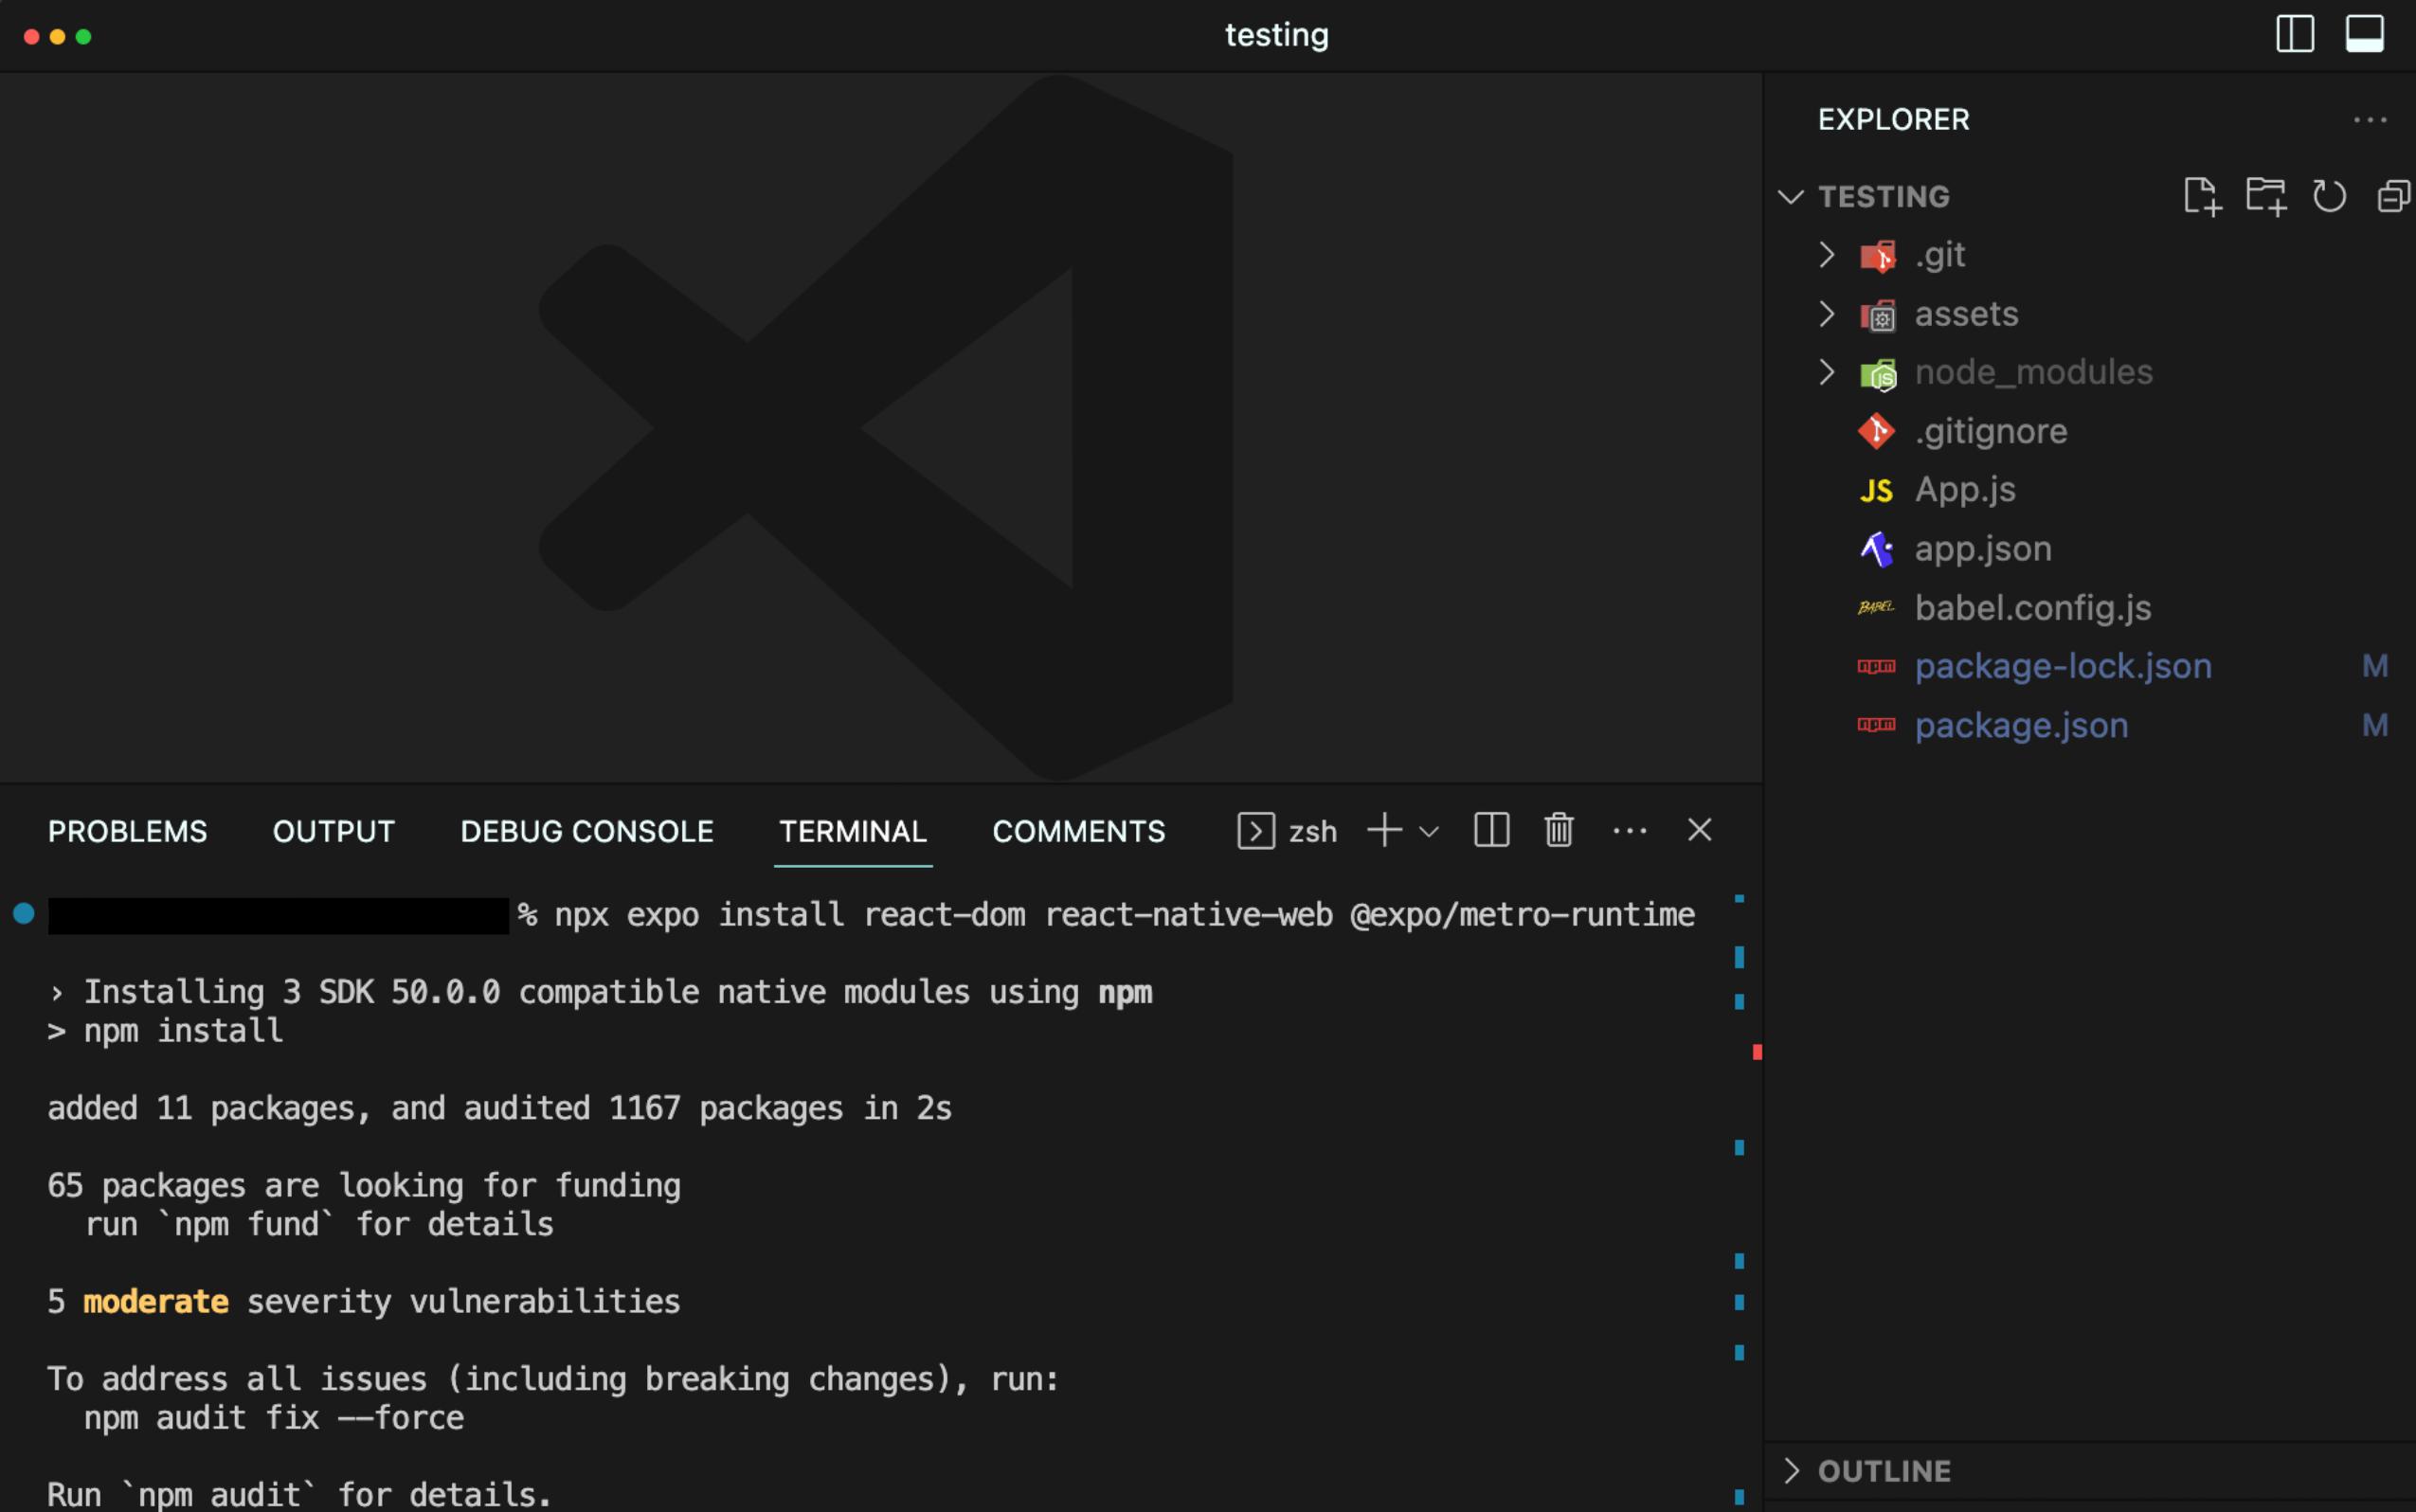
As React Native is a cross-platform mobile framework for building Android and iOS apps, it can be used to install additional packages before building the app for website use. Learn more about developing websites with React Native (Expo).
Also, ensure that you have the latest version of NPM, which can be installed with the command npm install -g npm and check that Expo is installed. You can install Expo with npm install expo-cli --global. Using Yarn, you can install Yarn by running npm install --global yarn, then yarn add expo.
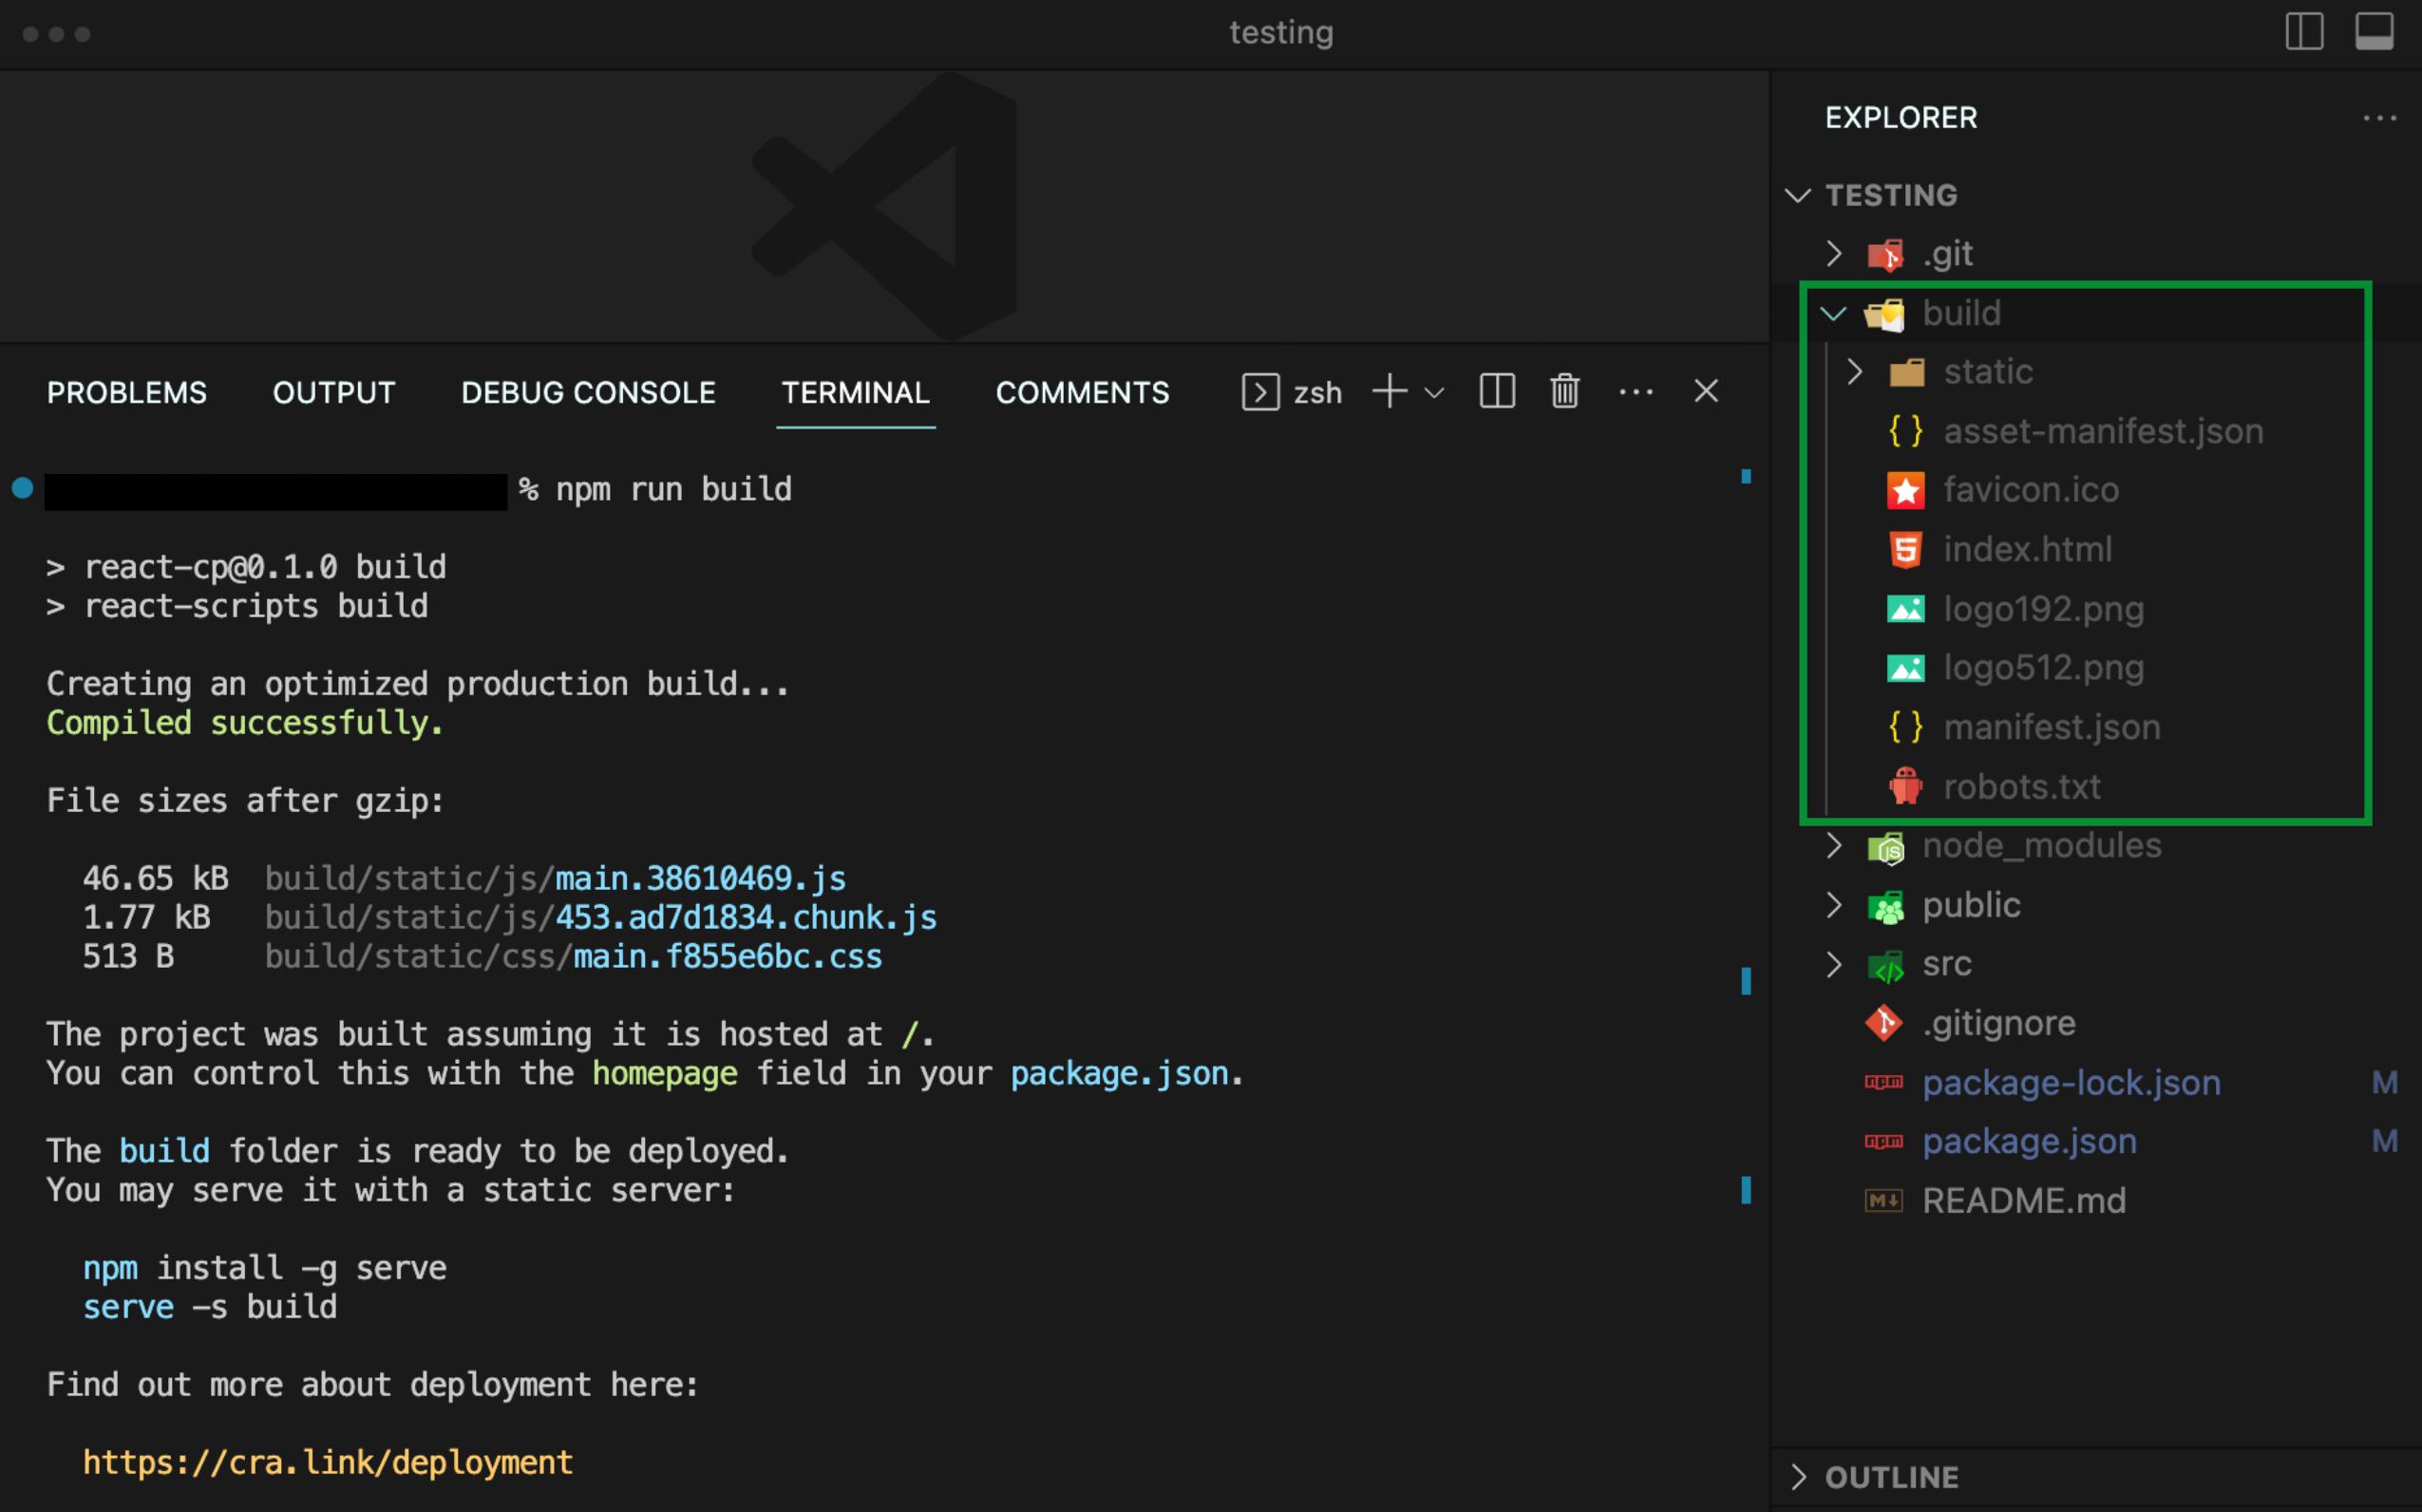
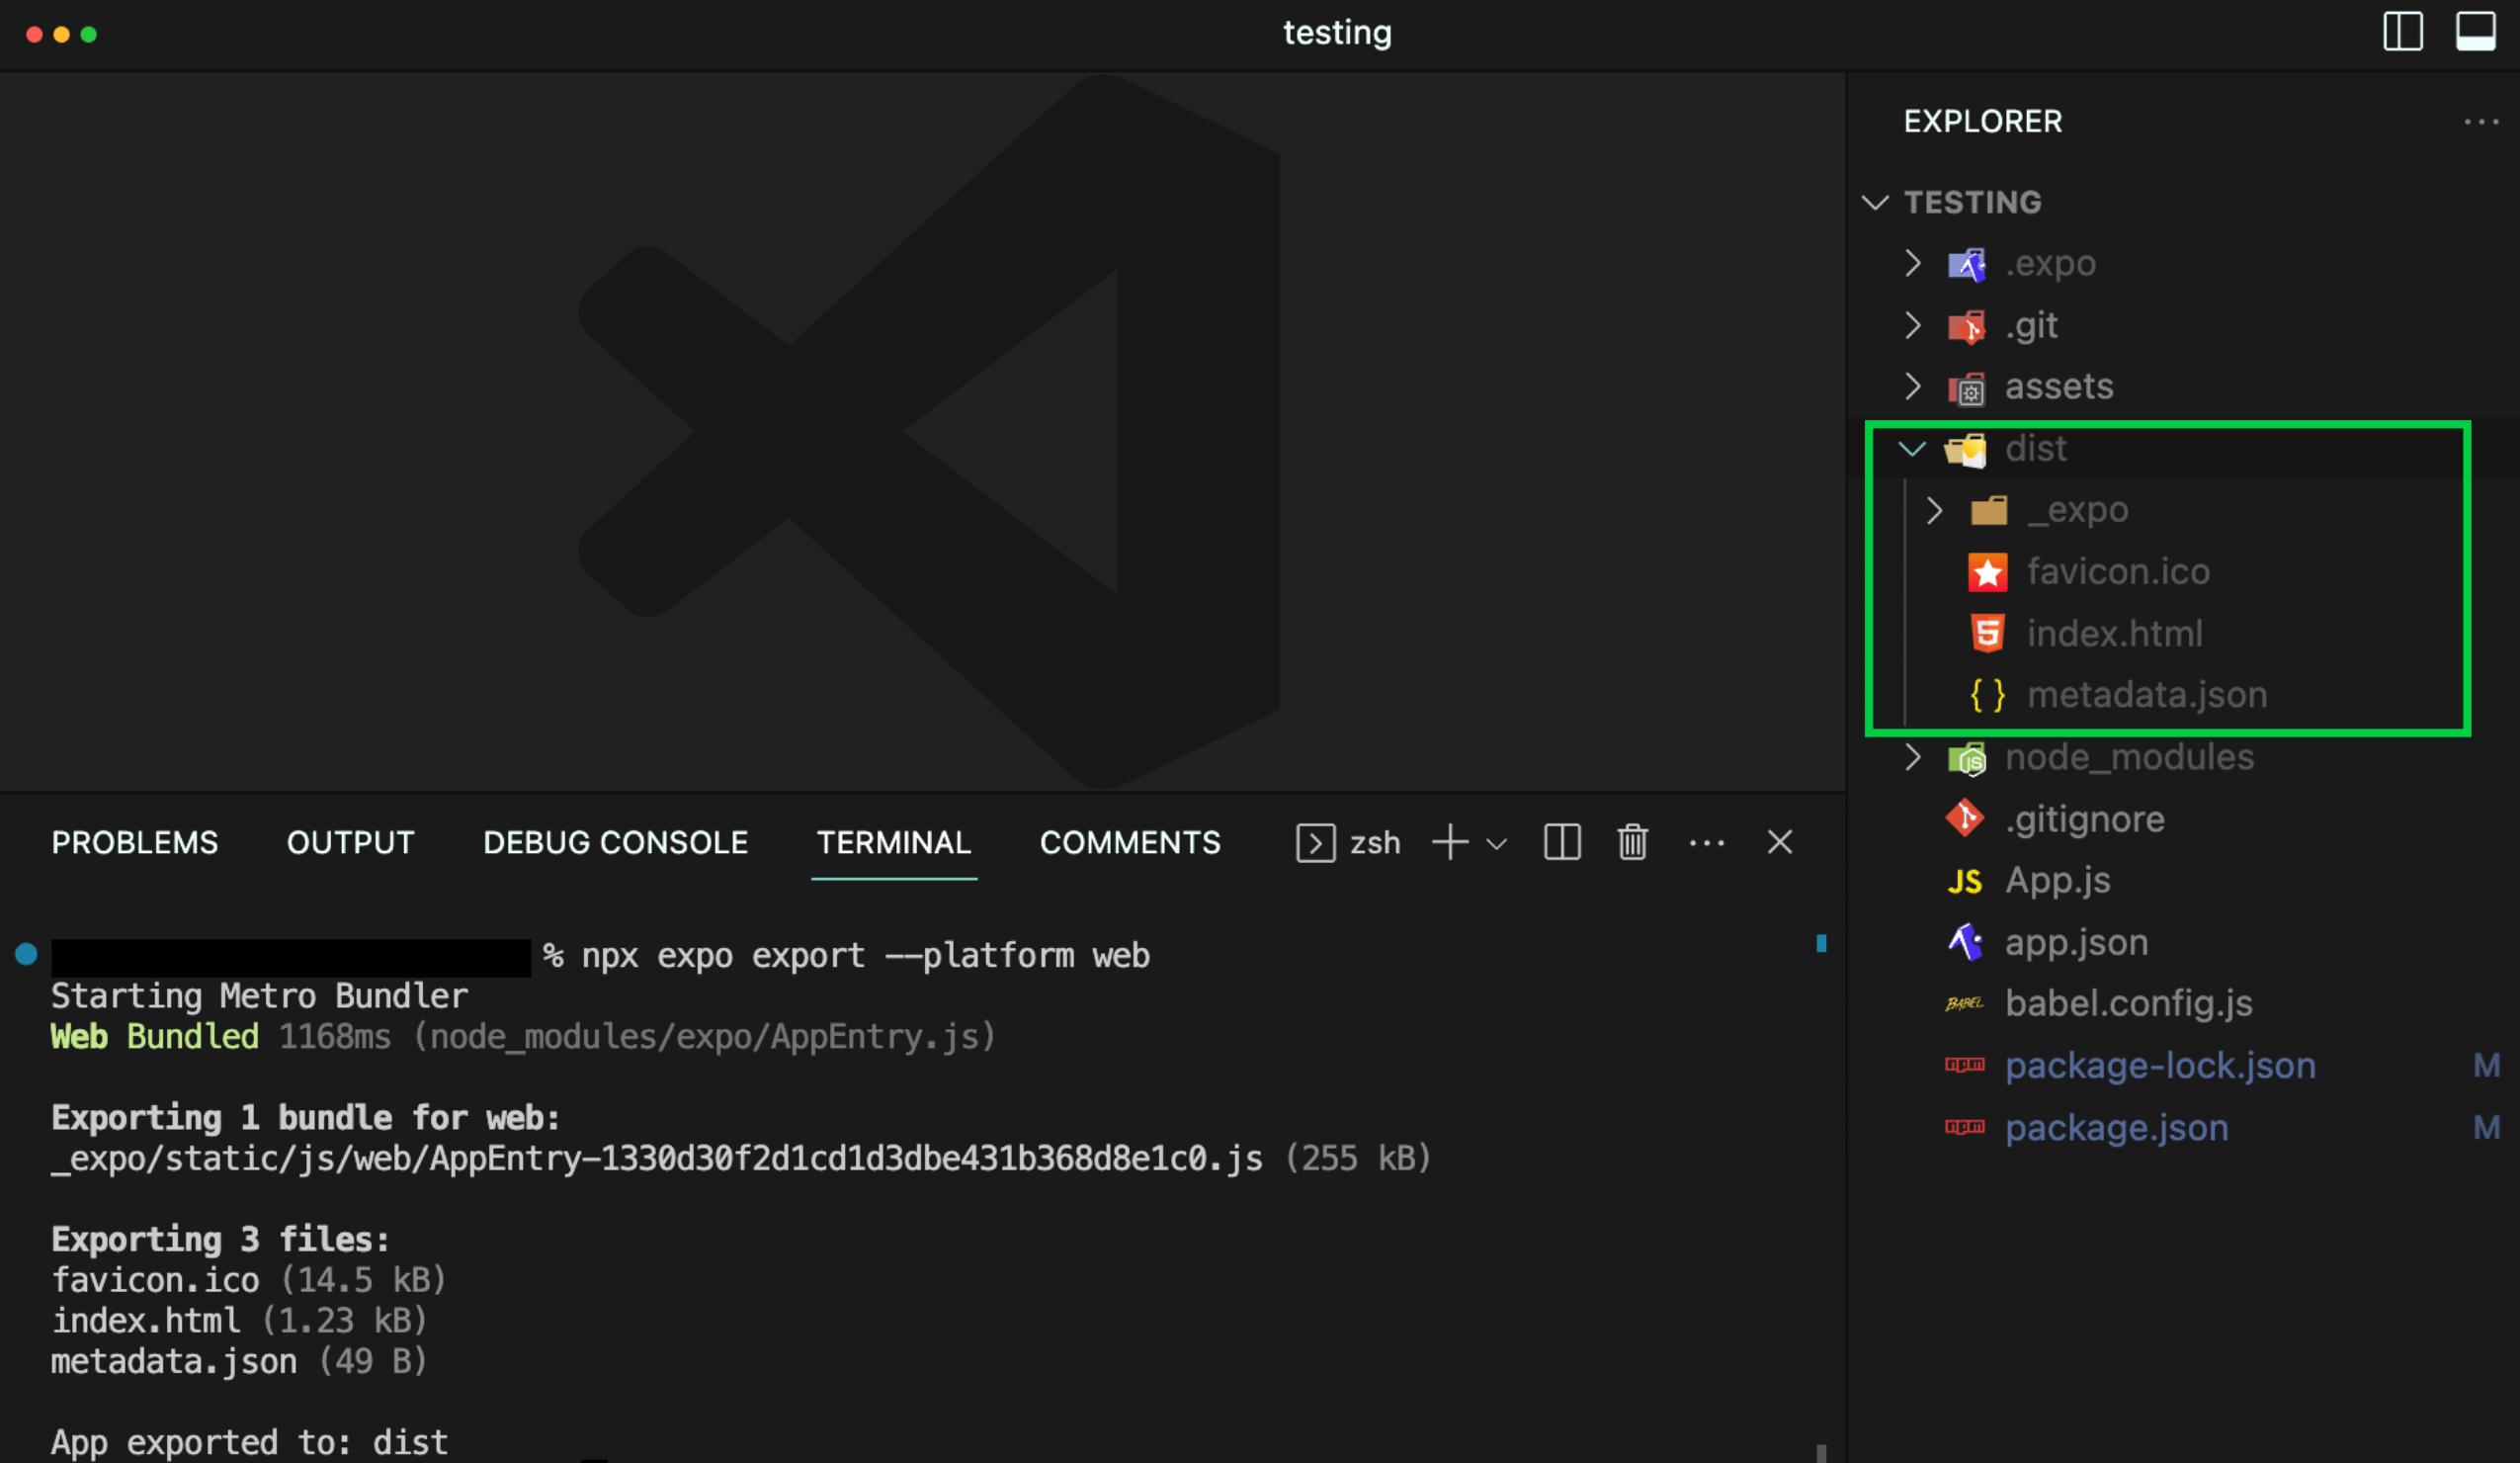
When this is finished, the build folder — or the dist folder for React.js apps built with Vite.js and React Native apps, will be created on your local machine. Then you need to compress the build or dist folder using any archiver. The compressed file should be deployed to your hosting.
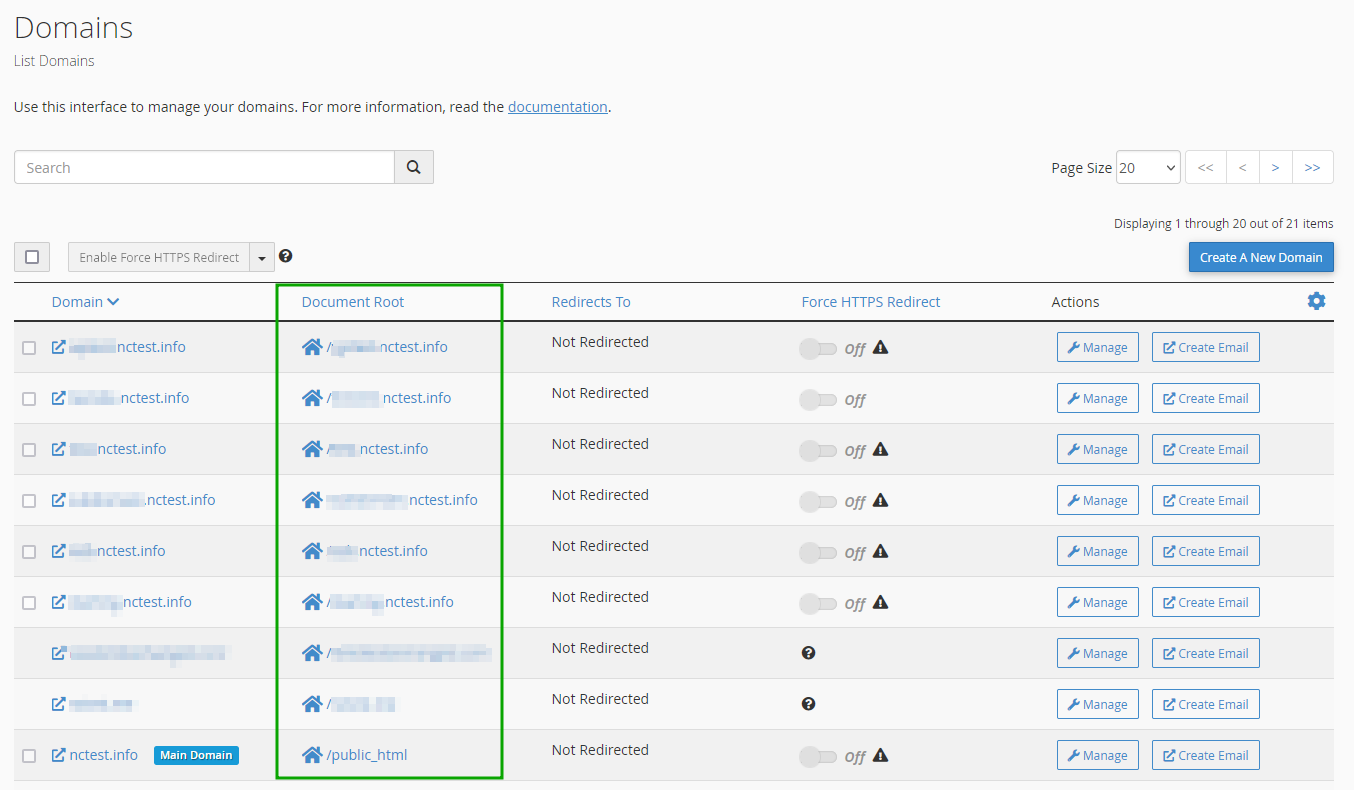
After importing the compressed folder, extract the content, and move all files and folders to the website’s root folder (found in the Domains menu). For the main domain, use the public_html folder, and for addon domains and subdomains, use the root folder.
For uploading files via File Manager:
Log into your cPanel.
Navigate to Domains >> Domains menu:
Go to your website’s root directory.
Select Upload from the top menu.
Choose the compressed build or dist file from your local machine and start the upload.
When the upload is complete, go back to the website directory.
Right-click on the uploaded file and choose Extract:
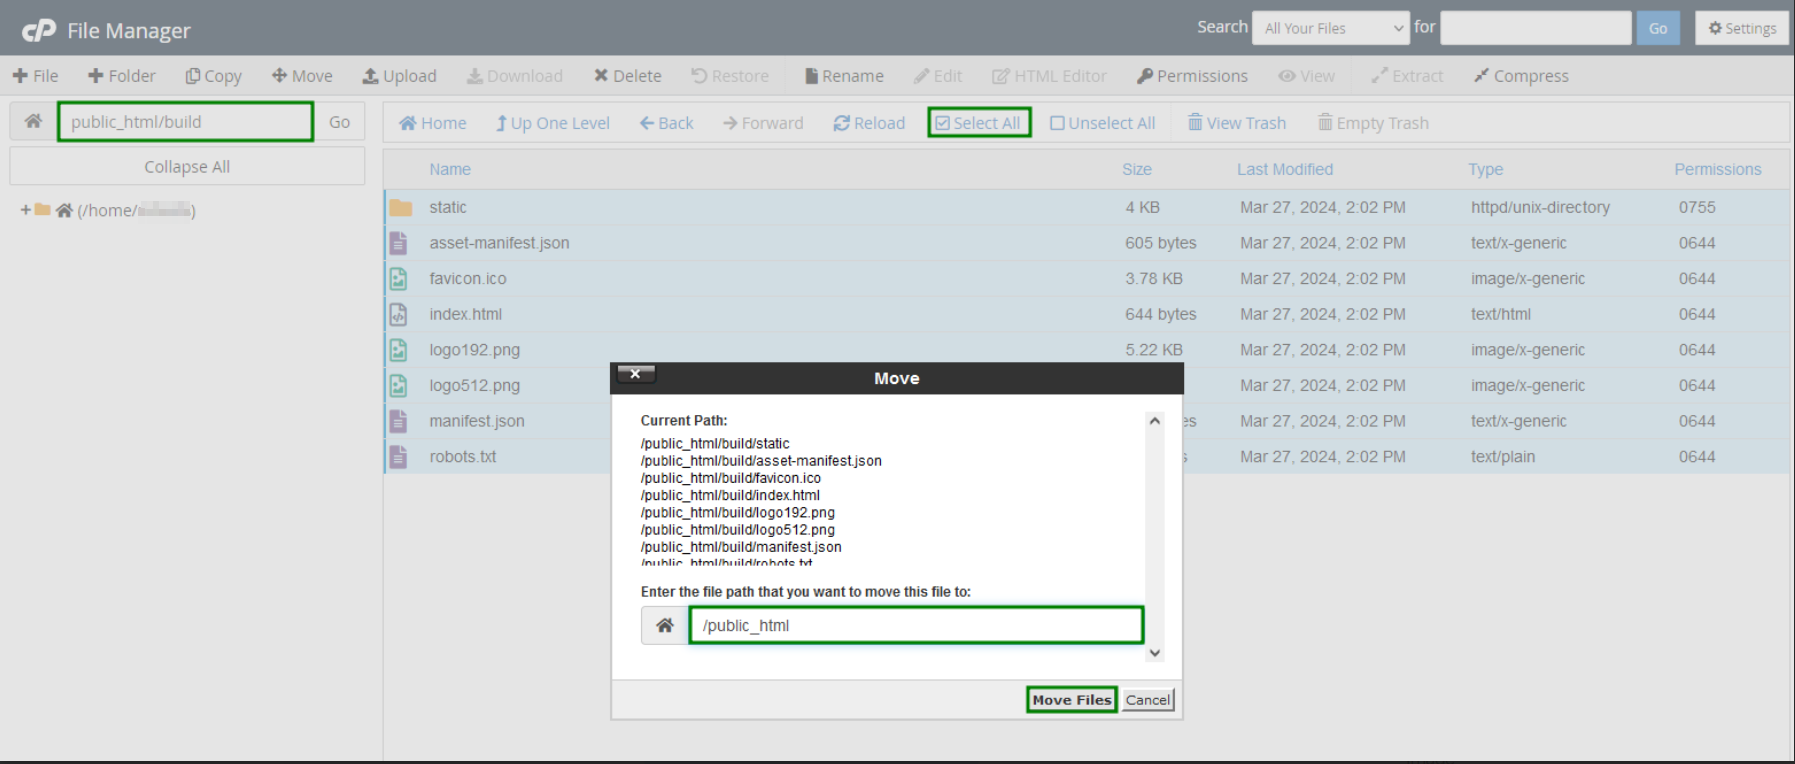
After the files are extracted, you should see a build or dist directory. Open this directory, select all the files and folders, then move them to the website directory.
Now that the build or dist directory is empty, you can delete it.
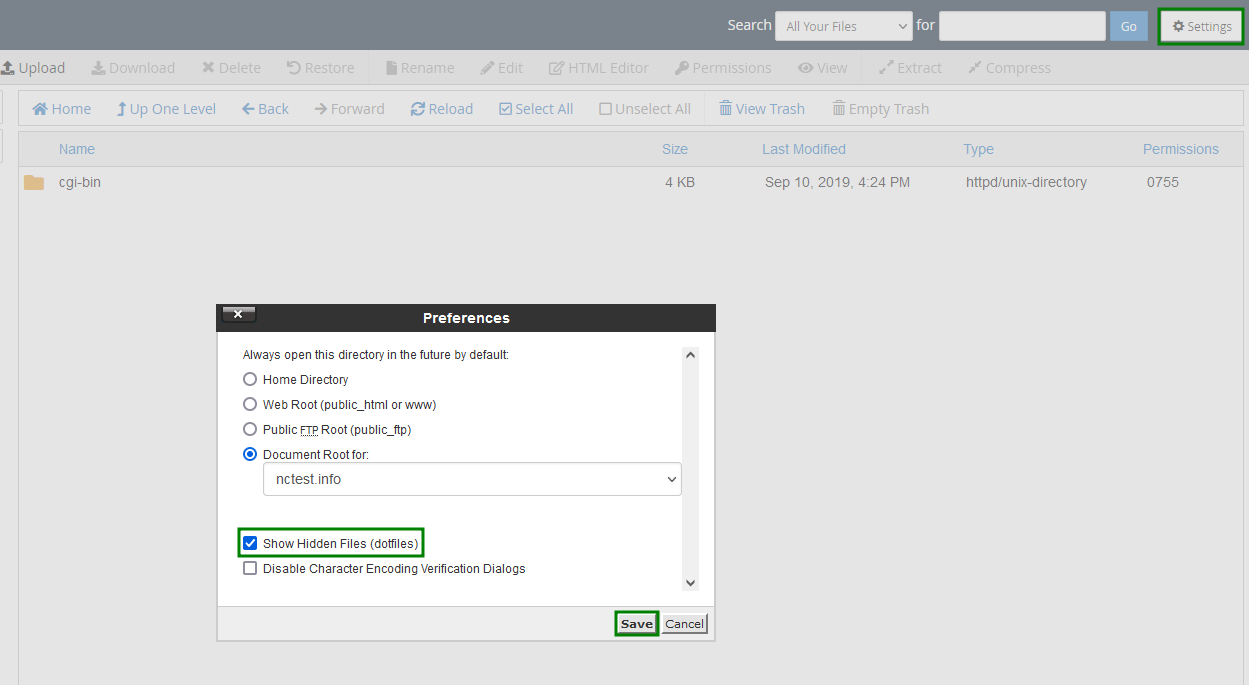
3. Create the .htaccess file
Make sure the Show Hidden Files (dotfiles) option in the Settings menu is enabled:
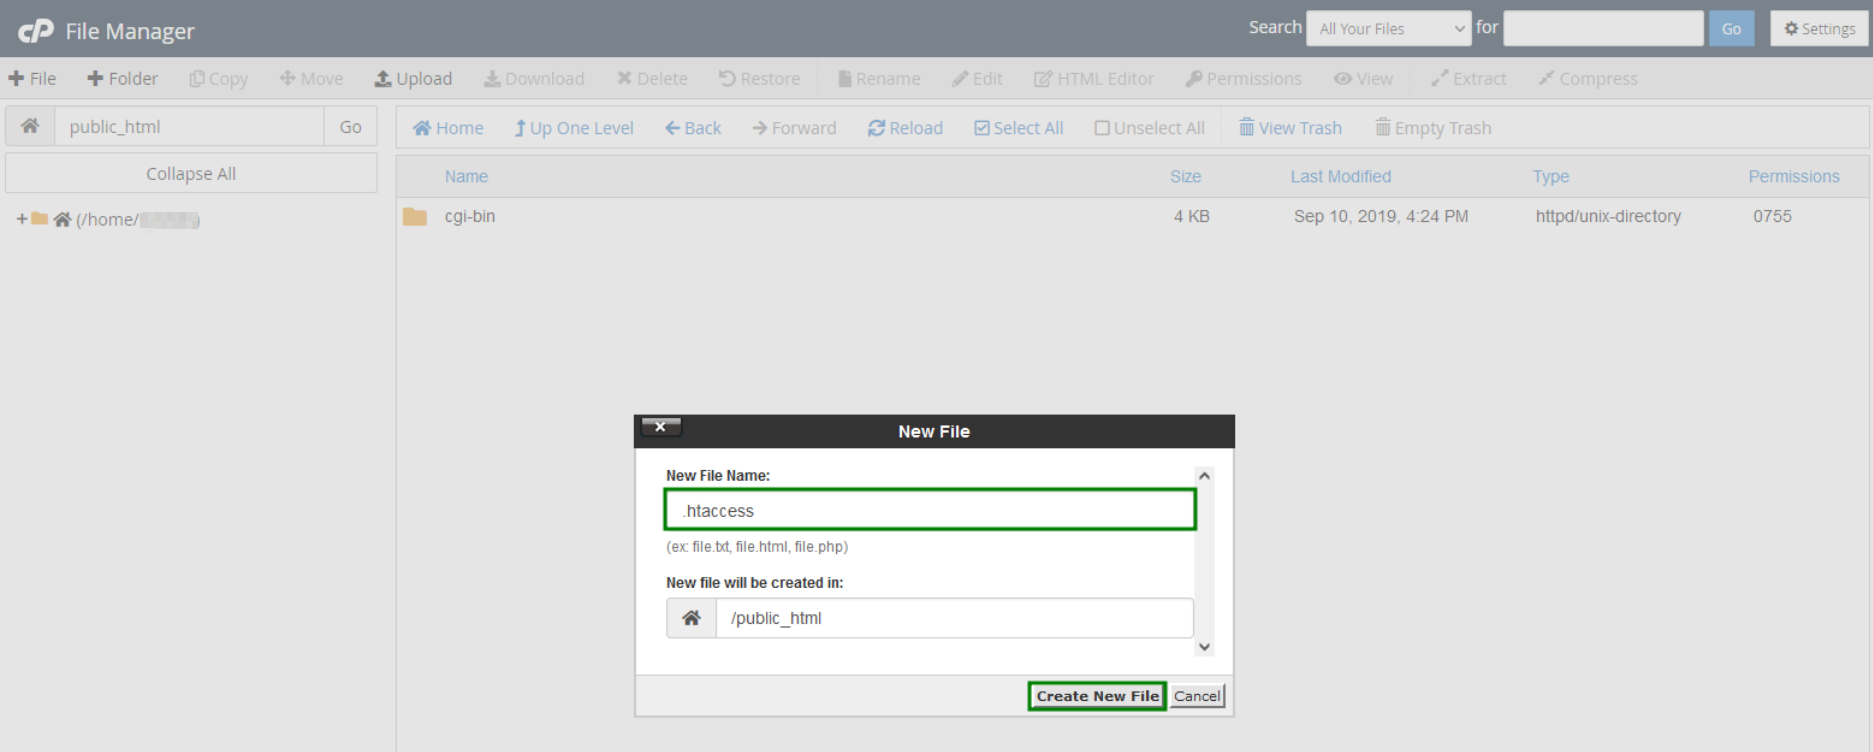
Choose the +File button and a new pop-up box will appear. Enter the name .htaccess and select Create New File:
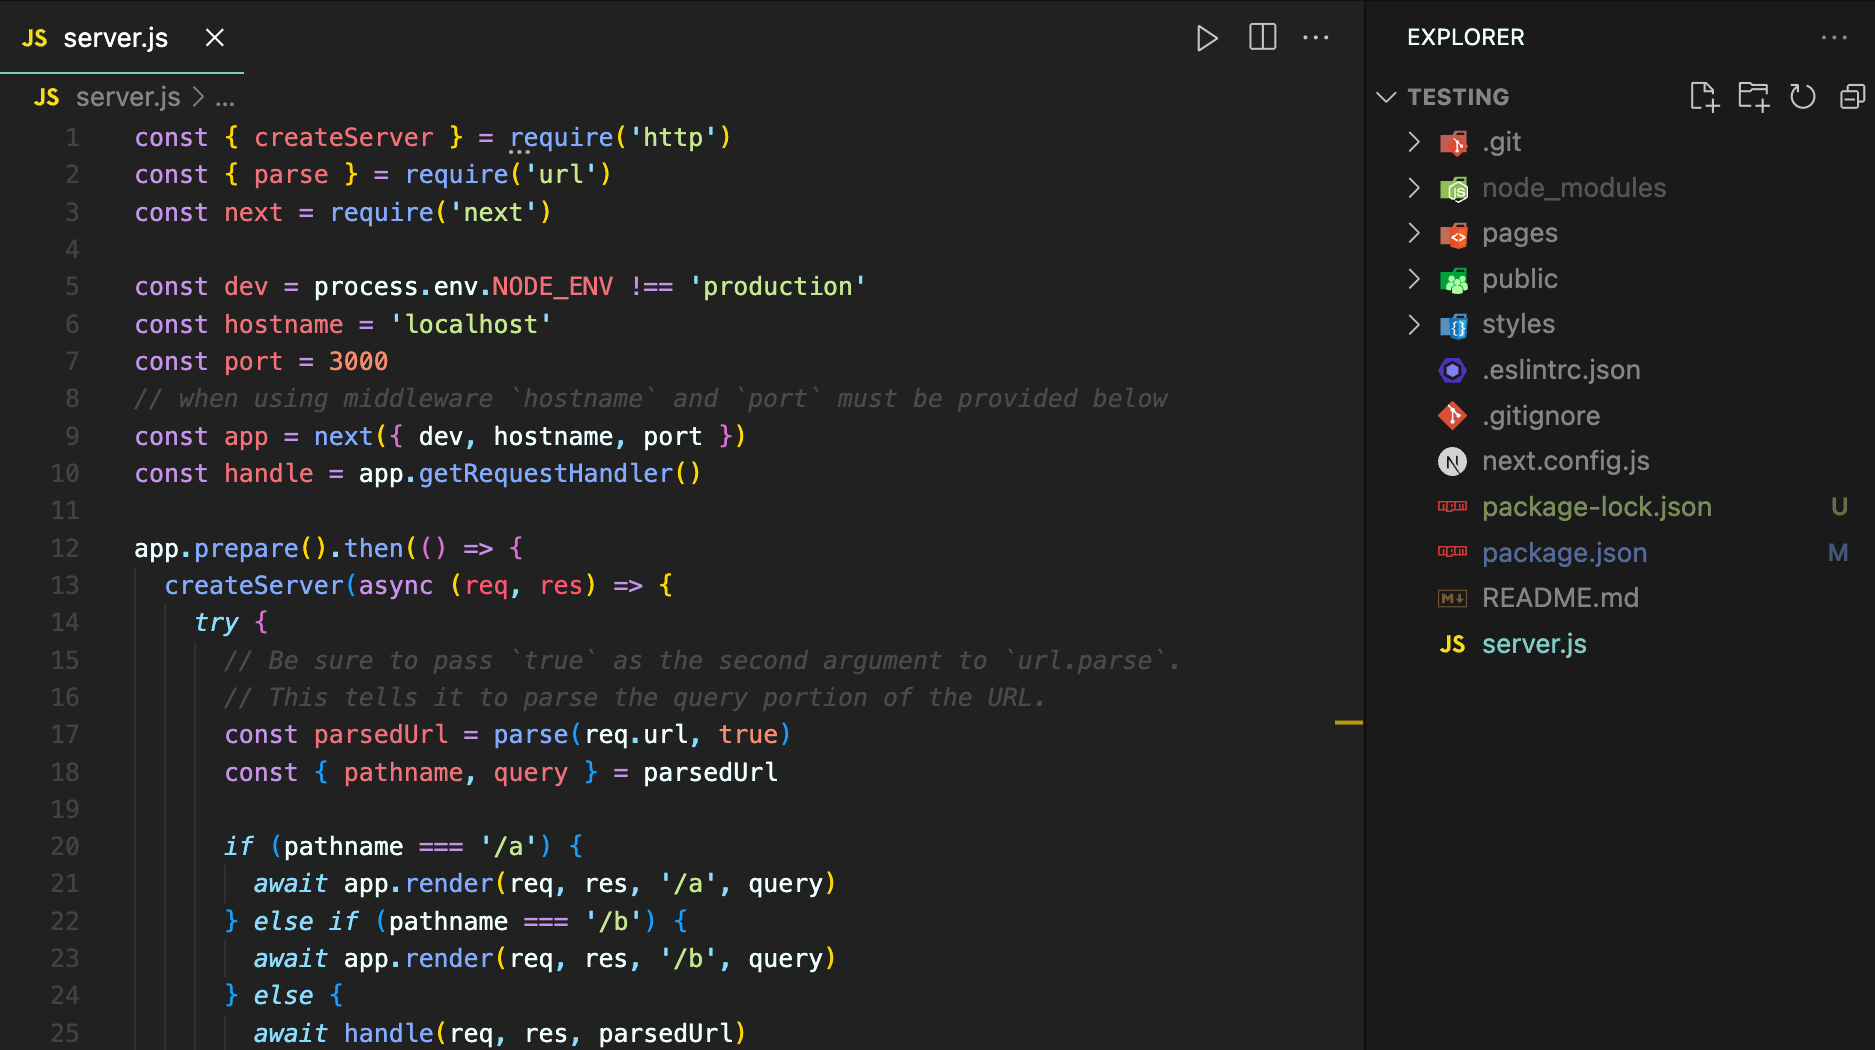
const dev = process.env.NODE_ENV !== 'production'
const hostname = 'localhost'
const port = 3000
// when using middleware `hostname` and `port` must be provided below
const app = next({ dev, hostname, port })
const handle = app.getRequestHandler()
app.prepare().then(() => {
createServer(async (req, res) => {
try {
// Be sure to pass true as the second argument to url.parse.
// This tells it to parse the query portion of the URL.
const parsedUrl = parse(req.url, true)
const { pathname, query } = parsedUrl
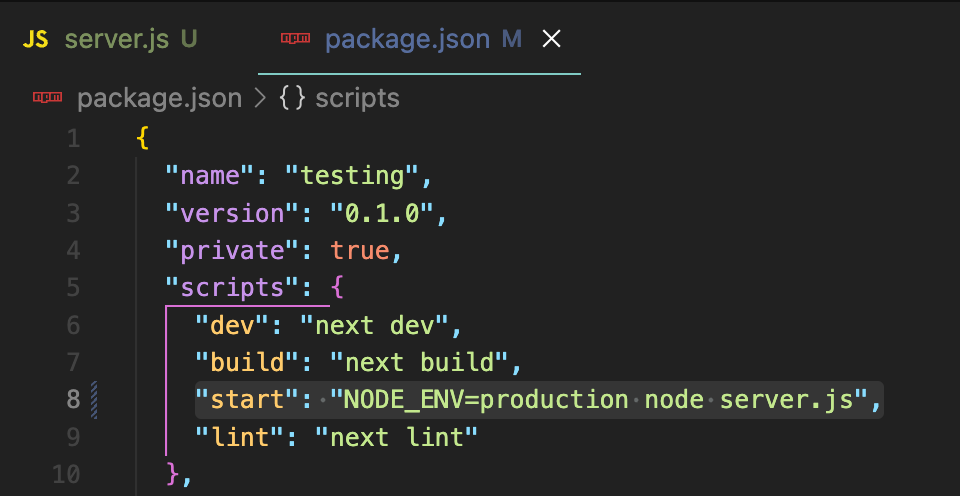
Modify the package.json file to set the environment to production on the start script and run the server.js file you created in the project root directory. Here you’ve replaced the default Next start server script with our own custom server.
Make sure you install the required dependencies by running npm install in your terminal.
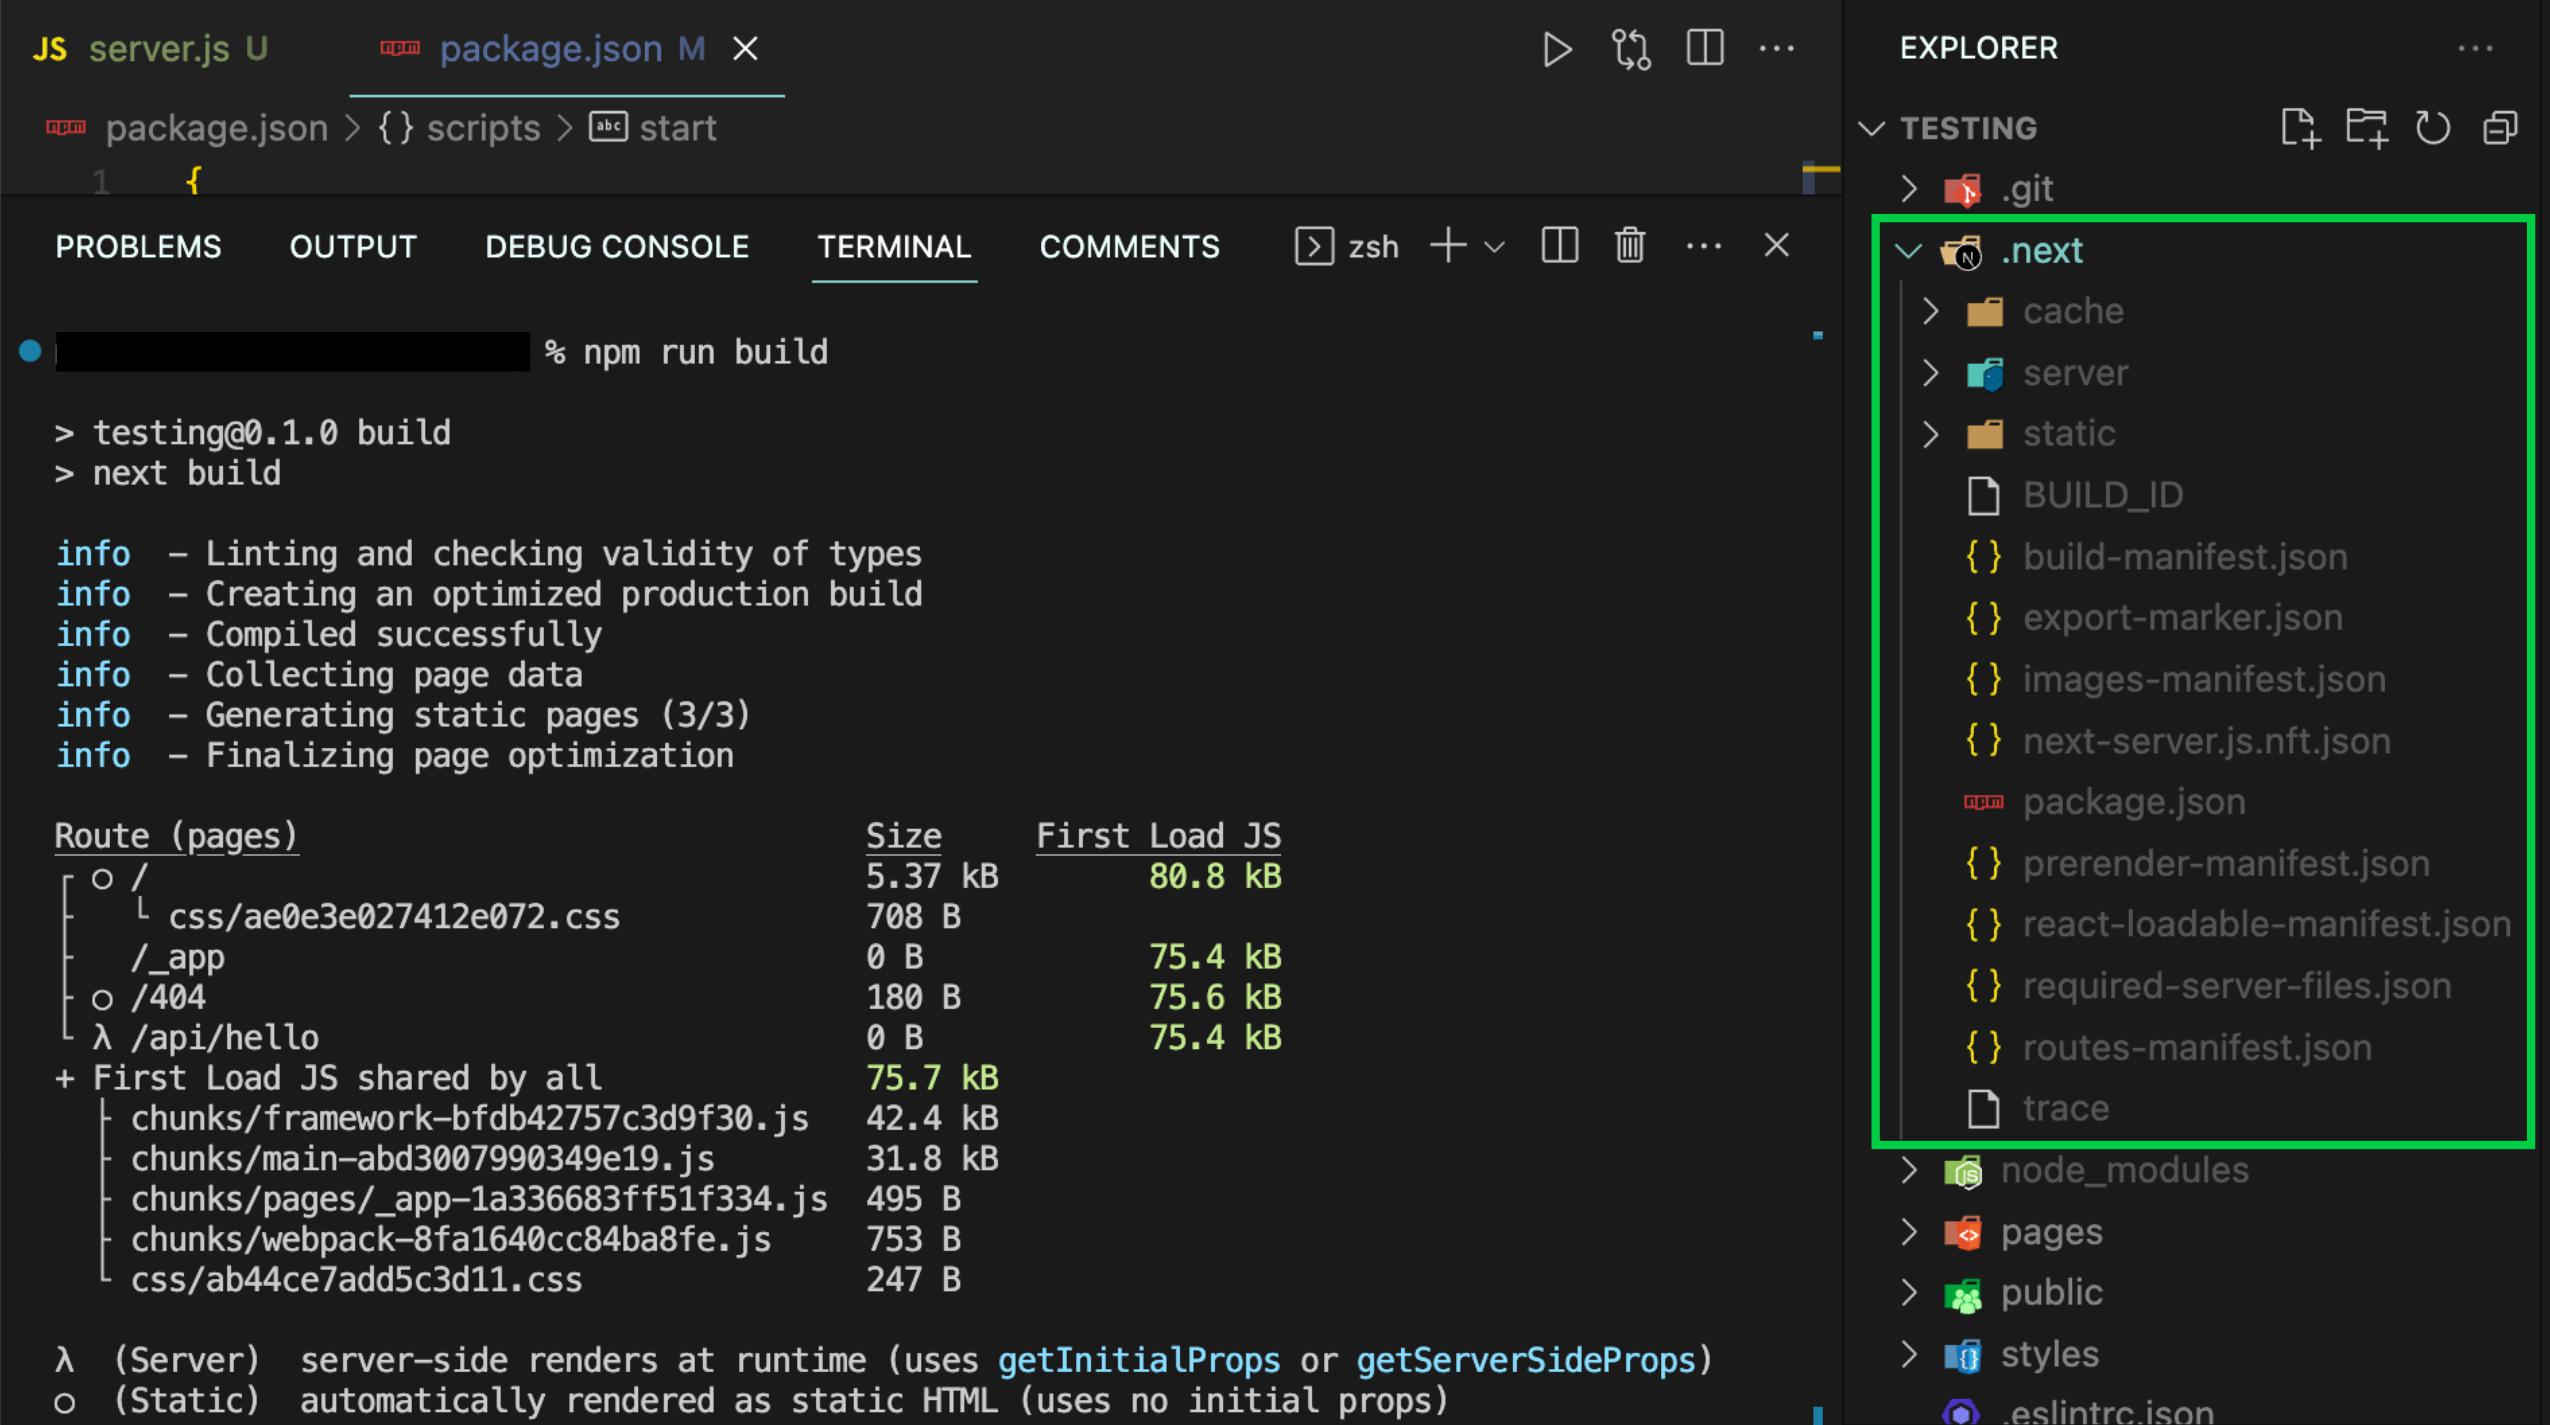
3. Build a Next.js application
To build a Next.js application:
Open your terminal and navigate to your project directory.
Run the build command:
npm run build
Ensure that there are no errors during the build process. If there are, they need to be fixed before going on.
4. Prepare Files for Deployment
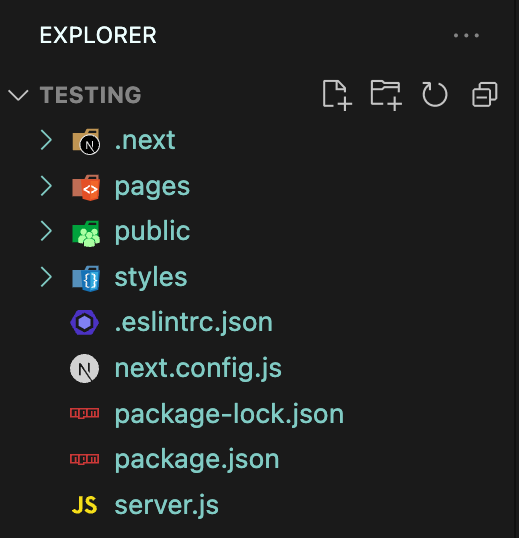
Open the file manager and locate your Next.js project files.
Enable visibility for any hidden files.
Exclude the following folders/files:
node_modules;
.git;
README.md;
.gitignore.
Select all remaining files and folders.
Create a ZIP archive of the selected files:
It's important to exclude the node_modules directory because it’s often large and not needed for deployment. The necessary modules will be installed on the server at a later stage.
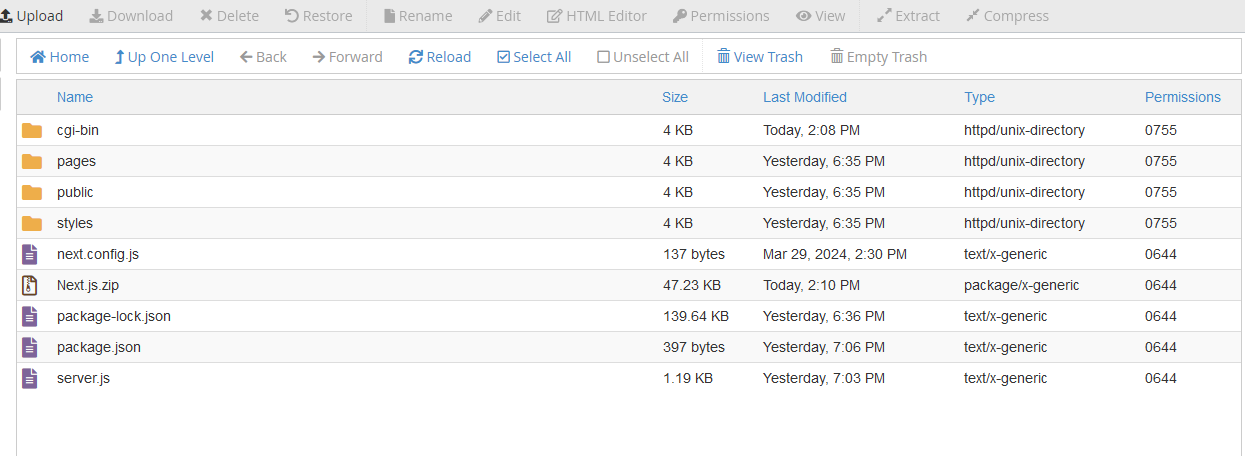
5. Upload the archive file to your cPanel on shared hosting.
NOTE: The public_html folder of the main domain cannot be used to configure the Node.js server. All files and folders should be in the app’s folder, not including public_html.
Below uploading files via File Manager:
Log into your cPanel.
Navigate to File Manager.
Select or create a directory for your website content.
Select Upload in the top menu.
Choose the compressed file from your local machine and start the upload.
When the upload is complete, go back to the website directory.
Right-click on the uploaded file and choose Extract:
Node.js version: select the version that matches the Node.js version you used when developing your app locally. Application mode: select Production. Application root: type the path of the directory where your website content is uploaded. Application URL: select your domain name. Application startup file: server.js.
If you have any environment variables, you can add them from your .env or .env.local file. For more information on environment variables in Next.js check Next.js Environment Variables Documentation.
Choose CREATE to create the Node.js application.
Stop the app temporarily, then navigate to Detected Configuration Files.
Select Run NPM Install to install Node.js packages.
Start the app again by choosing START APP.
Open a new tab in your web browser and enter your website URL. You should see your Next.js app running.
Congratulations! Your Next.js application should now be deployed on cPanel. Remember to check the application URL to ensure everything is working as expected. If you encounter any issues, check the error logs in cPanel or in your Next.js application.